How to Enable DejaUP! for Merchants
DejaUP! is an unattended payment terminal application that enables merchants to accept payments through compatible Dejavoo payment terminals on unattended devices, vending machines, and kiosks.
This document explains how ISOs can enable DejaUP! for new and existing merchants in iPOSpays and configure the required applications for use on supported payment terminals.
Feature Compatibility
- Minimum Required POS Build:
- Supported Terminals: Dejavoo Q3mini and Q3V
- Required Applications:
- DVStore
- DvPayLite (Anchor App)
- DejaUP! (Value-Added App)
- Supported Transaction Flows:
- Tap-to-Start
- Select First
- Multivend
Prerequisites
- DejaUP! must be enabled for your ISO. If it is not yet enabled for your ISO account, contact sales@dejavoo.io.
- To assign Dejavoo Q3mini and Q3V devices to your merchants, the corresponding DejaUP! application must be assigned to your ISO account.
Enable DejaUP! for a New Merchant
If you are onboarding a new merchant, follow the standard Merchant Onboarding process. During setup, follow the steps given below to ensure that DejaUP! is enabled under Modules and Privileges and that a supported Q Series device is assigned to the merchant.
Step 1: Create a New Merchant
- Log in to the iPOSpays Portal using an ISO account.
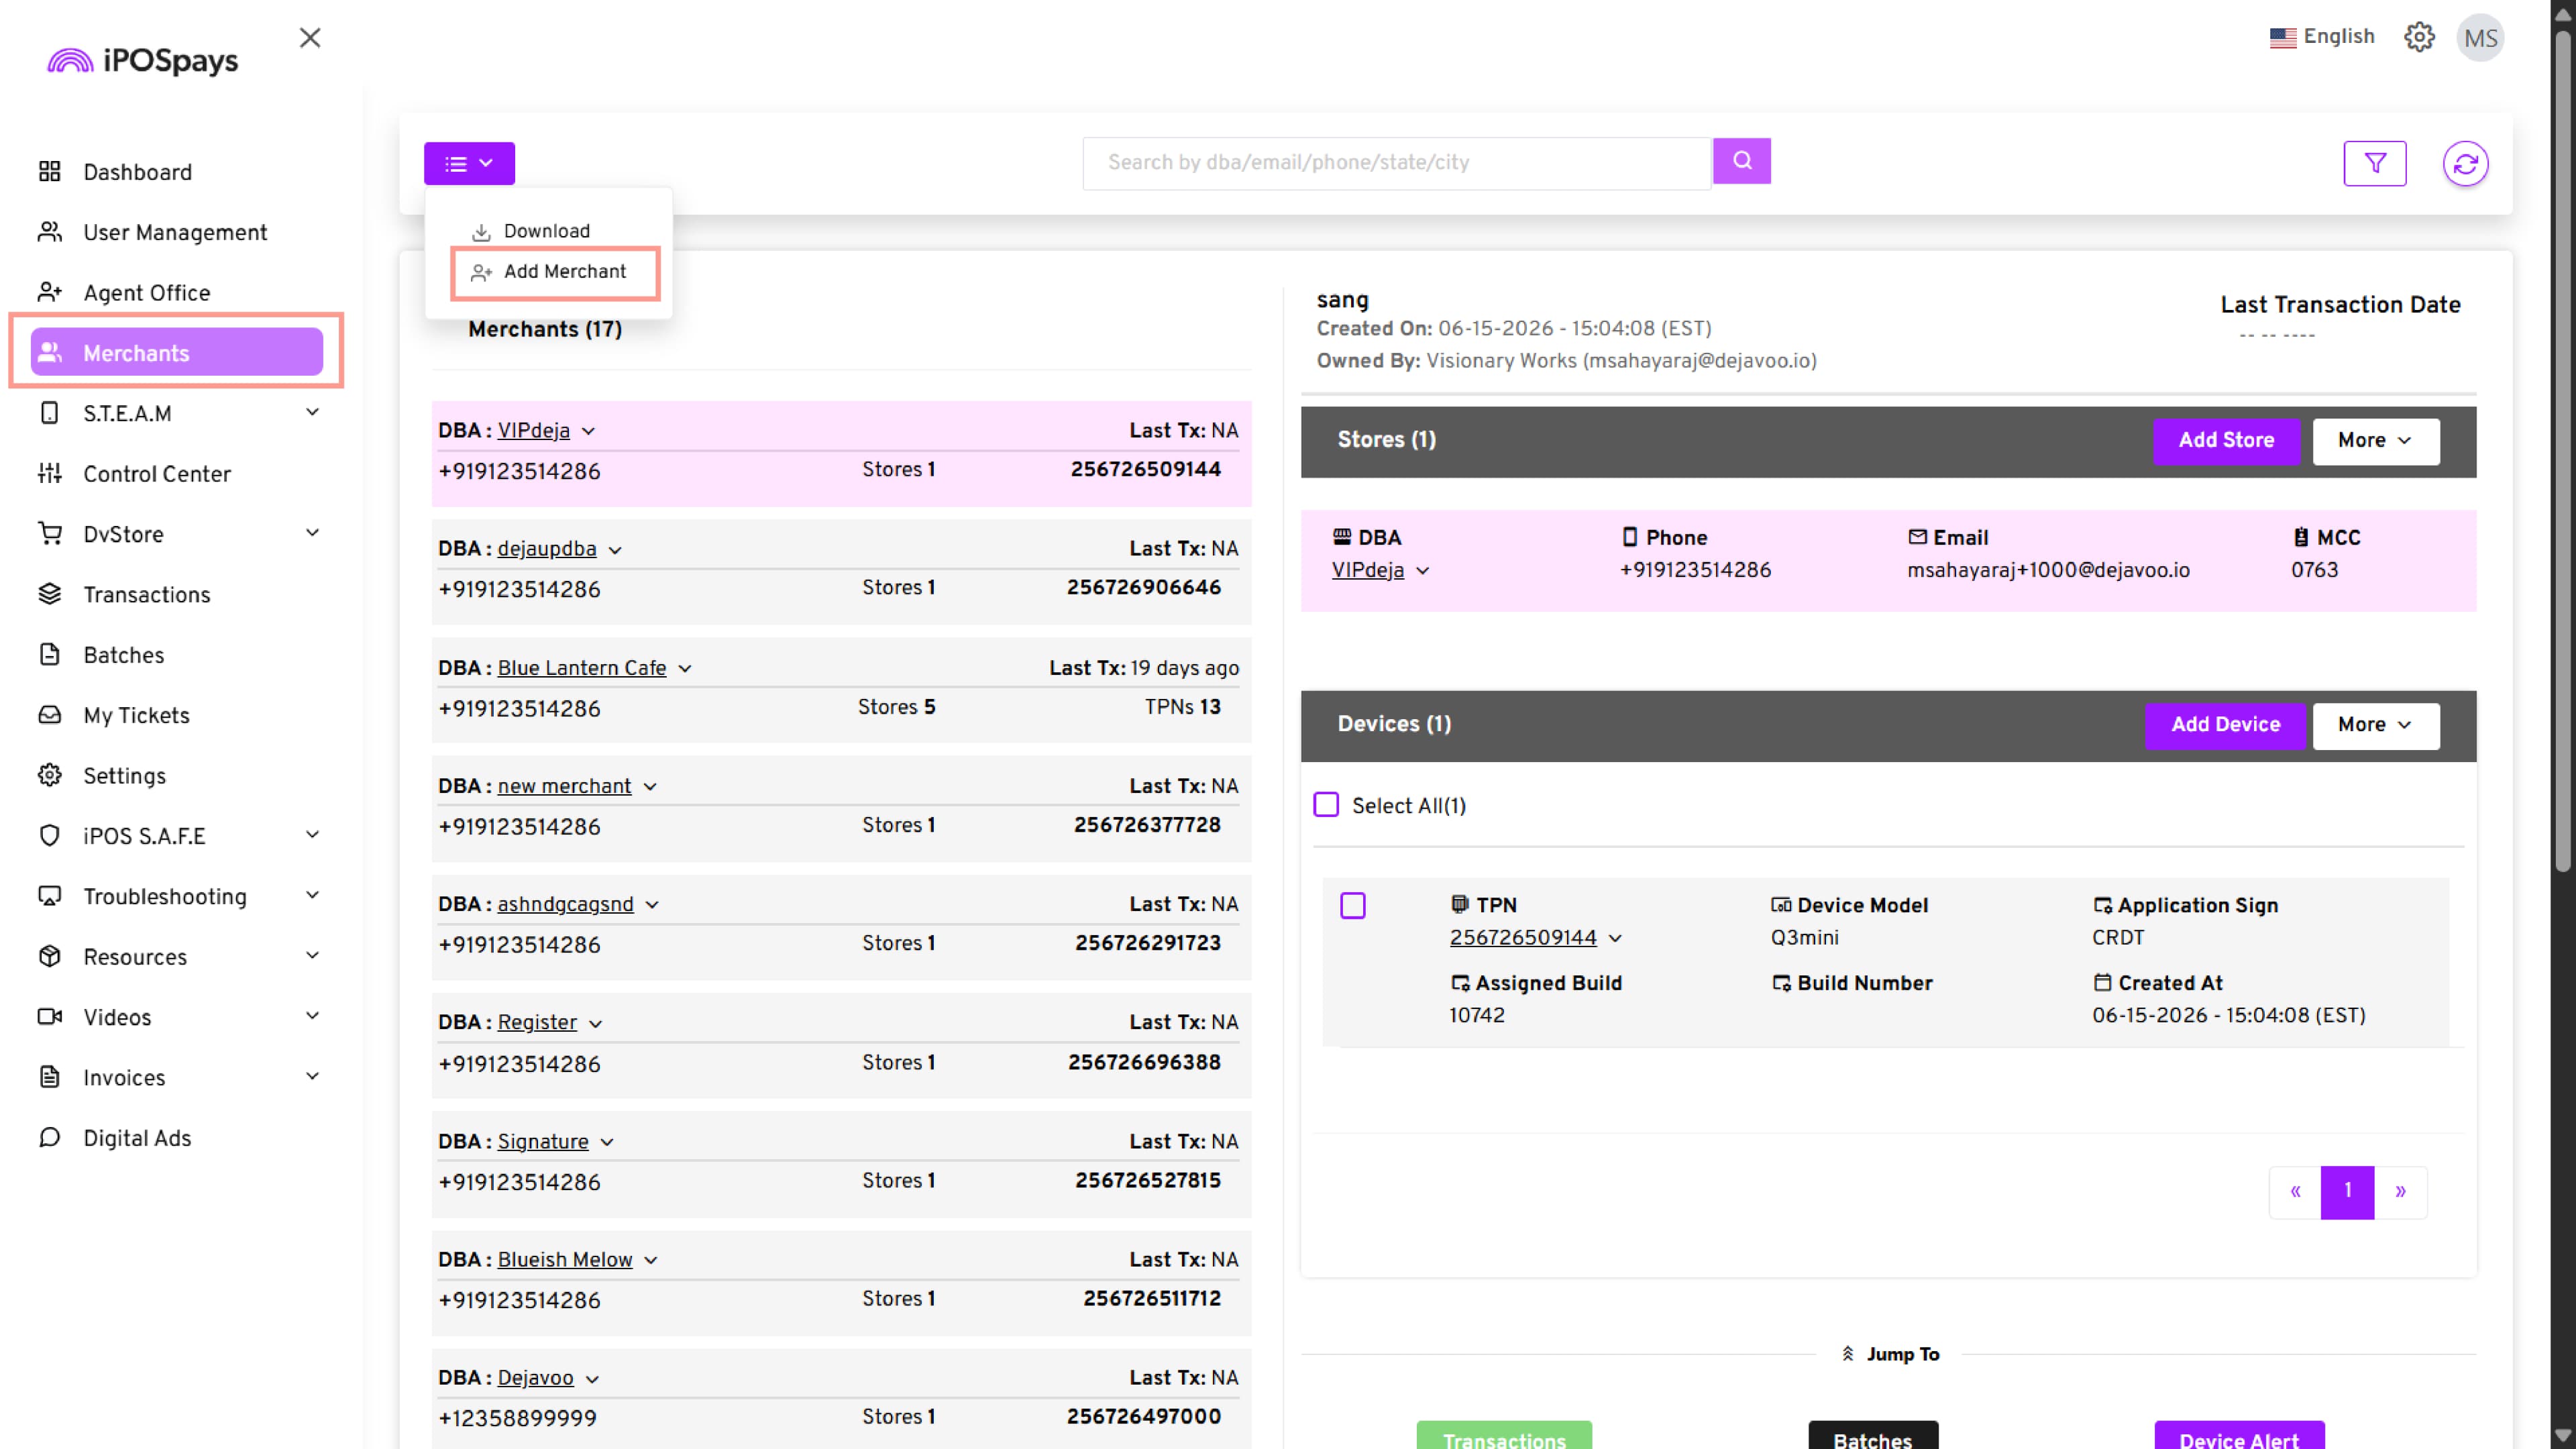
- Navigate to Merchants.
- Click Actions → Add Merchant.
- Complete the required merchant information.
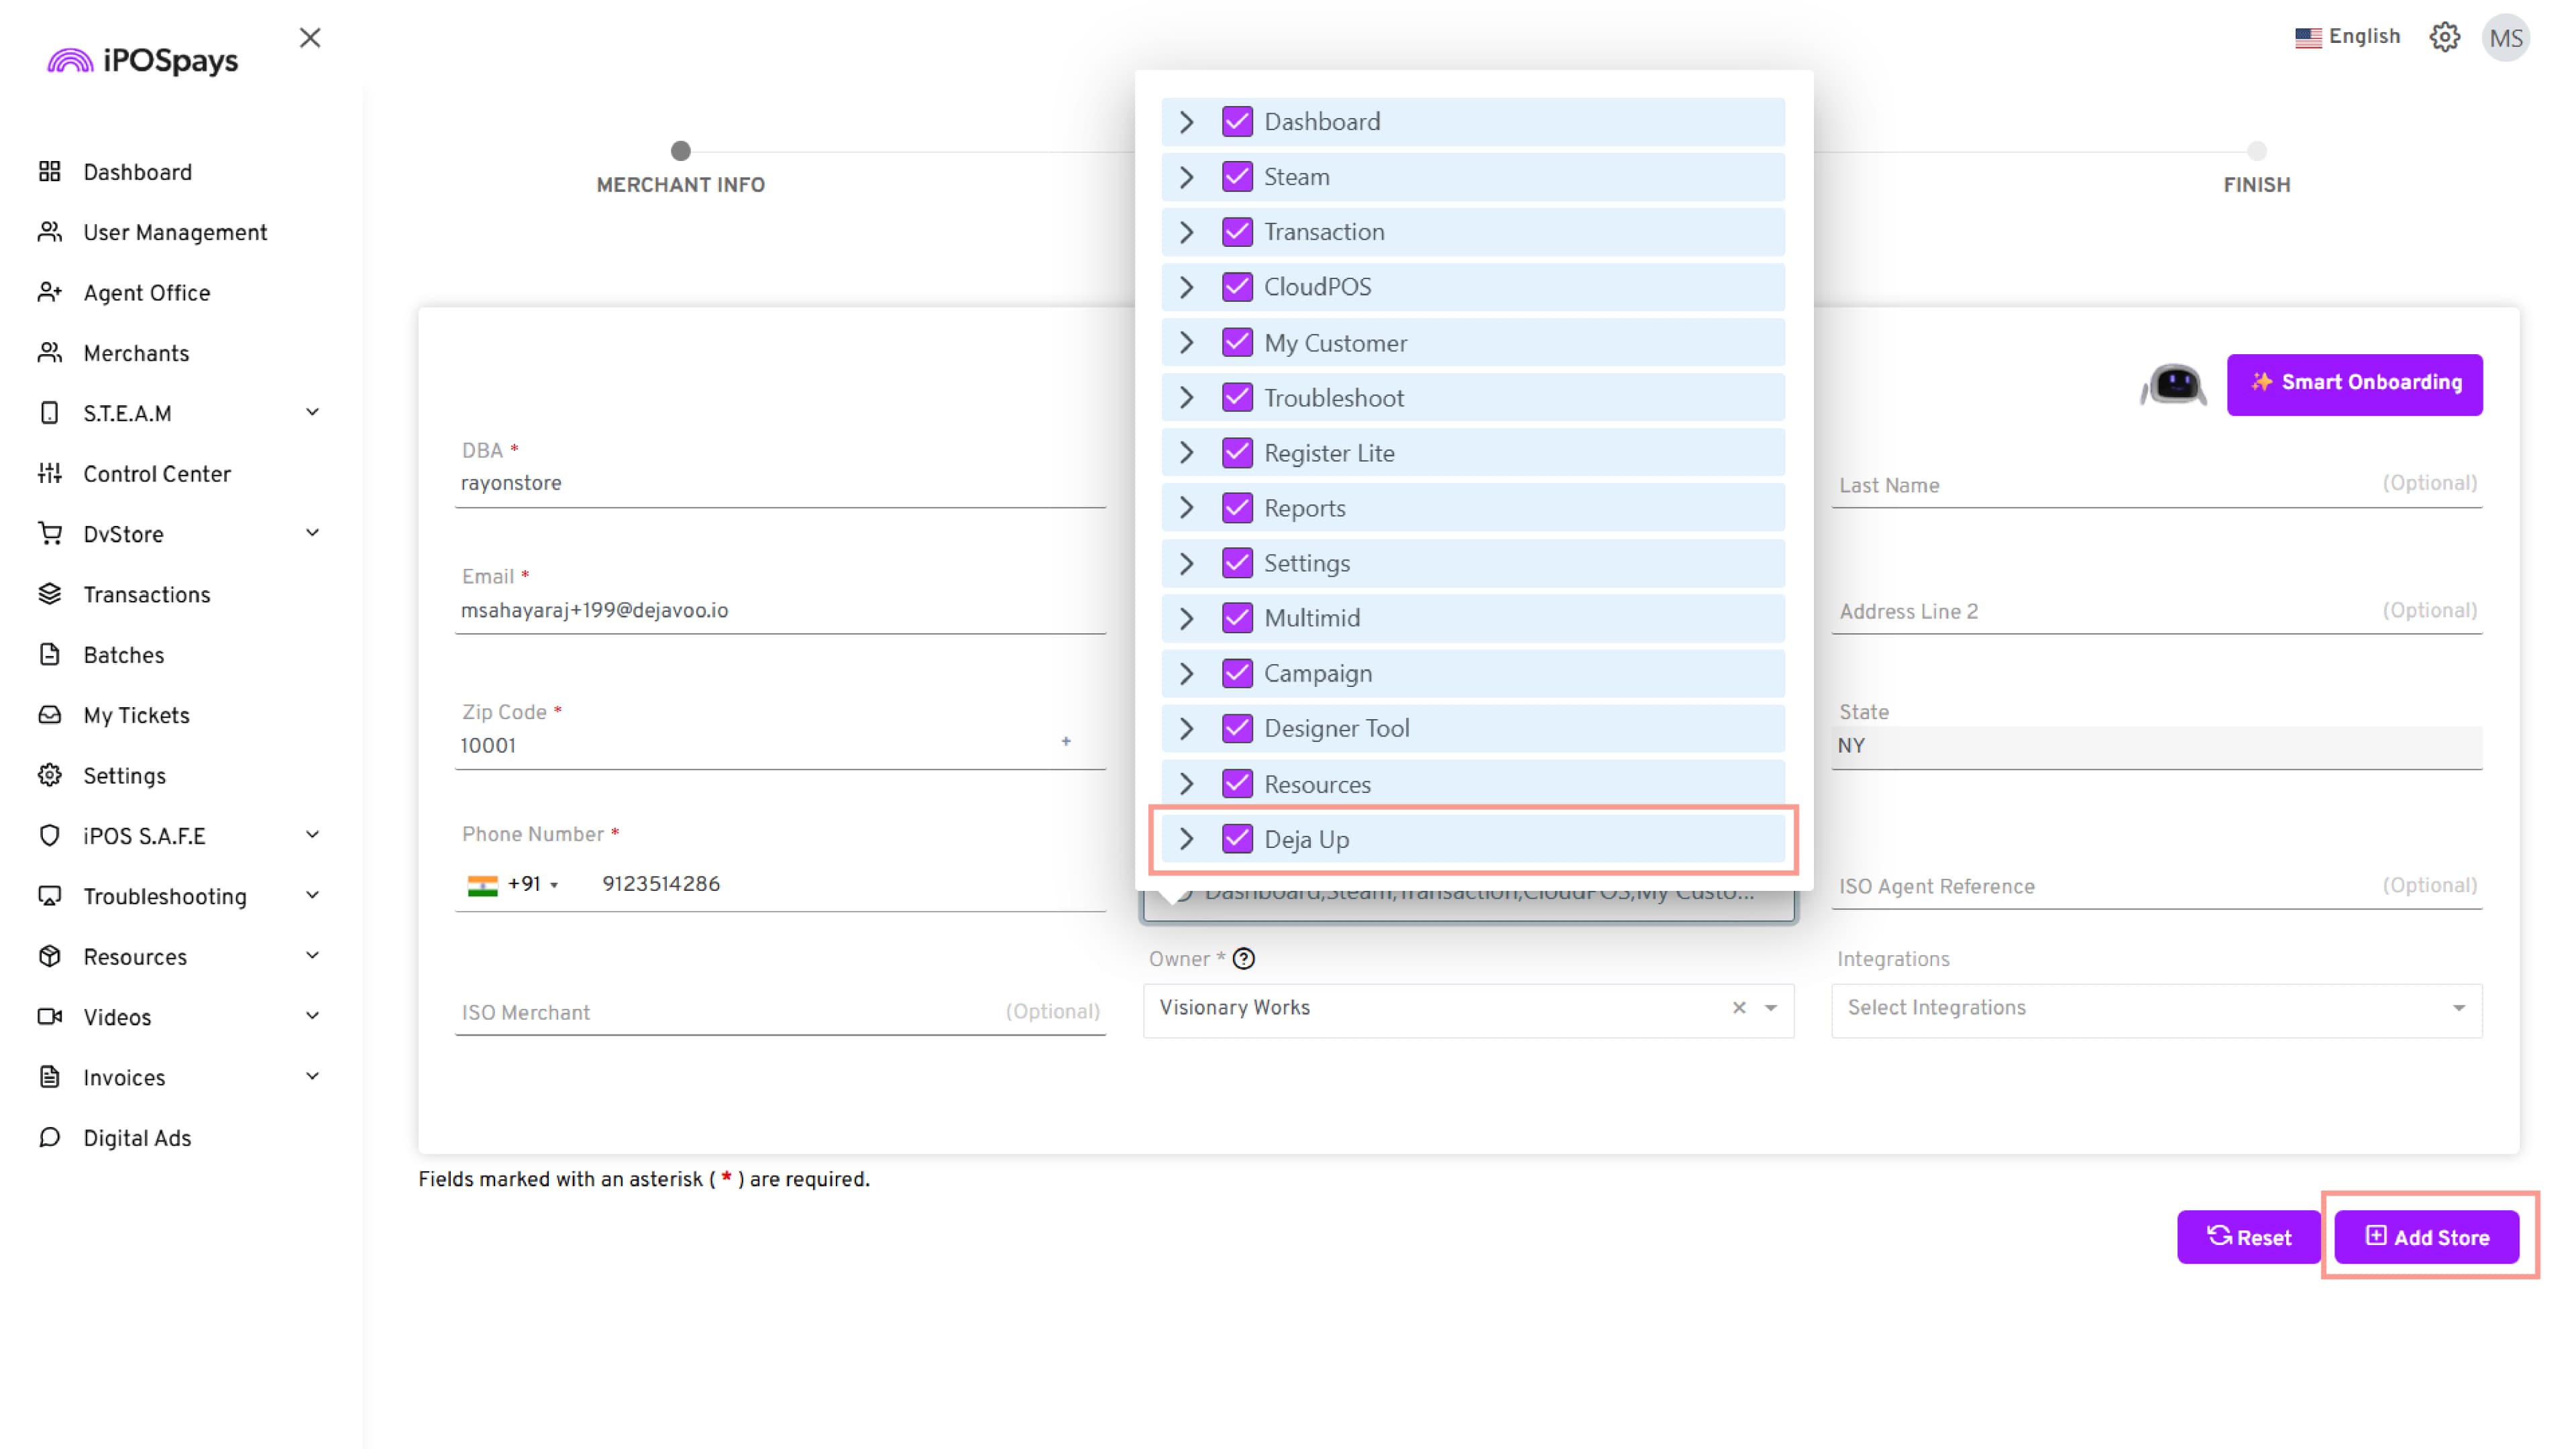
Step 2: Enable DejaUP!
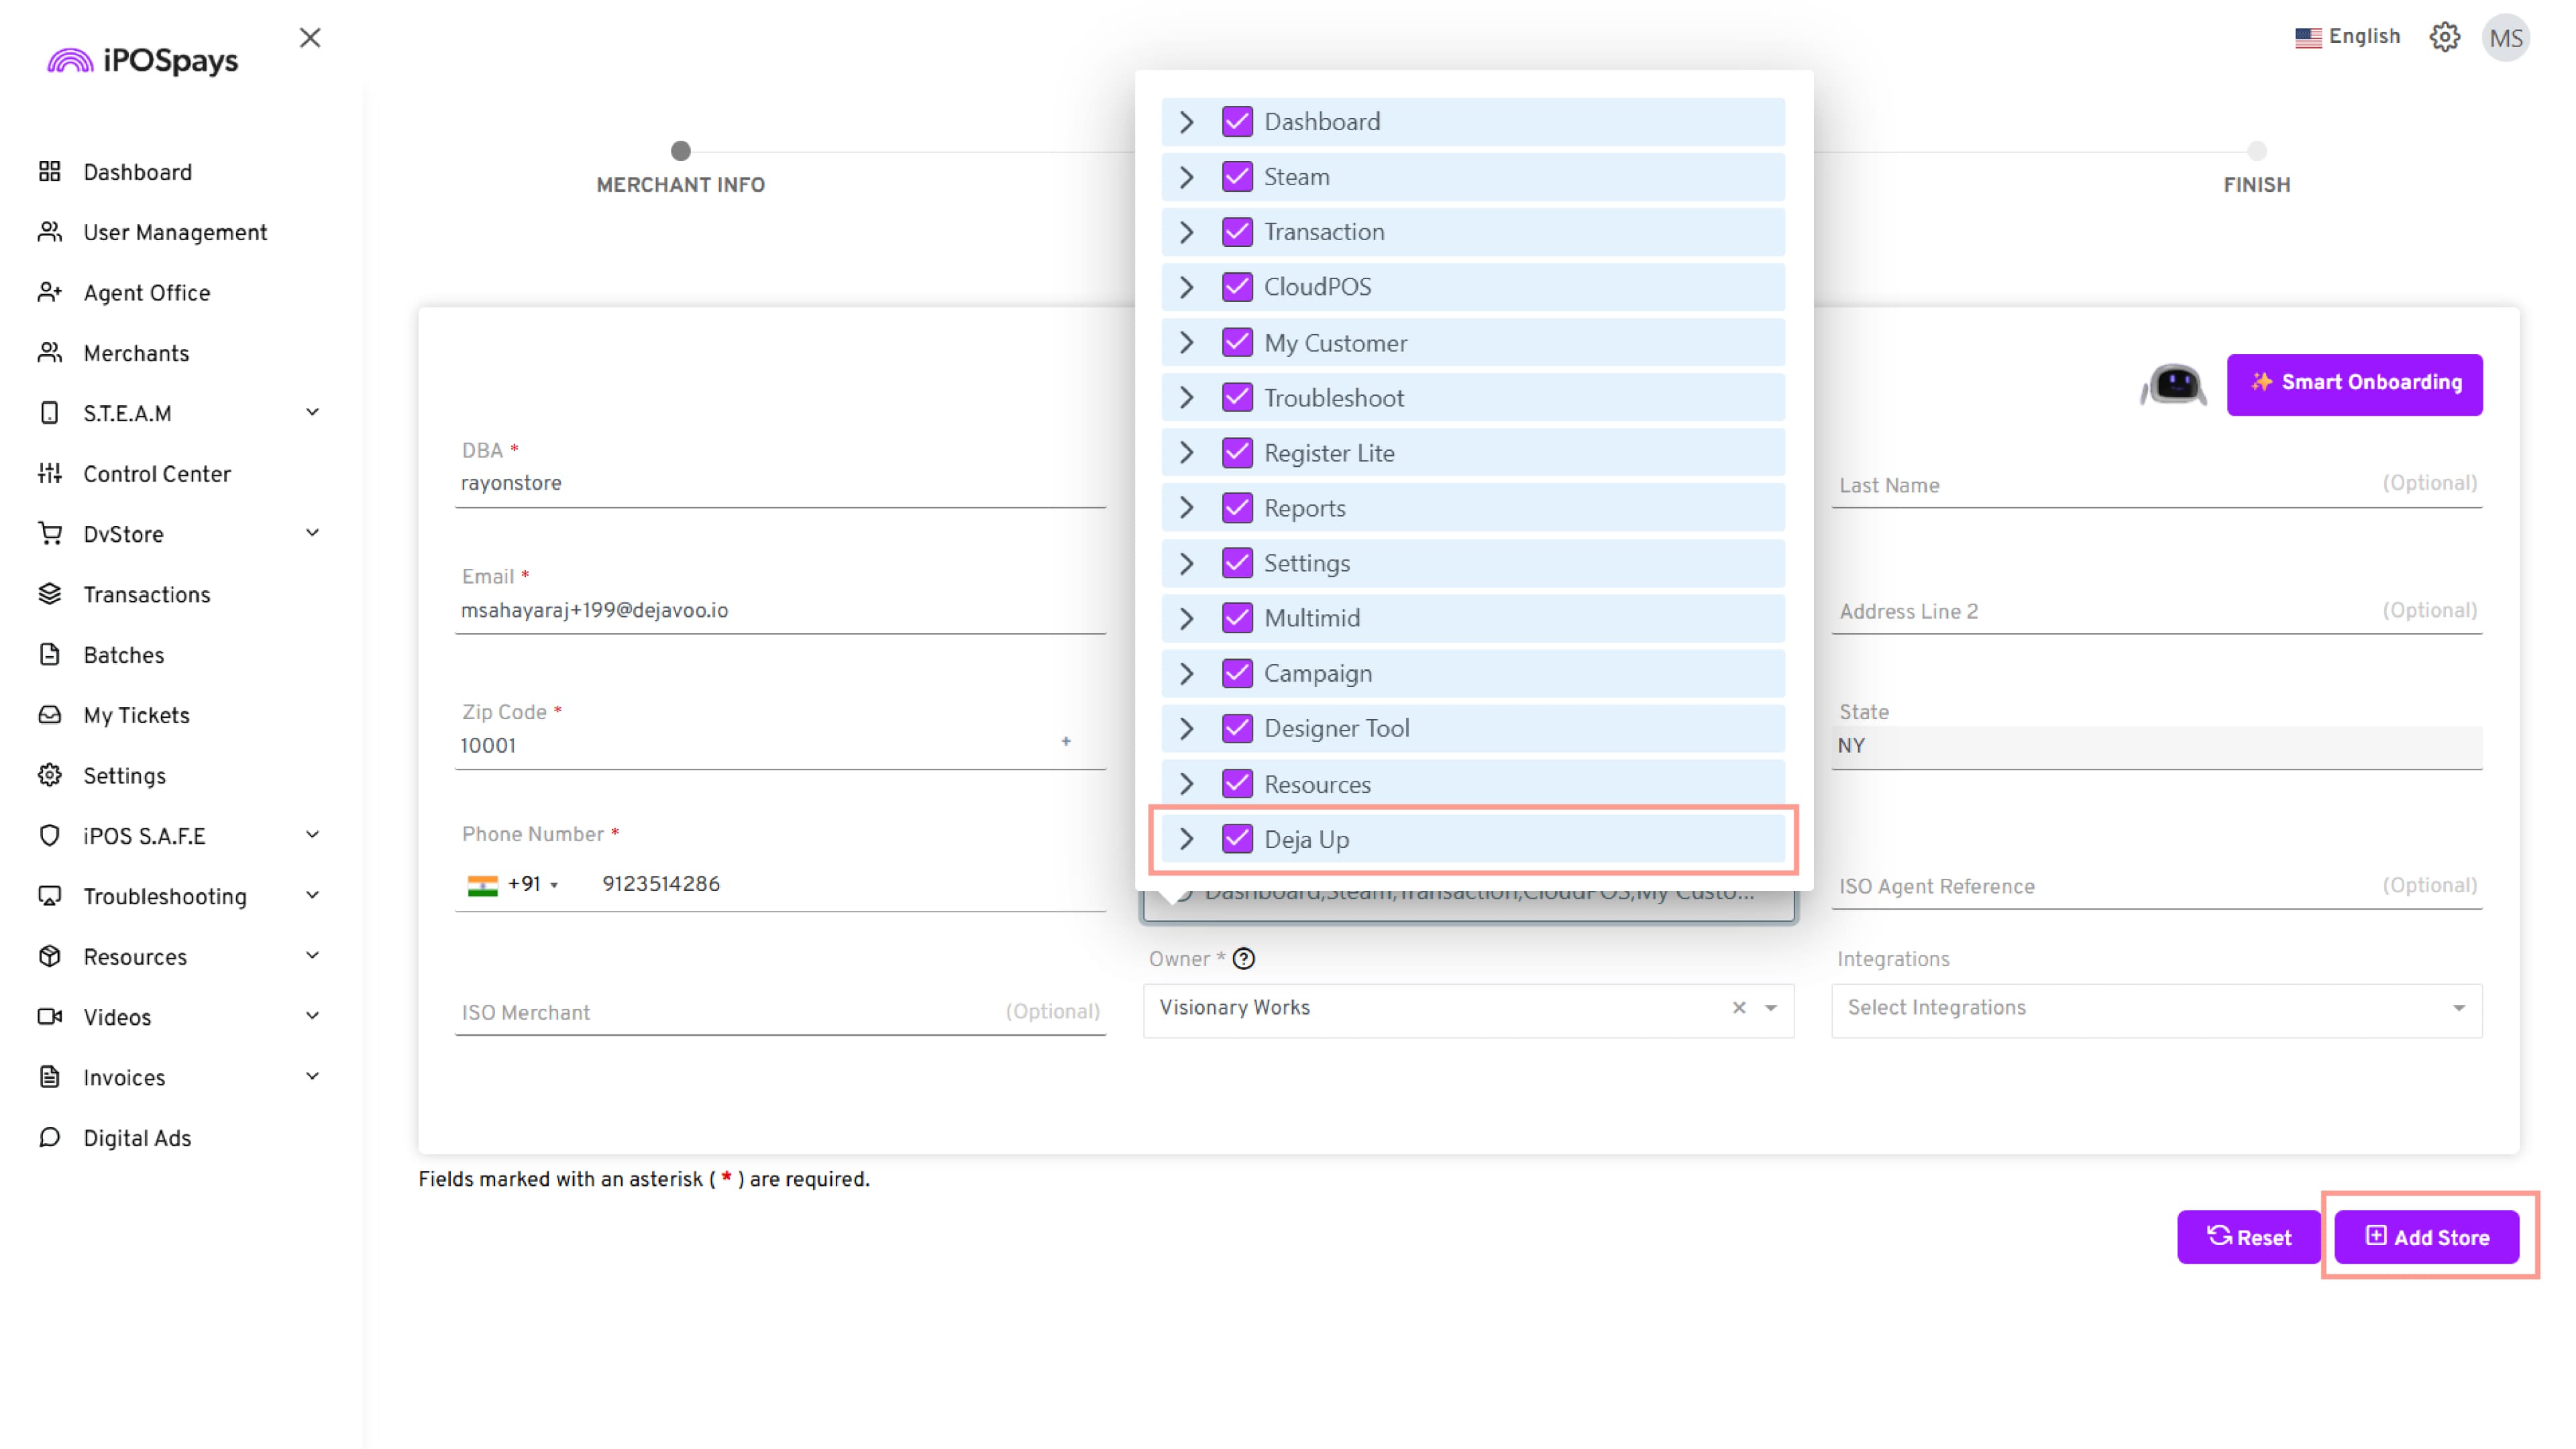
- Under Modules and Privileges, select DejaUP!.
- This enables DejaUP! Access for the merchant.
- Click Add Store to continue.
Step 3: Add Store Information
- Complete the required store information.
- Click Add Device to continue.
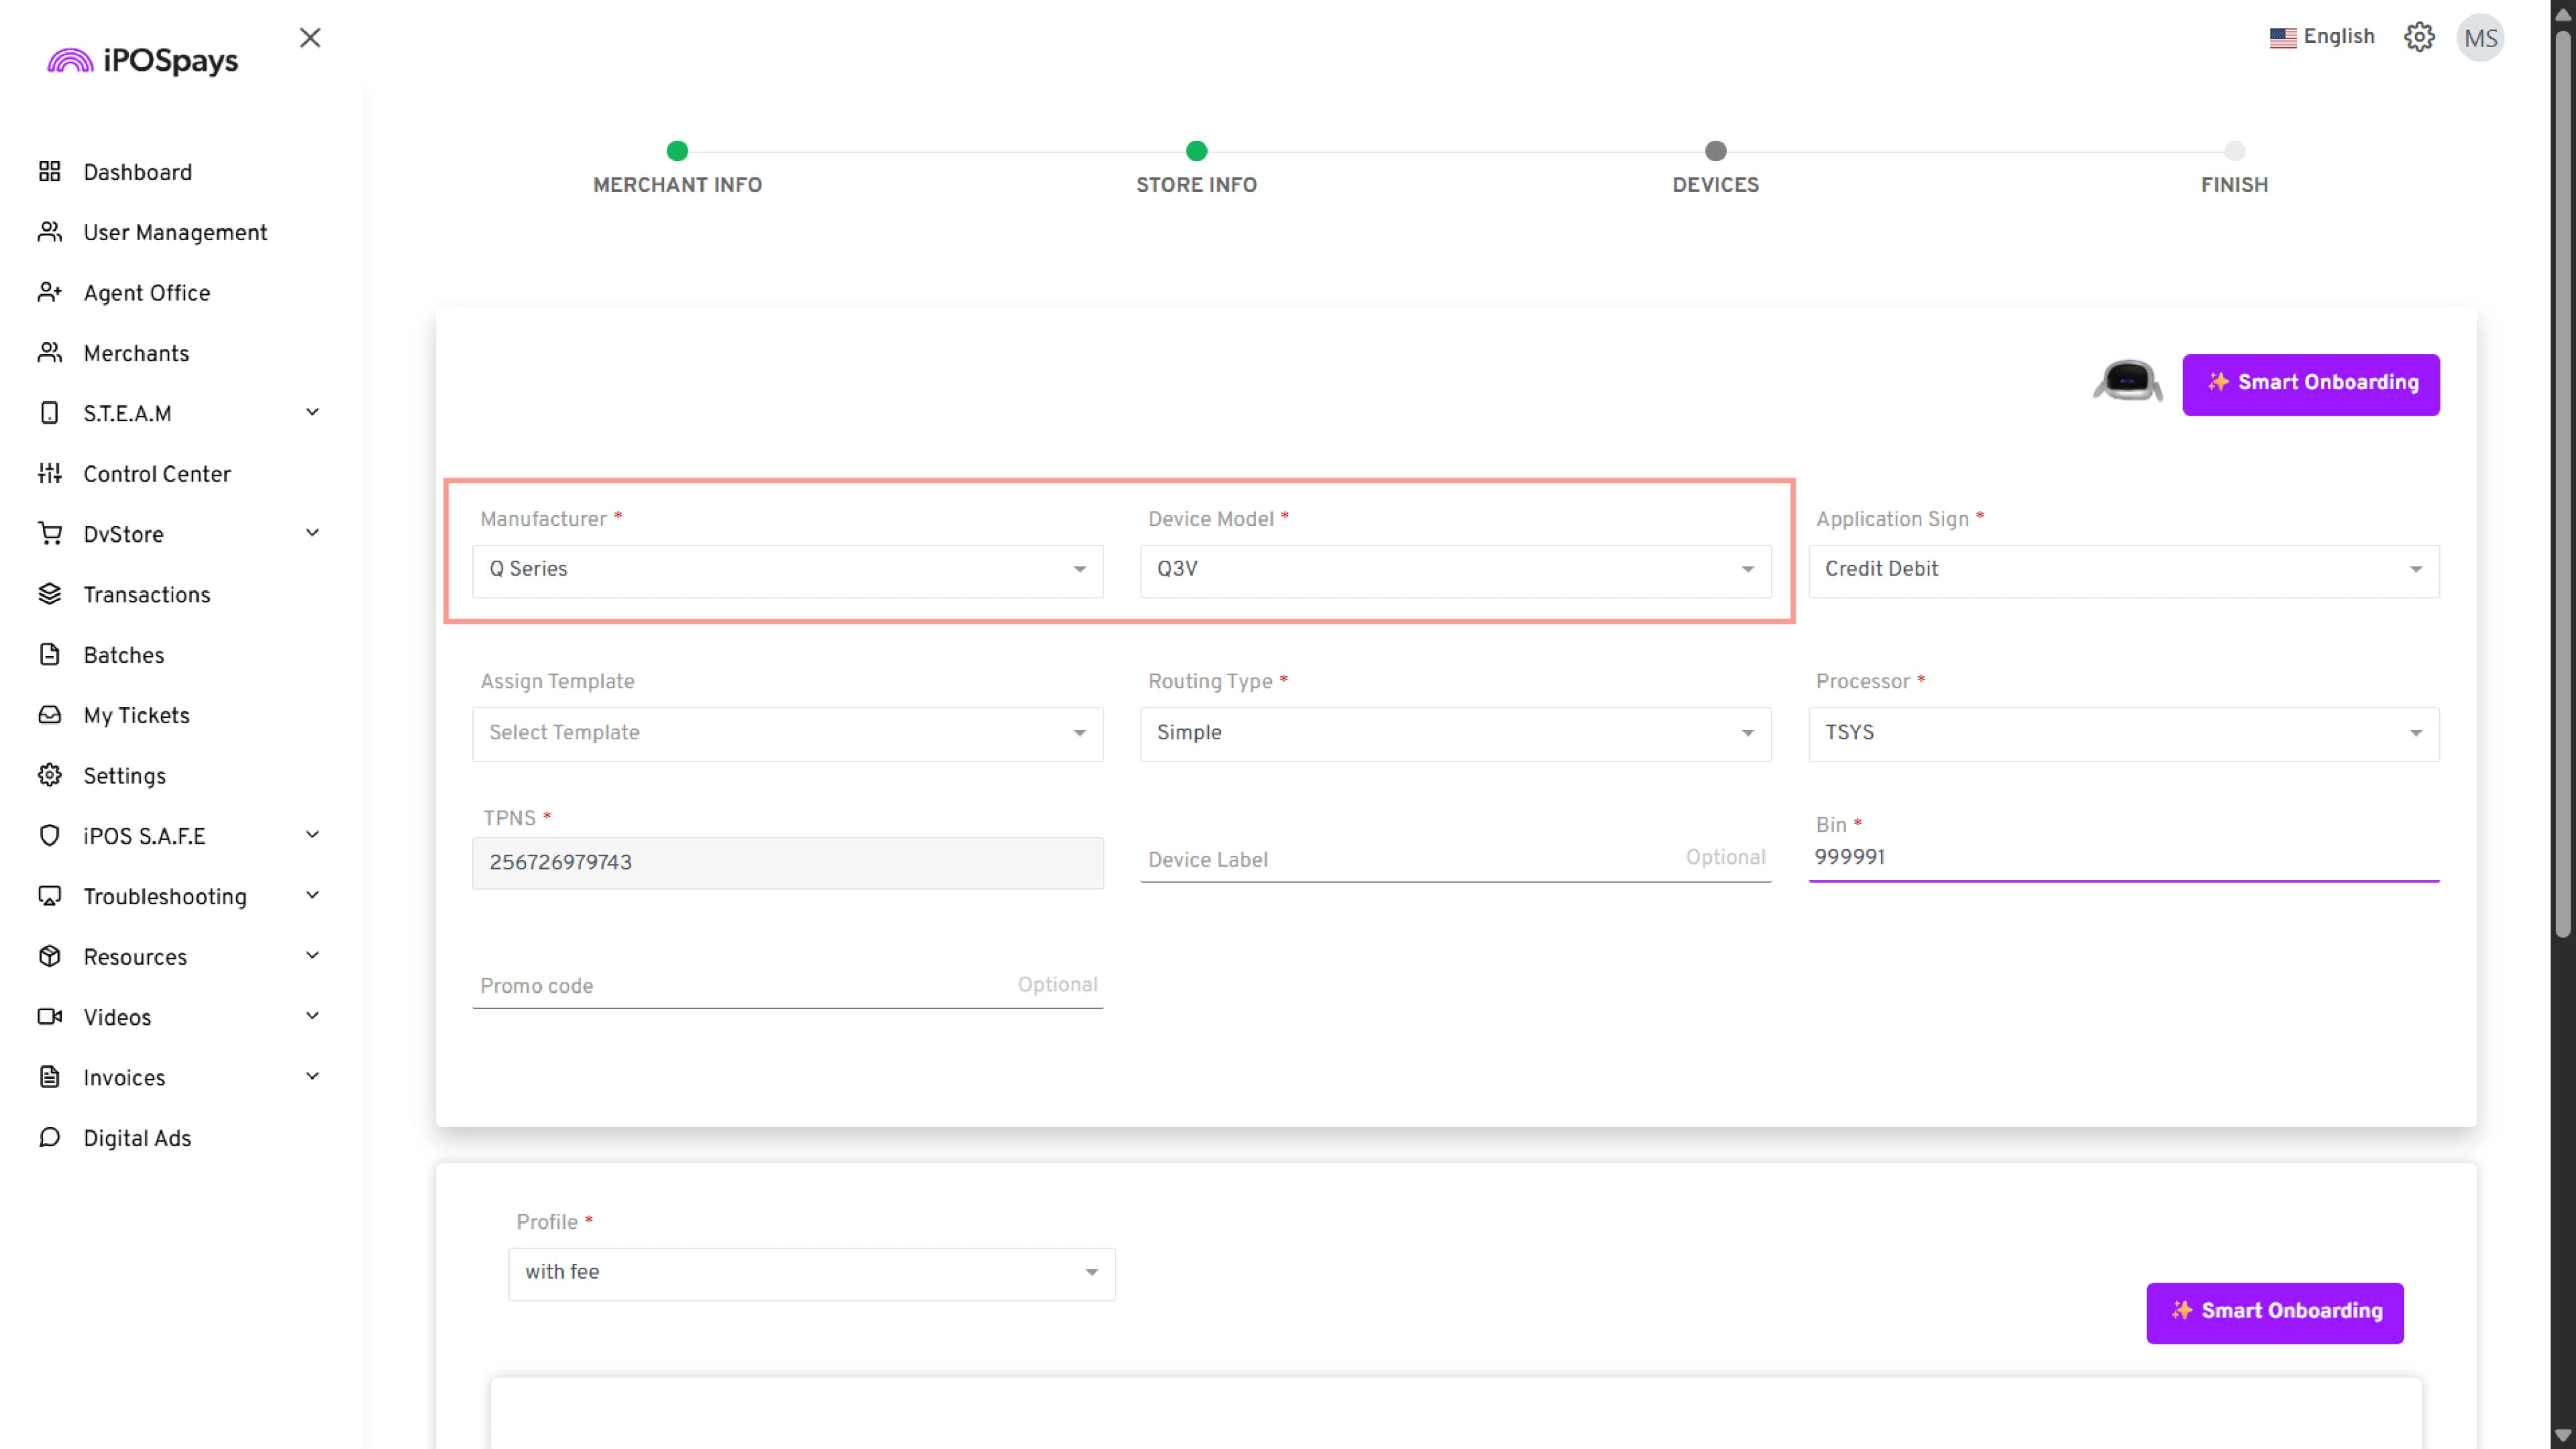
Step 4: Assign a Supported Device
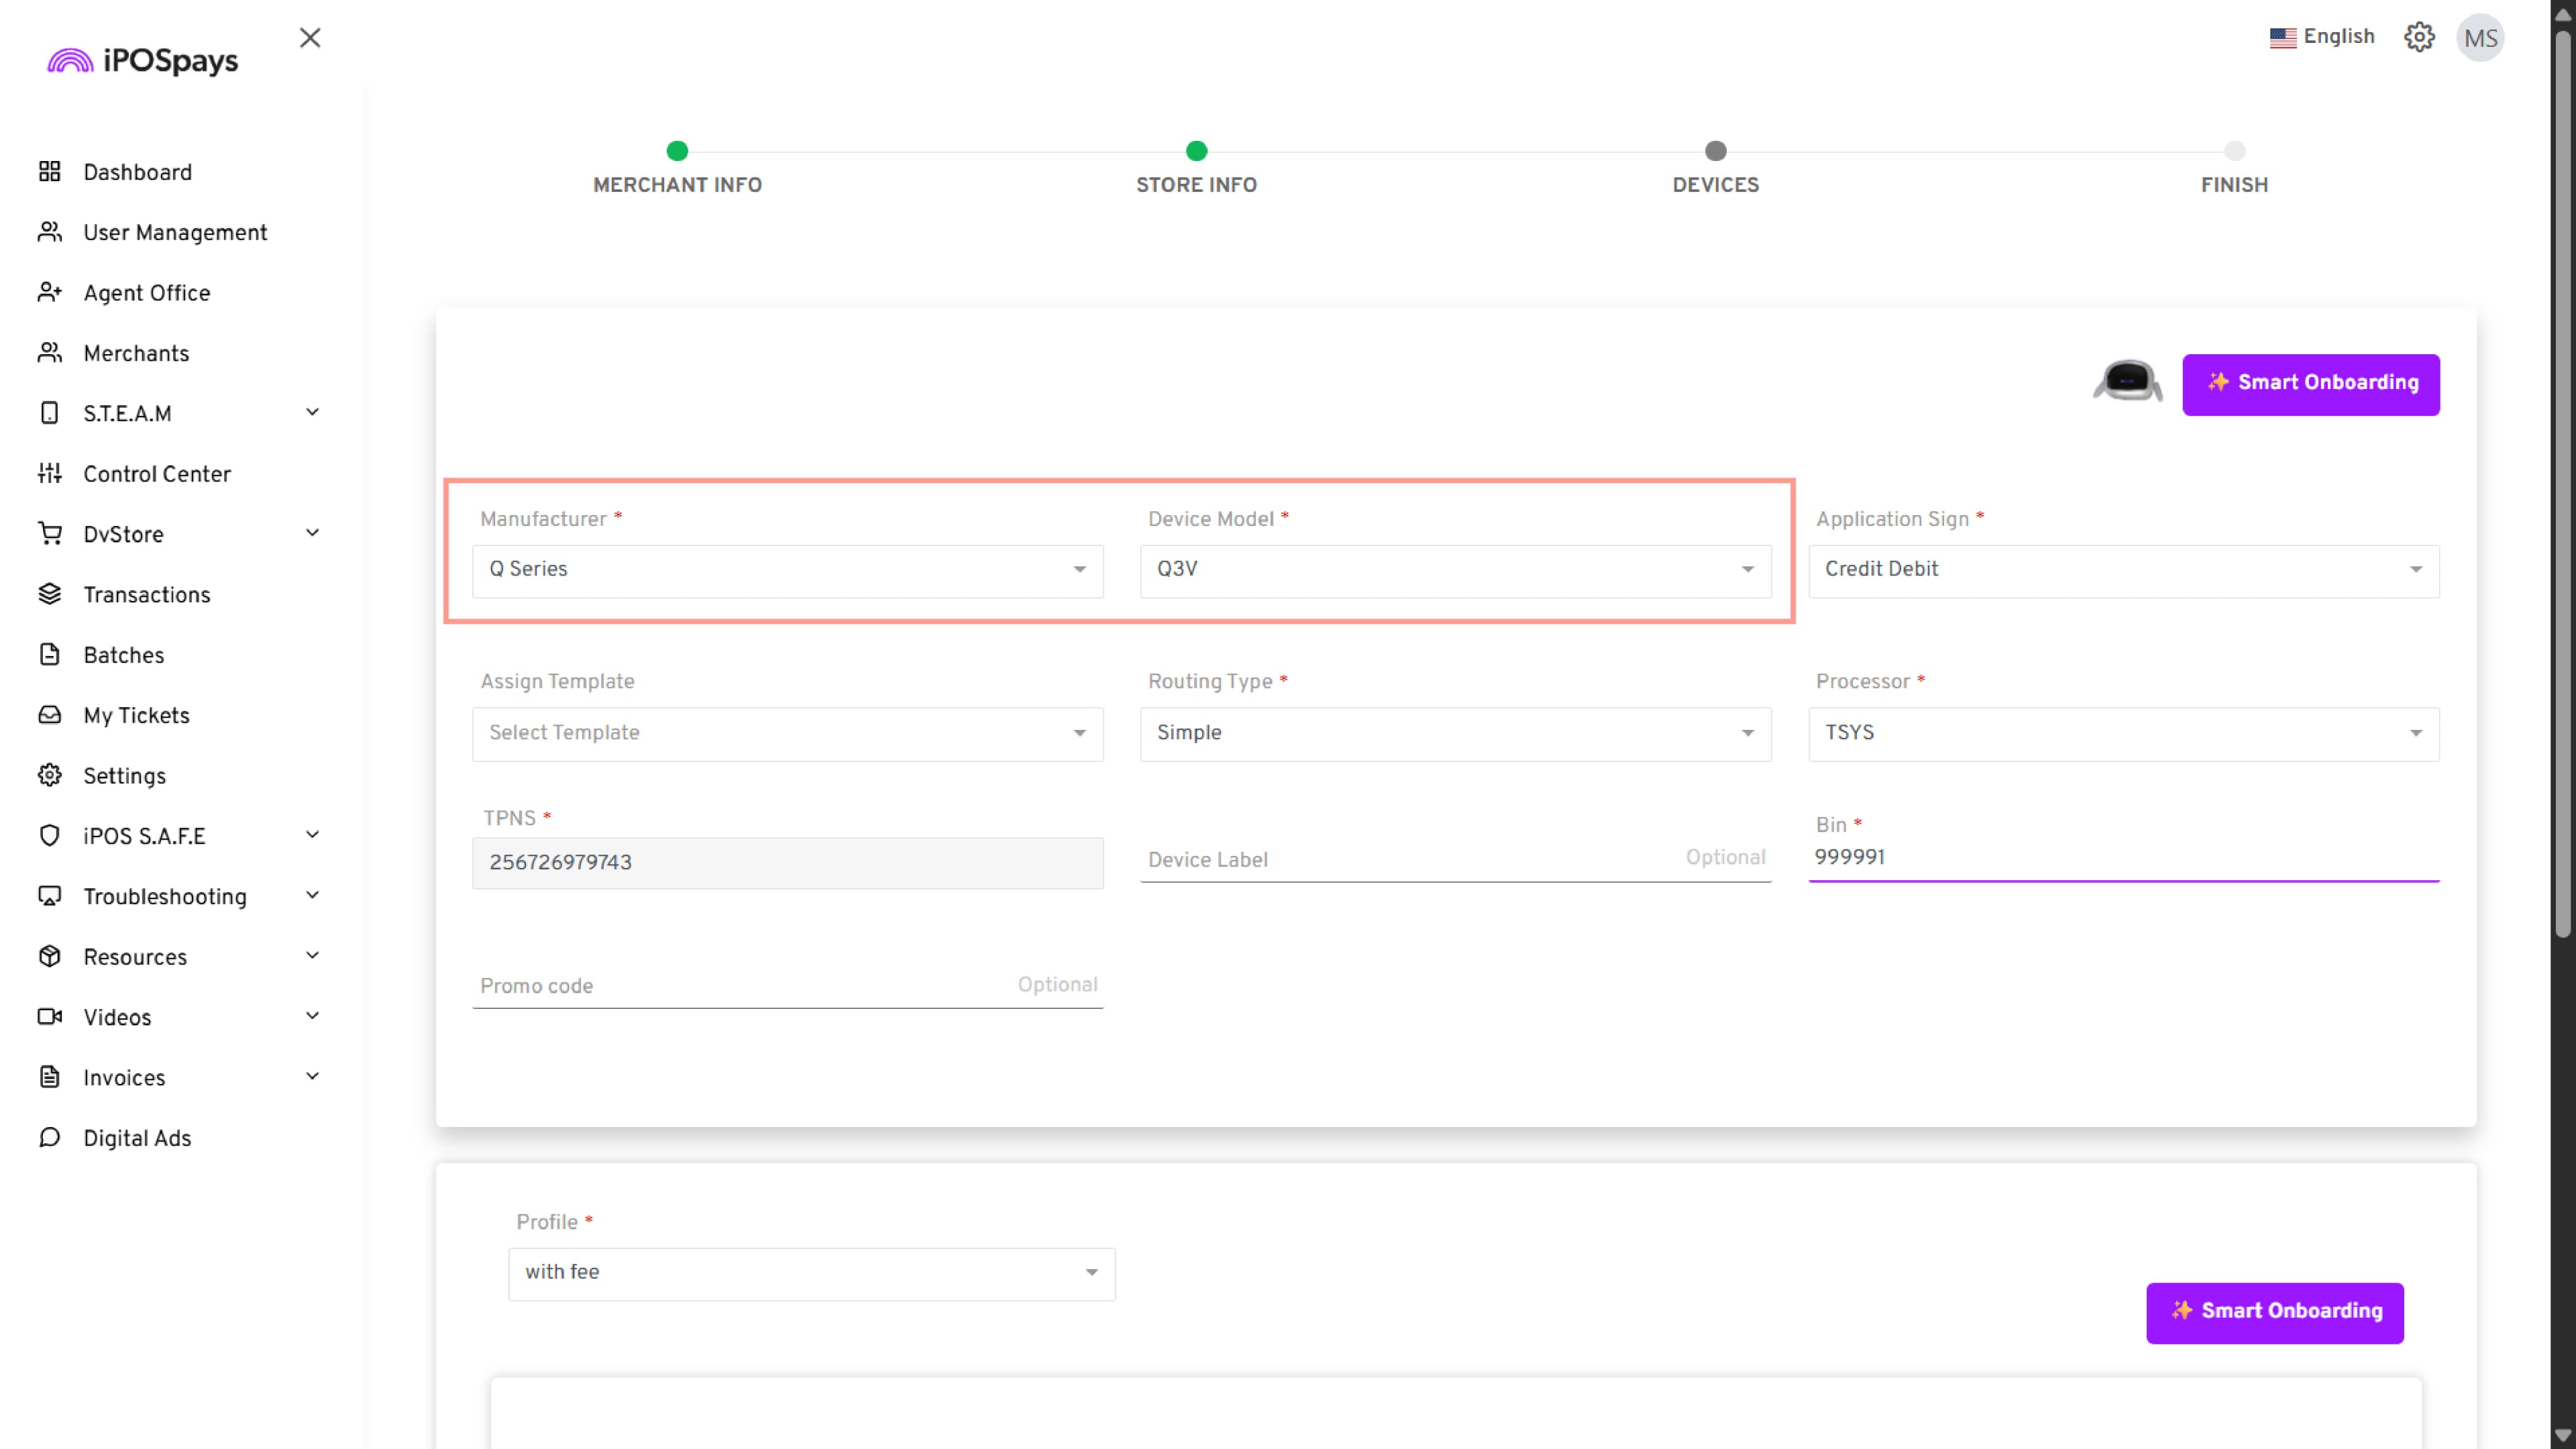
- Under Manufacturer, select Q Series.
- Under Device Model, select one of the supported devices:
- Q3mini
- Q3V
- Complete the remaining device configuration and click Finish.
Reference: For complete onboarding steps, refer to How to Onboard a Merchant on iPOSpays
Enable DejaUP! for an Existing Merchant
If DejaUP! was not enabled during merchant onboarding, complete the steps below to enable DejaUP! for an existing merchant.
Step 1: Search and Select the Merchant
- Log in to the iPOSpays Portal using ISO credentials.
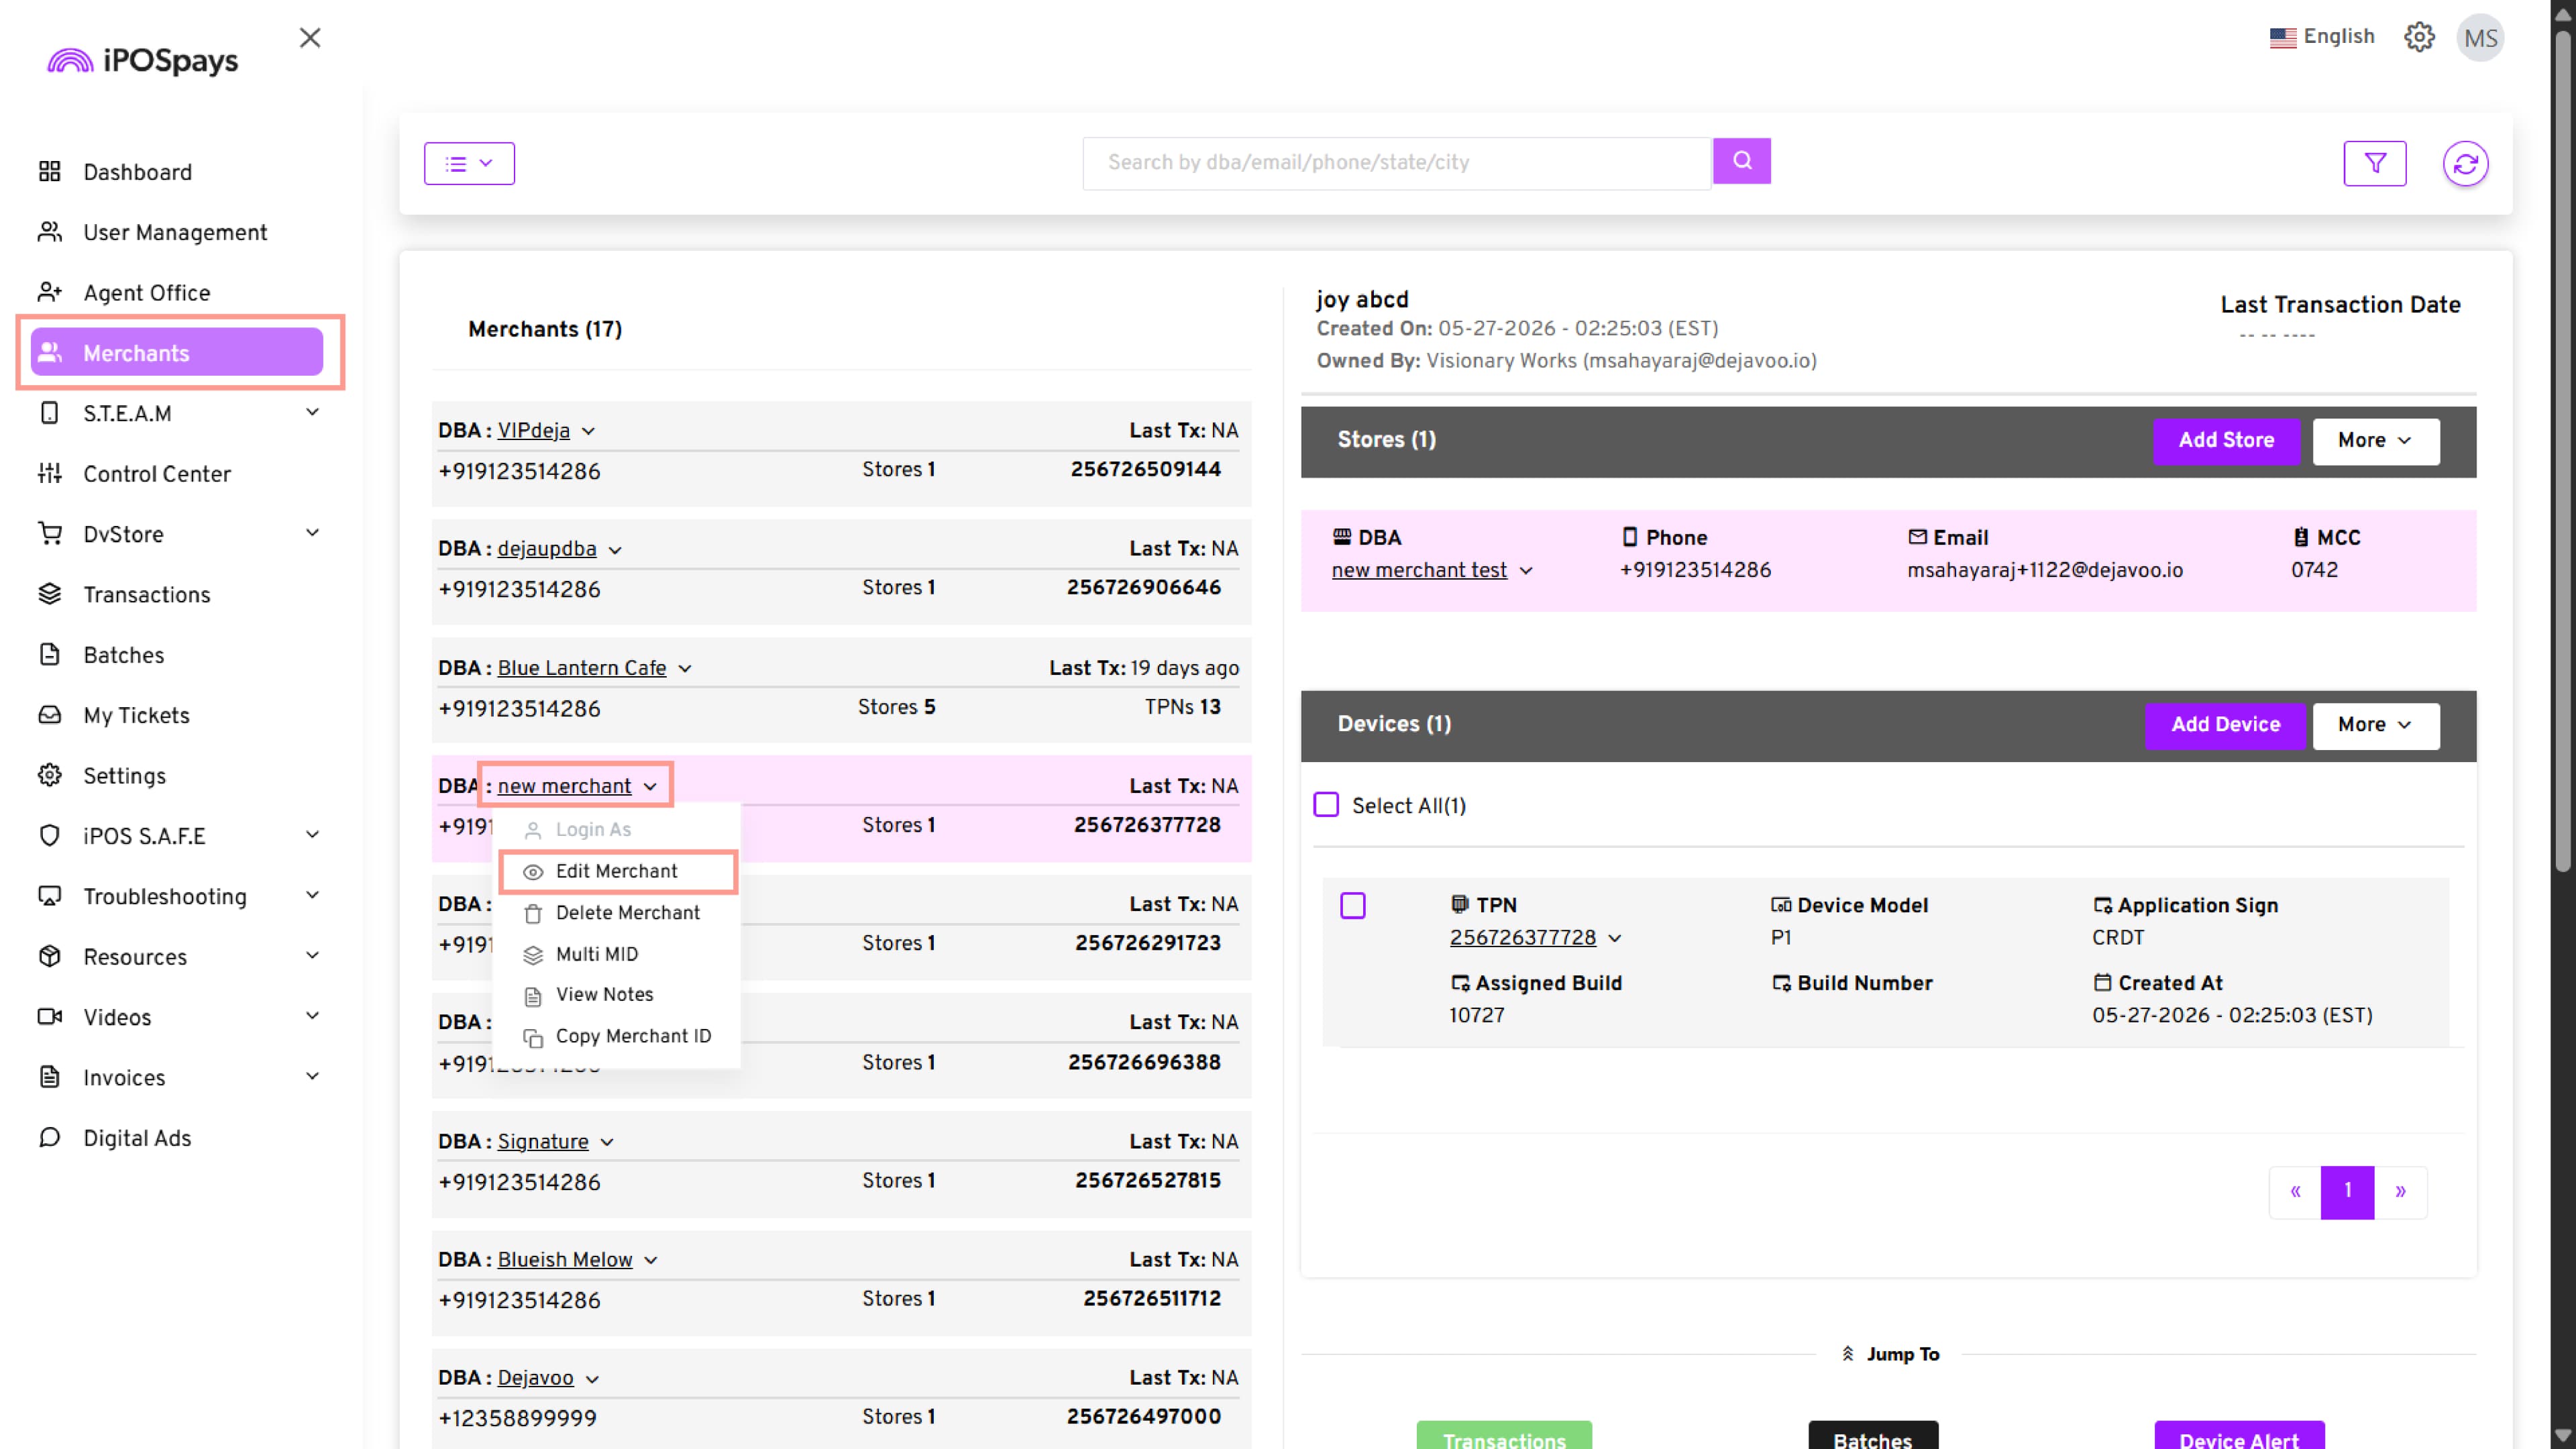
- Navigate to Merchants.
- Search for and select the required merchant.
Step 2: Enable DejaUP!
- Click the drop-down arrow next to the merchant’s DBA name and select Edit Merchant.
- Under Modules and Privileges, select DejaUP!.
- Click Save to apply the changes.
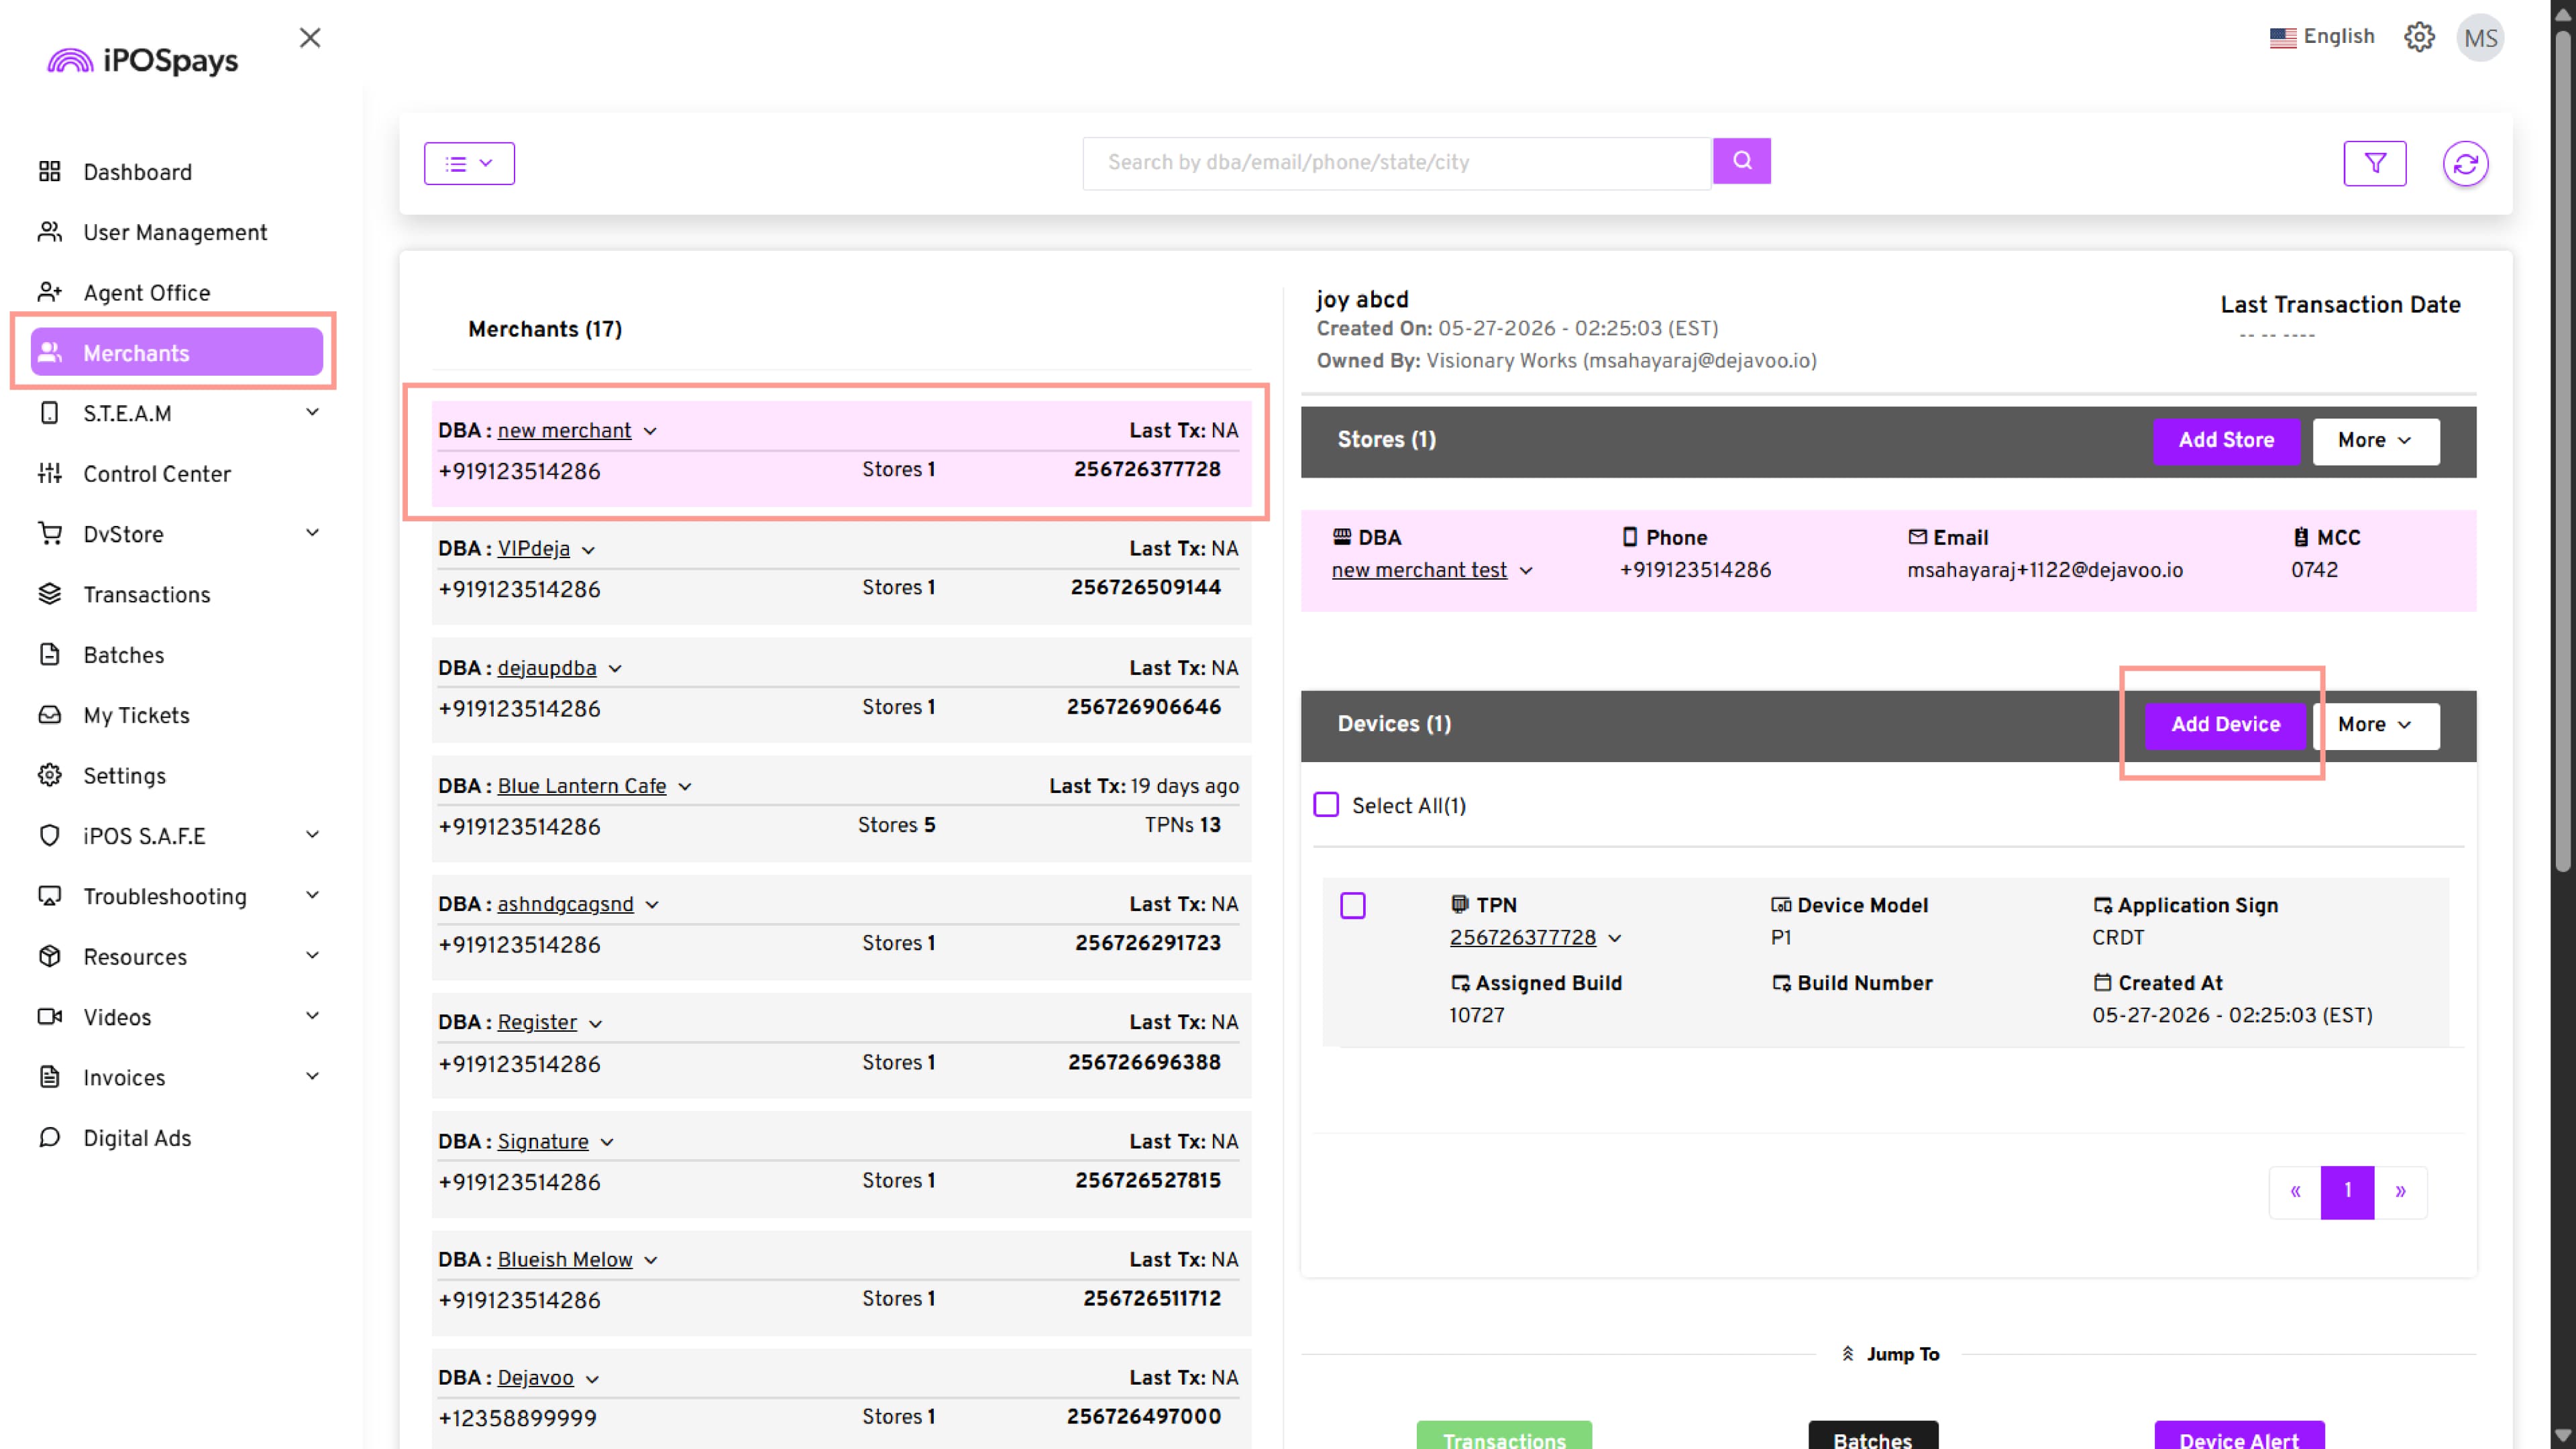
Step 3: Add a Supported Device
- Click Add Device.
-
Under Manufacturer, select Q Series.
-
Under Device Model, select one of the supported devices:
- Q3mini
- Q3V
-
Complete the remaining device configuration and click Finish.
Downloading and accessing DejaUP! Through DVStore
DejaUP! is available on supported Dejavoo payment terminals through DVStore.
To use DejaUP!:
- DvPayLite must be installed as the Anchor App.
- DejaUP! must be assigned as a Value-Added App to the required TPN.
Assign DejaUP! as a Value-Added App
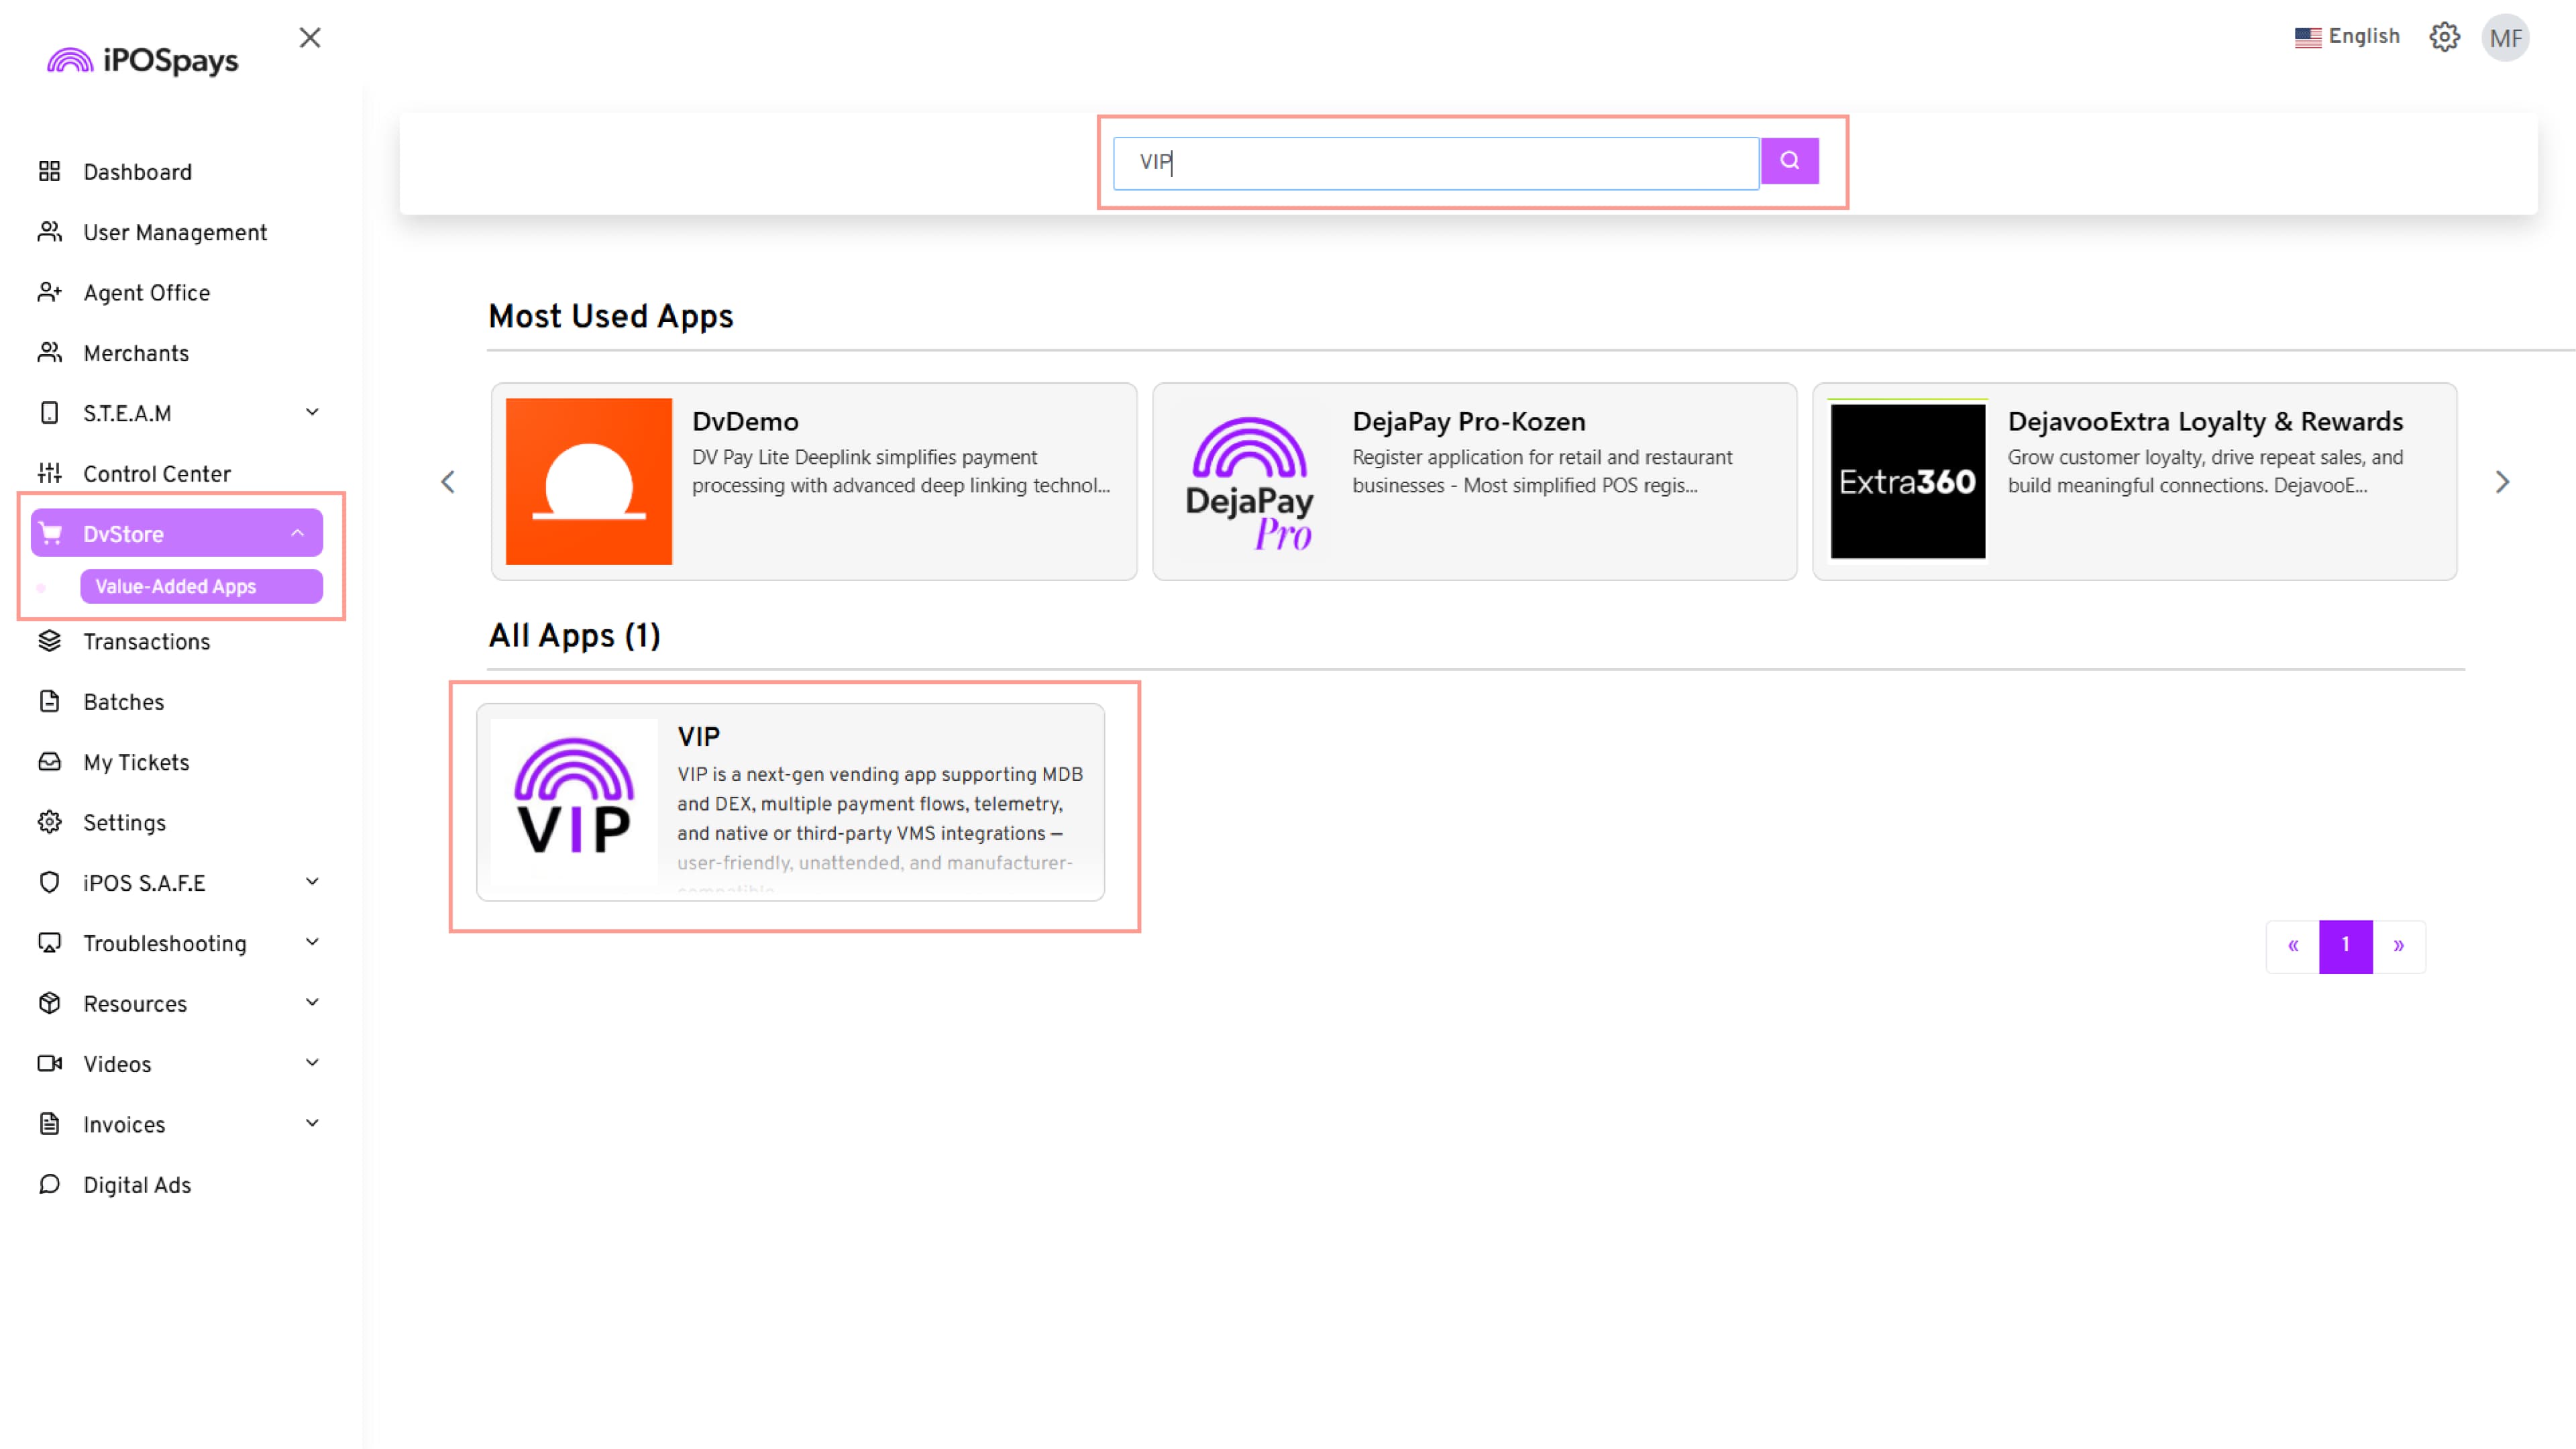
Step 1: Open the DejaUP! Application
- Log in to the iPOSpays Portal using your ISO account.
- Navigate to DVStore → Value Added Apps.
- In the Search box, enter DejaUP!.
- Select the DejaUP! application from the search results.
- Click Assign.
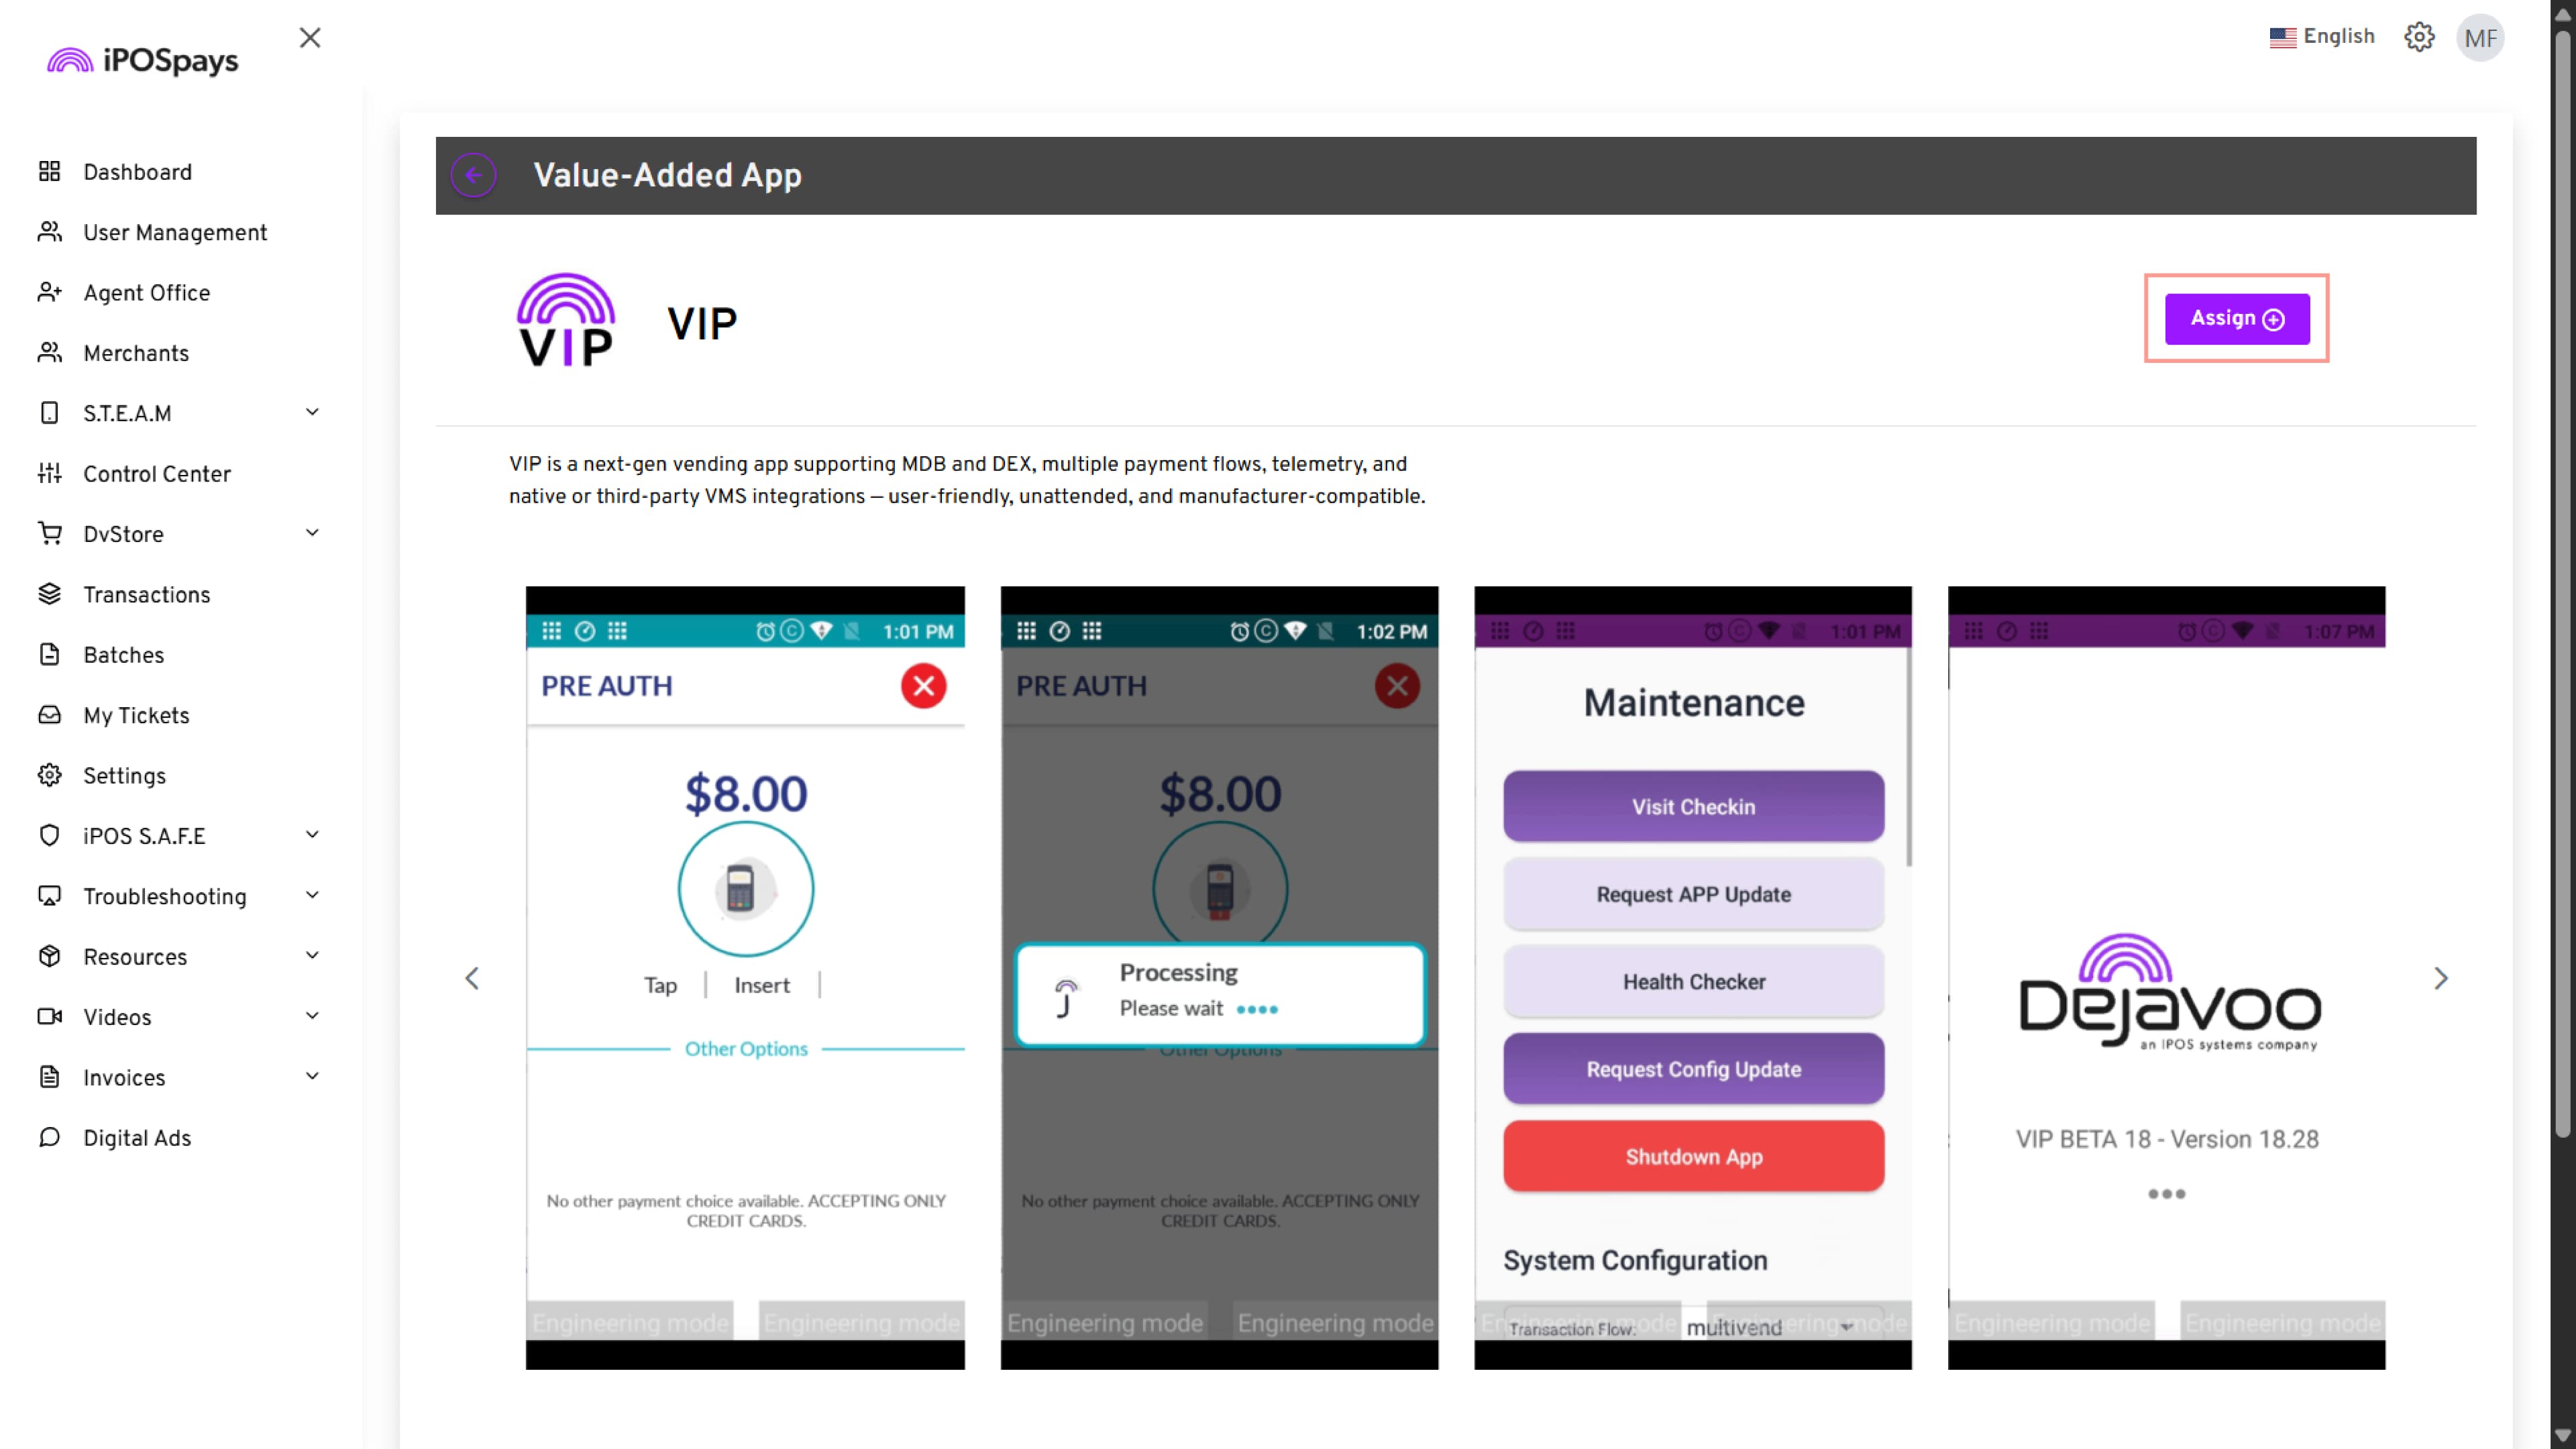
The Assign Value-Added Apps pop-up window appears.
Step 2: Assign DejaUP! to a Specific TPN
- Verify the AssignBuild version displayed.
- Select the required Merchant from the drop-down list.
- Leave the Device Models field unchanged.
- From the TPN(s) drop-down list, select the required terminal profile (TPN).
- Click Submit.
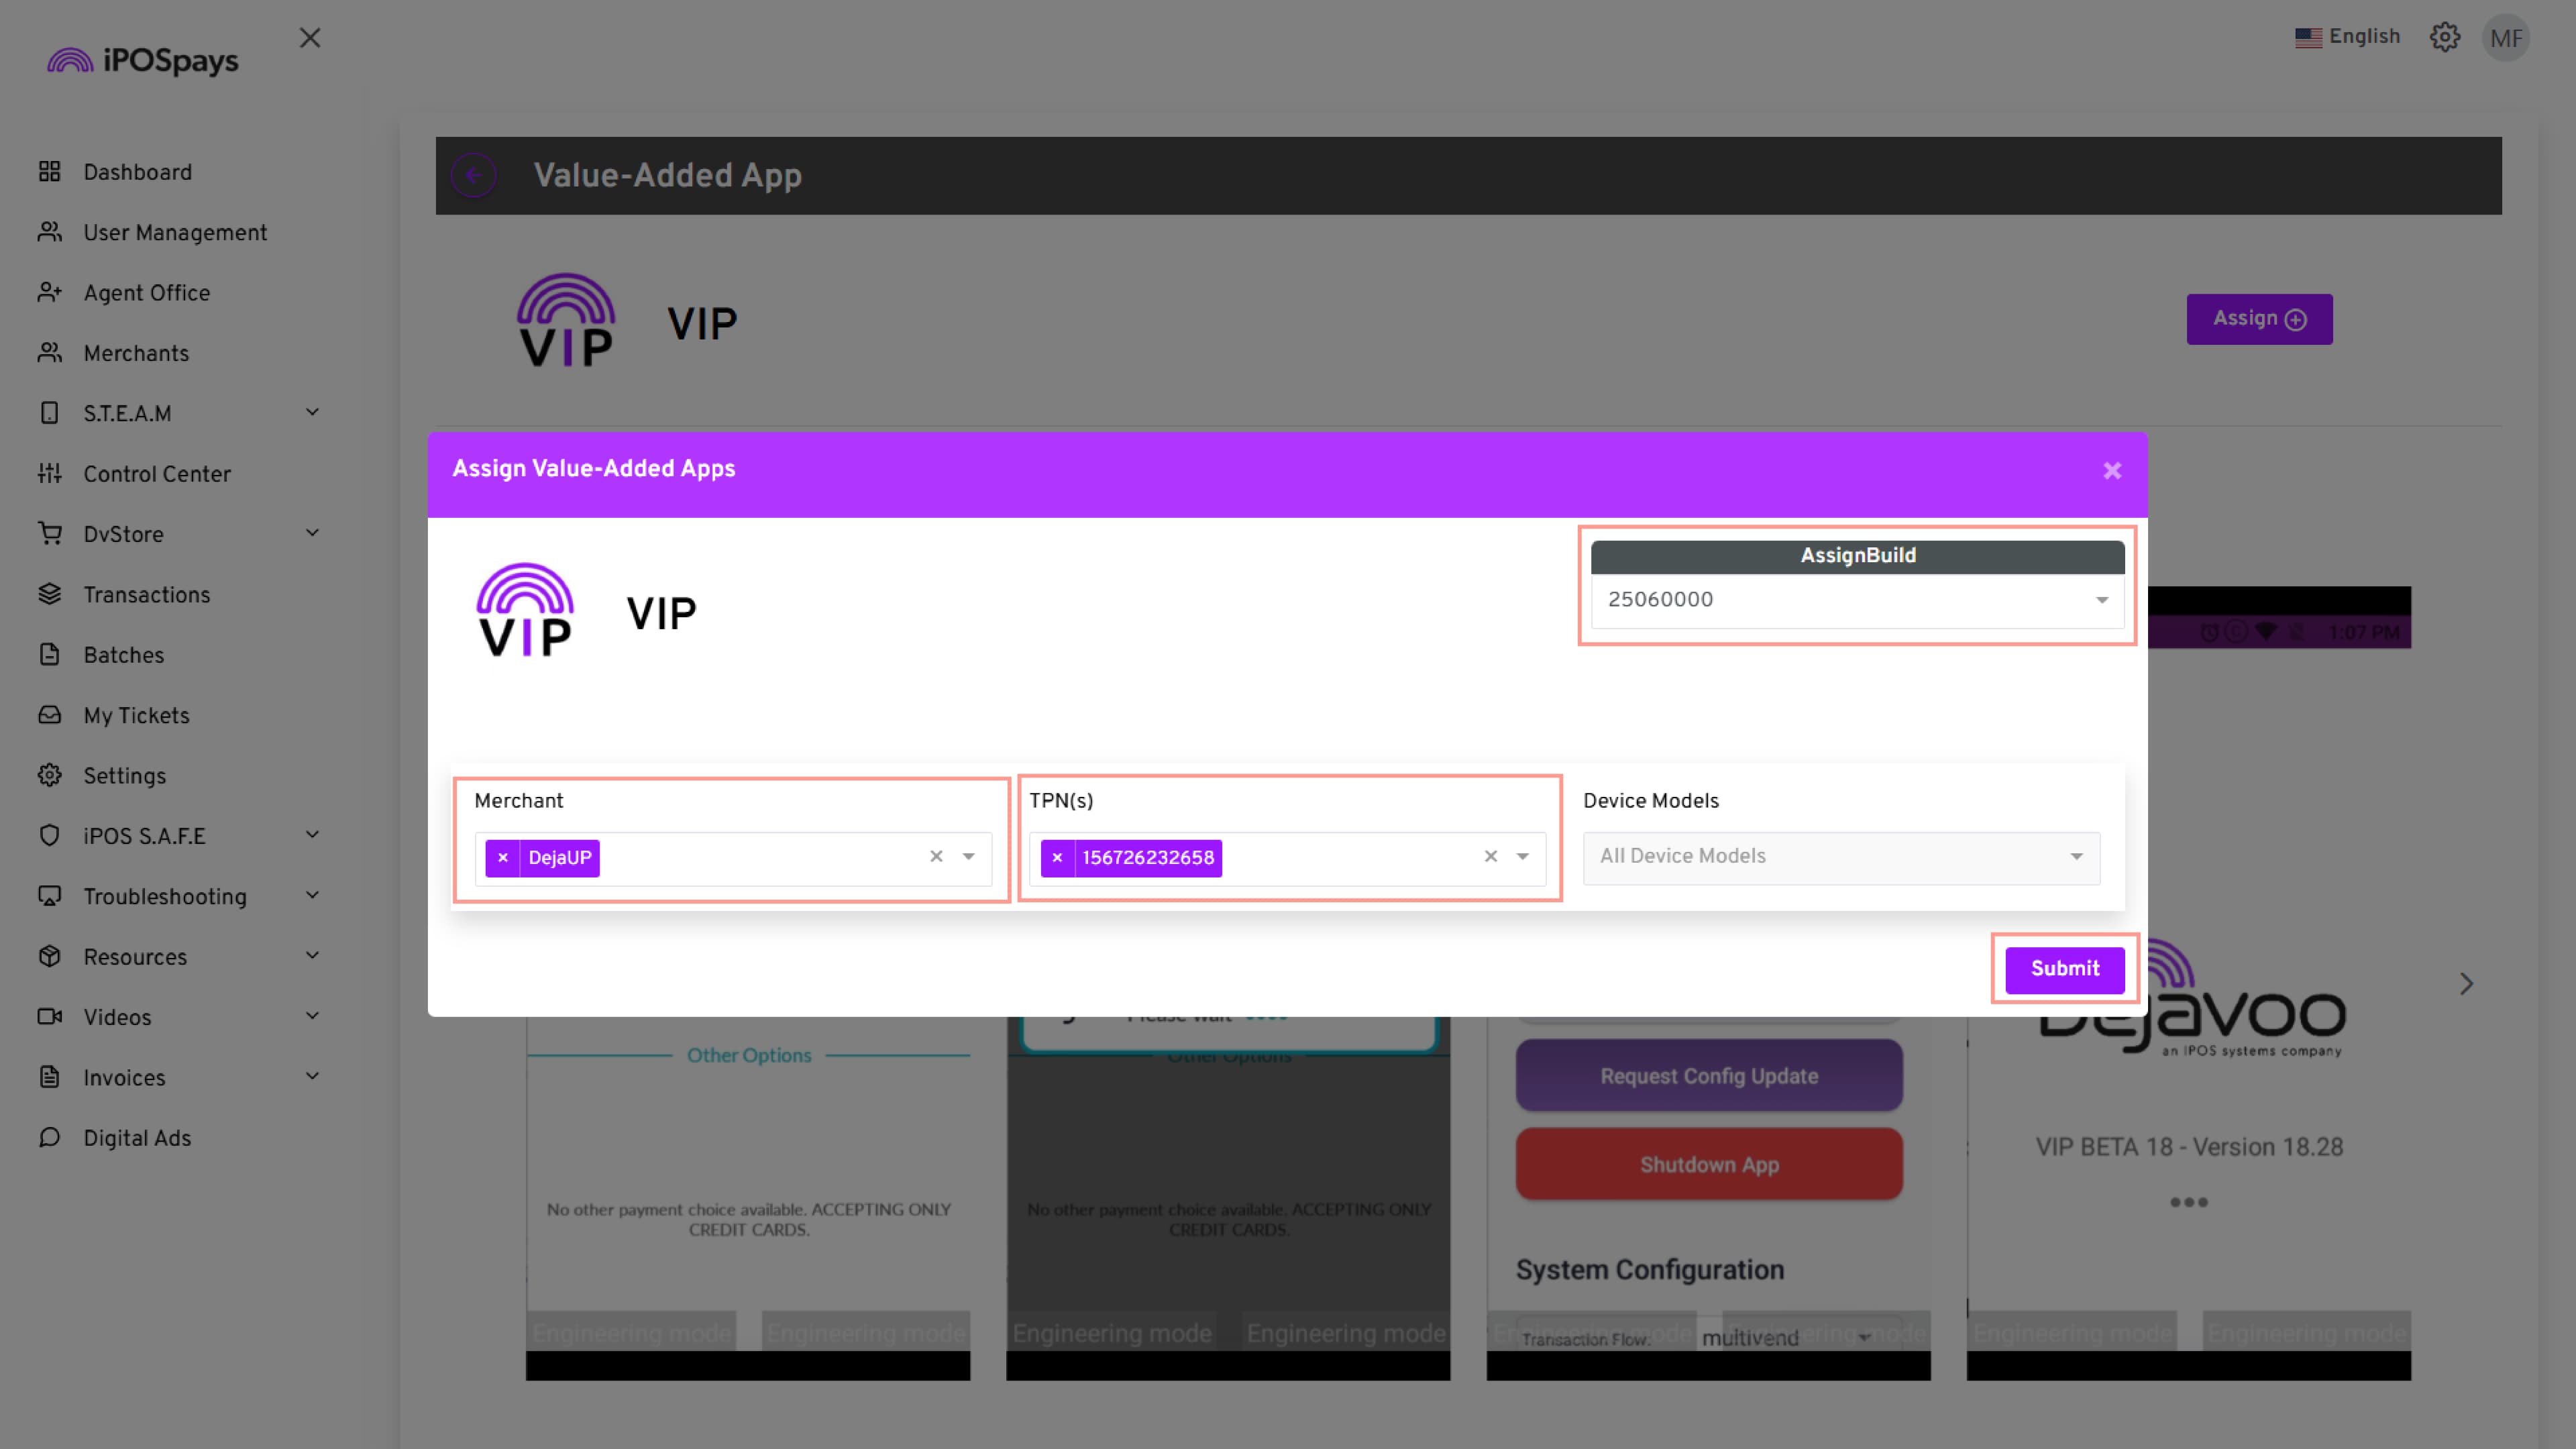
The application is assigned only to the selected TPN.
Step 3: Confirm the Assignment
- Review the confirmation message displaying the number of selected TPNs.
- Click Yes, Proceed to continue with the assignment.
- Click Back if you want to modify the selection.
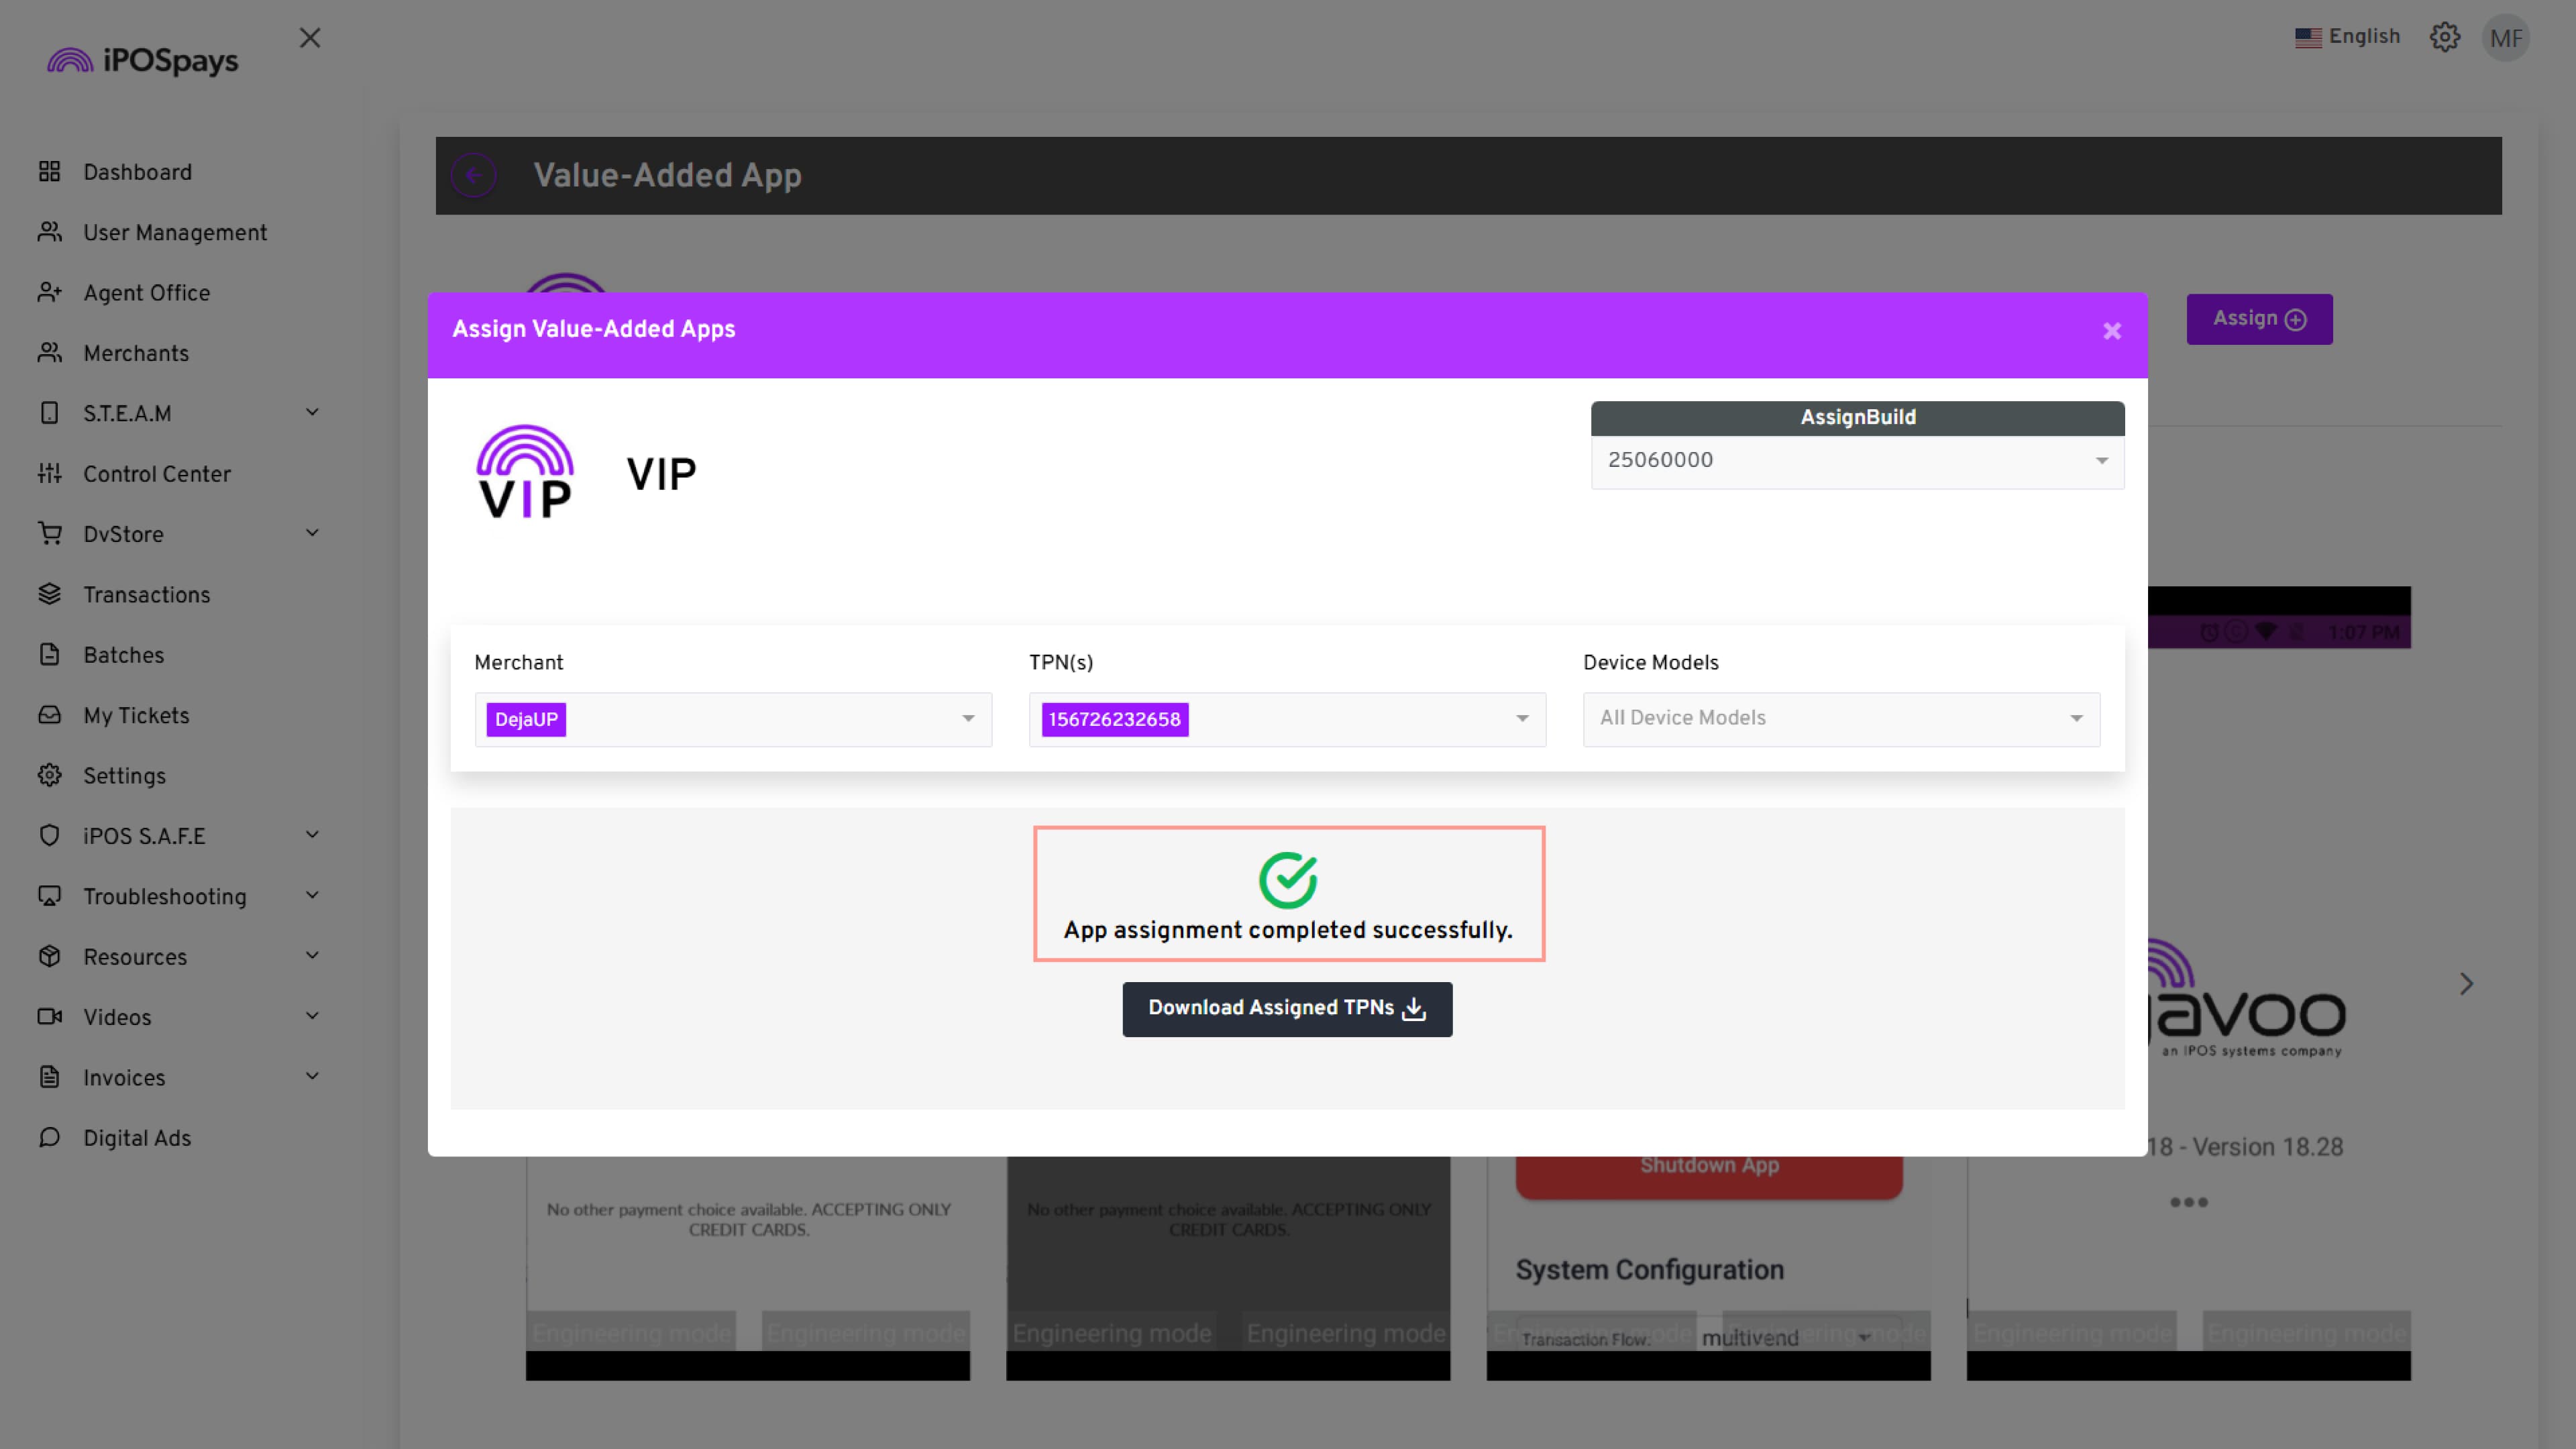
Step 4: Verify the Assignment
- Wait for the assignment process to complete.
- Verify that the message “App assignment completed successfully.” is displayed.
The DejaUP! application is now assigned to the selected TPN and is ready for deployment on the associated device.
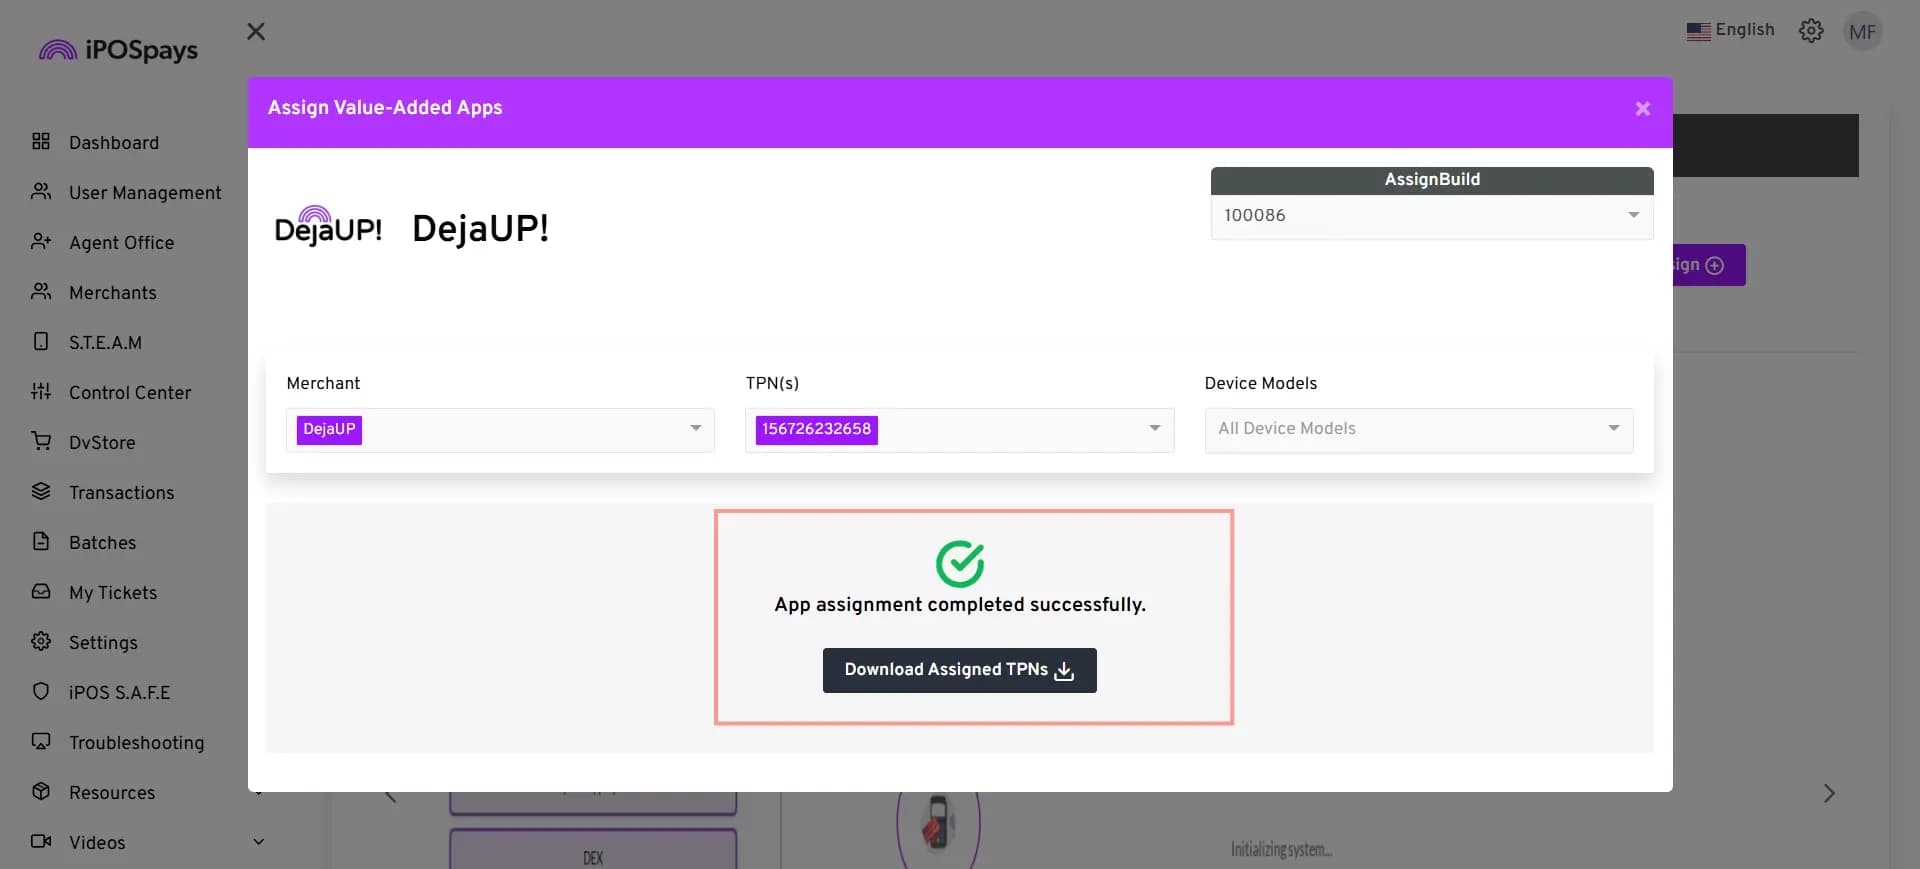
Optional: Click Download Assigned TPN IDs to download a list of the TPNs that were successfully assigned for future reference.
Assign DejaUP! to All Terminals of a Device Model
Step 1: Assign the Application to a Device Model
- Verify the AssignBuild version.
- Select the required Merchant.
- From the Device Models drop-down list, select the required device model (for example, Q3V or Q3mini).
- Leave the TPN(s) field unchanged.
- Click Submit.
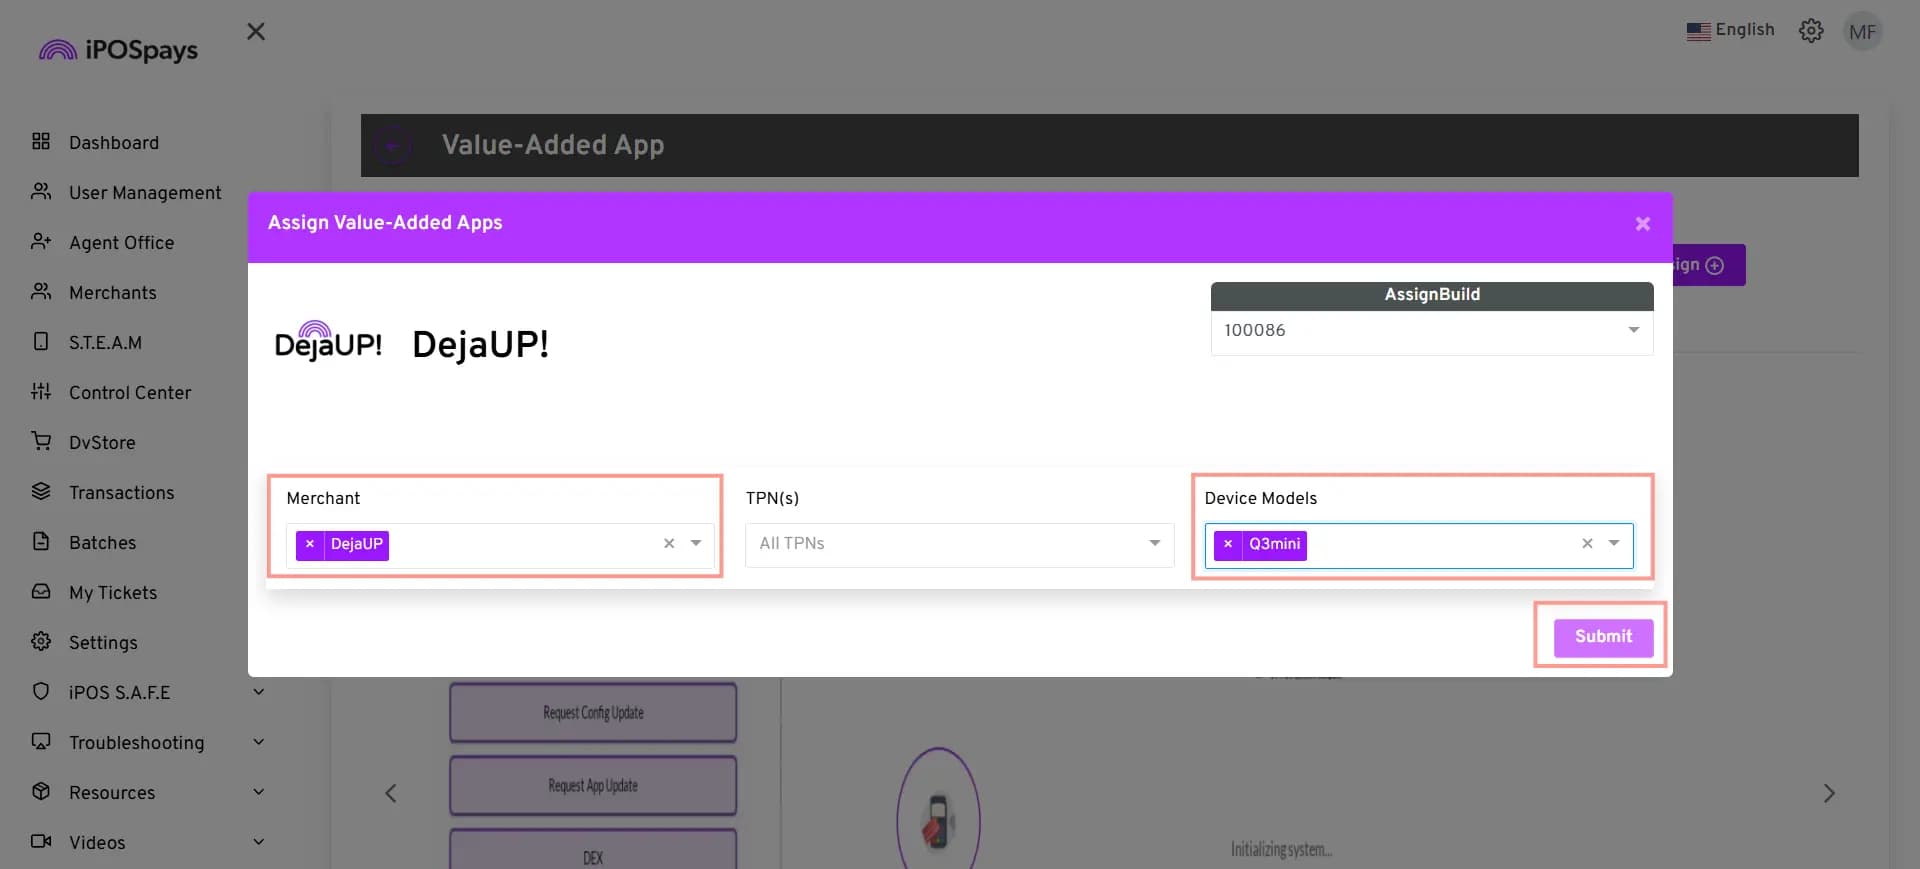
All TPNs associated with the selected device model will be assigned to the DejaUP! application.
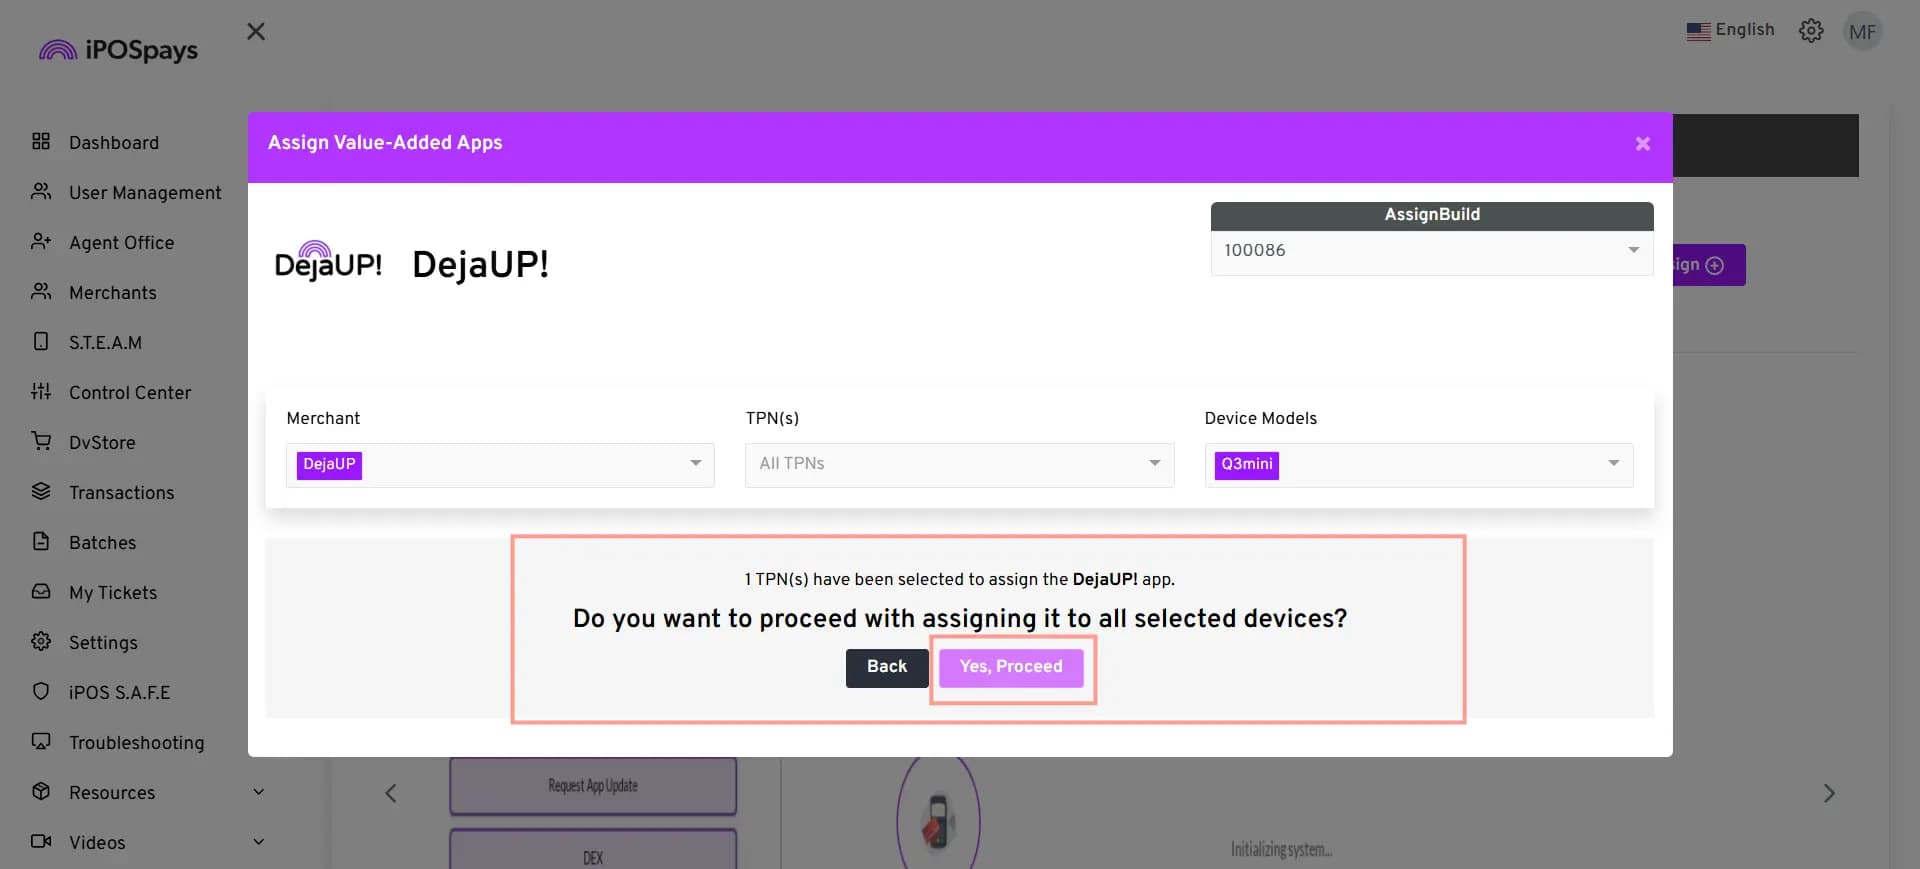
Step 2: Confirm the Assignment
- Review the confirmation message showing the number of TPNs that will receive the application.
- Click Yes, Proceed to continue.
- Click Back to return and change the selection.
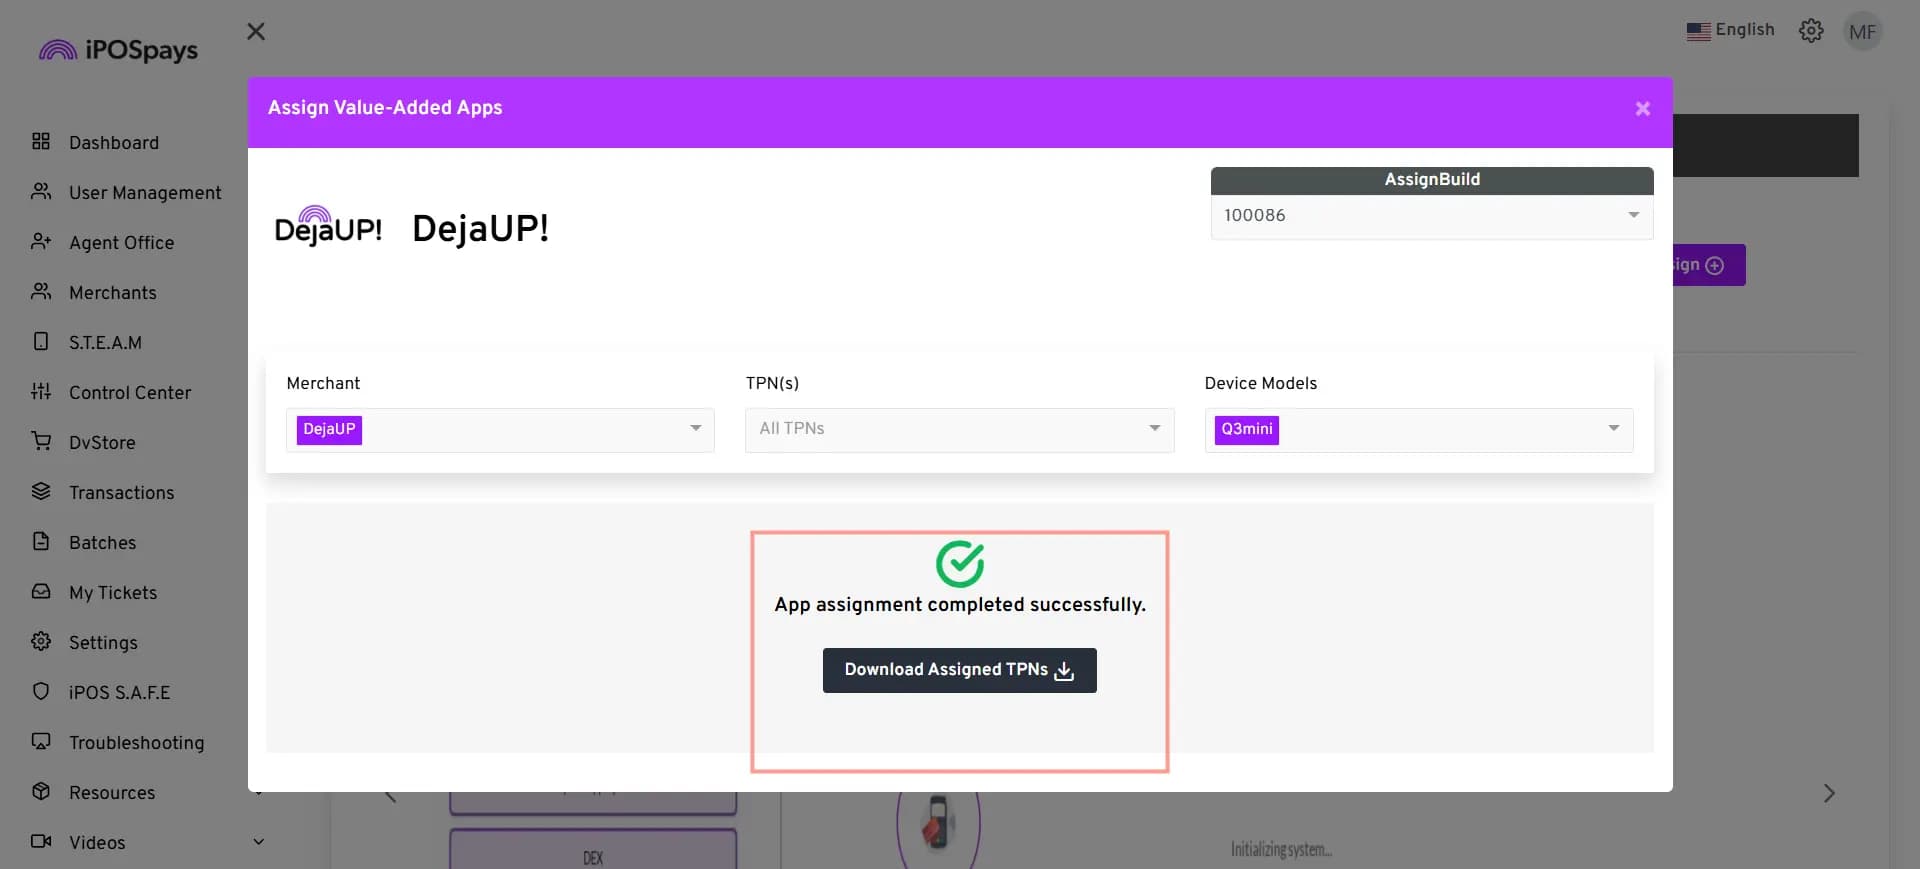
Step 3: Verify the Assignment
- Wait for the assignment to finish.
- Verify that the message “App assignment completed successfully.” is displayed.
The DejaUP! application is now assigned to all eligible terminals of the selected device model.
Optional: Click Download Assigned TPN IDs to download a list of all TPNs that were successfully assigned for future reference.
For more information about DVStore setup and application assignment, refer to: