Configure and Manage Dispensers in DejaUP!
The Dispensers module in DejaUP! allows merchants to manage vending machine dispensers associated with their payment terminals. Merchants can add new dispensers, update dispenser information, and view dispenser details (monitor inventory and manage product pricing and stock levels—soon to be implemented within our VMS).
This document explains how to access the Dispensers module and manage dispensers in the DejaUP! Portal.
Prerequisites
- Merchant account with access to the iPOSpays Portal.
- DejaUP! is enabled for the merchant.
- A supported vending payment terminal with the DejaUP! app installed and assigned to the merchant.
For instructions, refer to:
How to Access DejaUP!
- Log in to the iPOSpays Portal using your merchant credentials.
- From the navigation menu on the left, click DejaUP!.
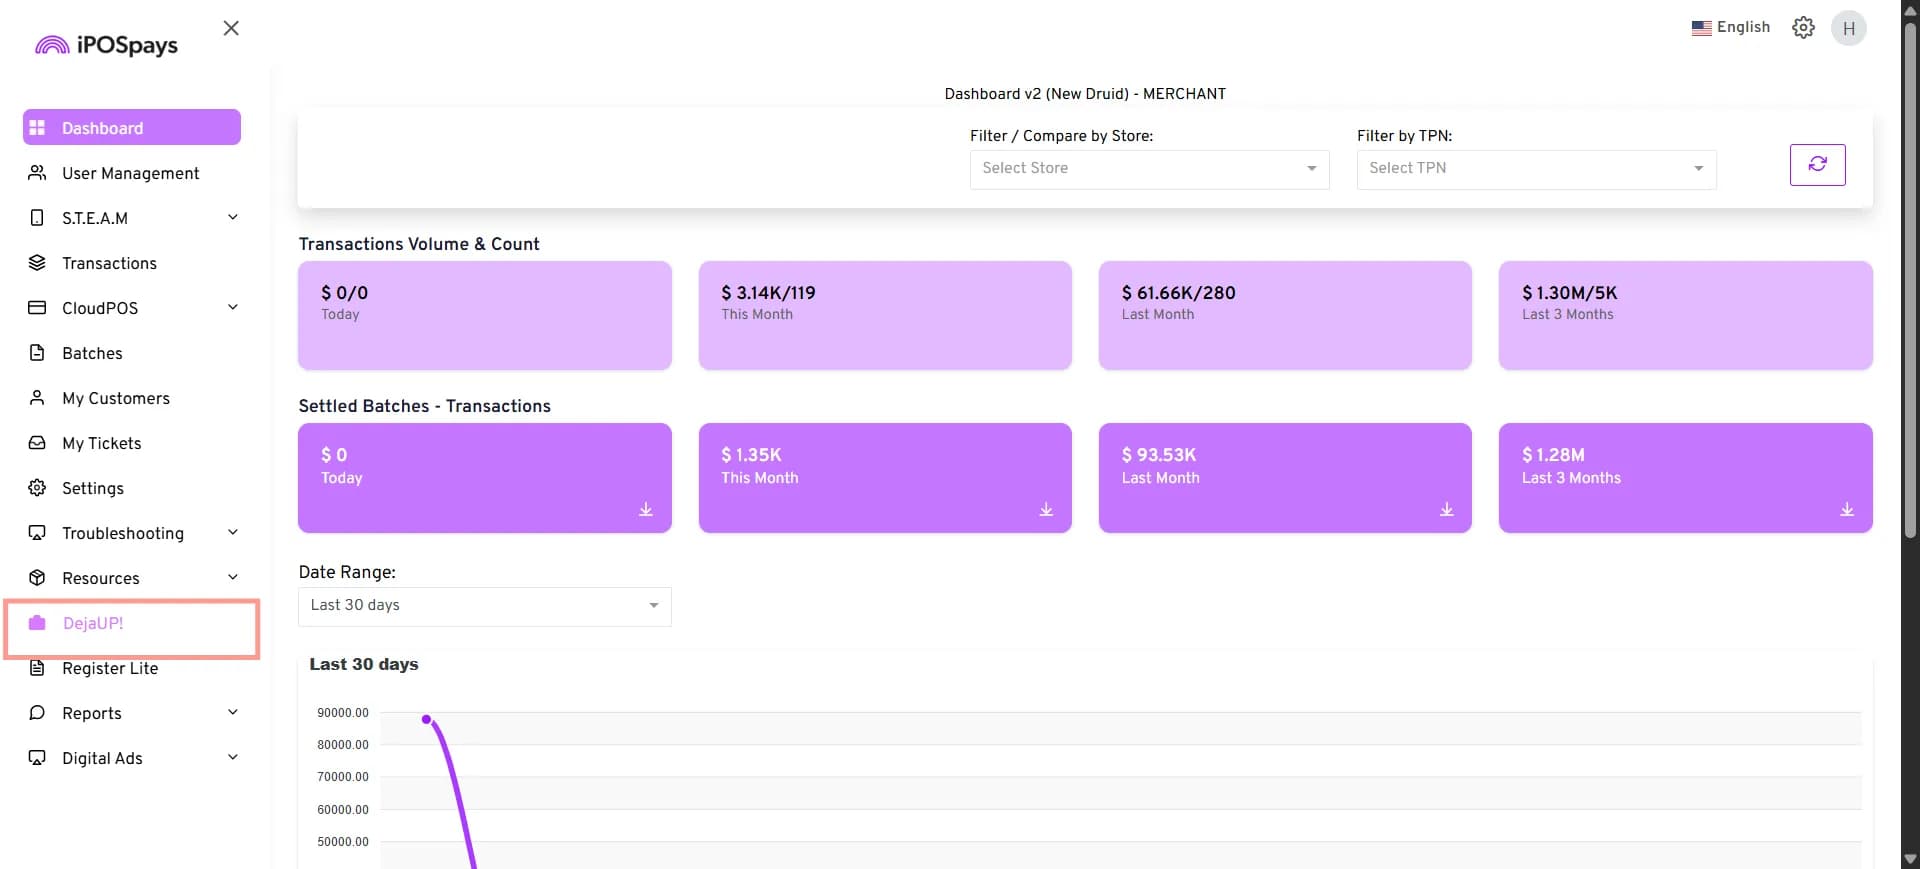
- The DejaUP! portal opens in a new browser tab.
Open the Dispensers Module
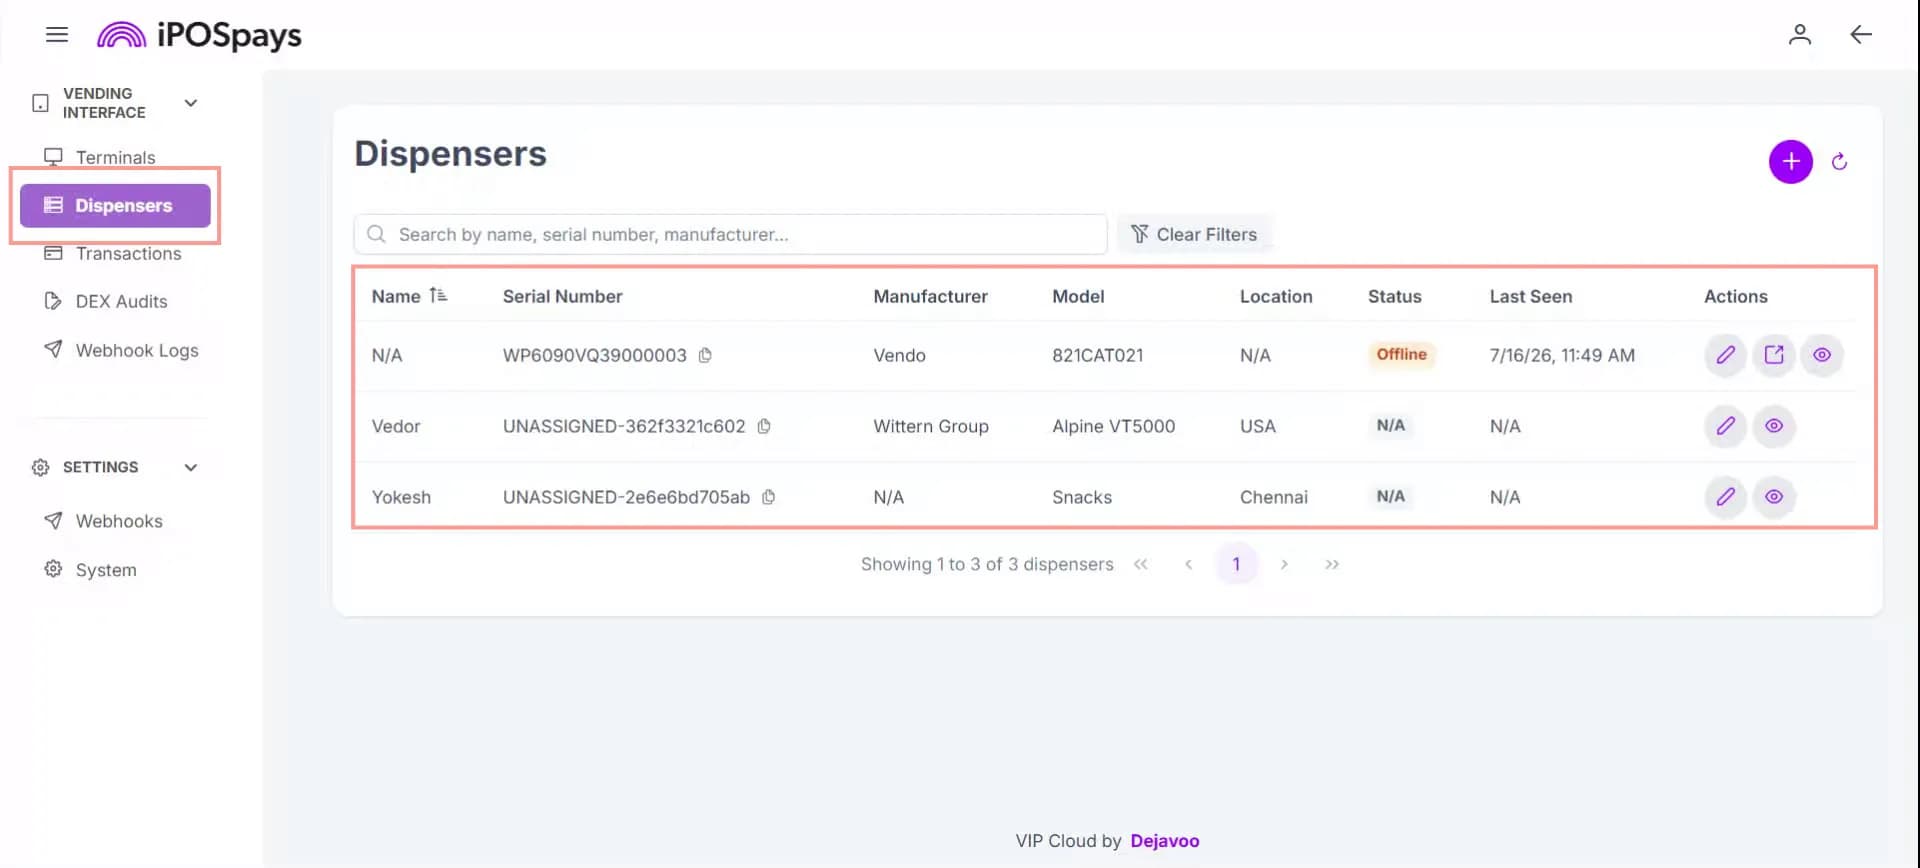
- From the navigation menu on the left, under Vending Interface, click Dispensers.
- The Dispensers page displays all dispensers associated with your merchant account.
- The following information is displayed for each dispenser:
- Name
- Serial Number
- Manufacturer
- Model
- Location
- Status
- Last Seen
- Actions
Search and Manage Dispensers
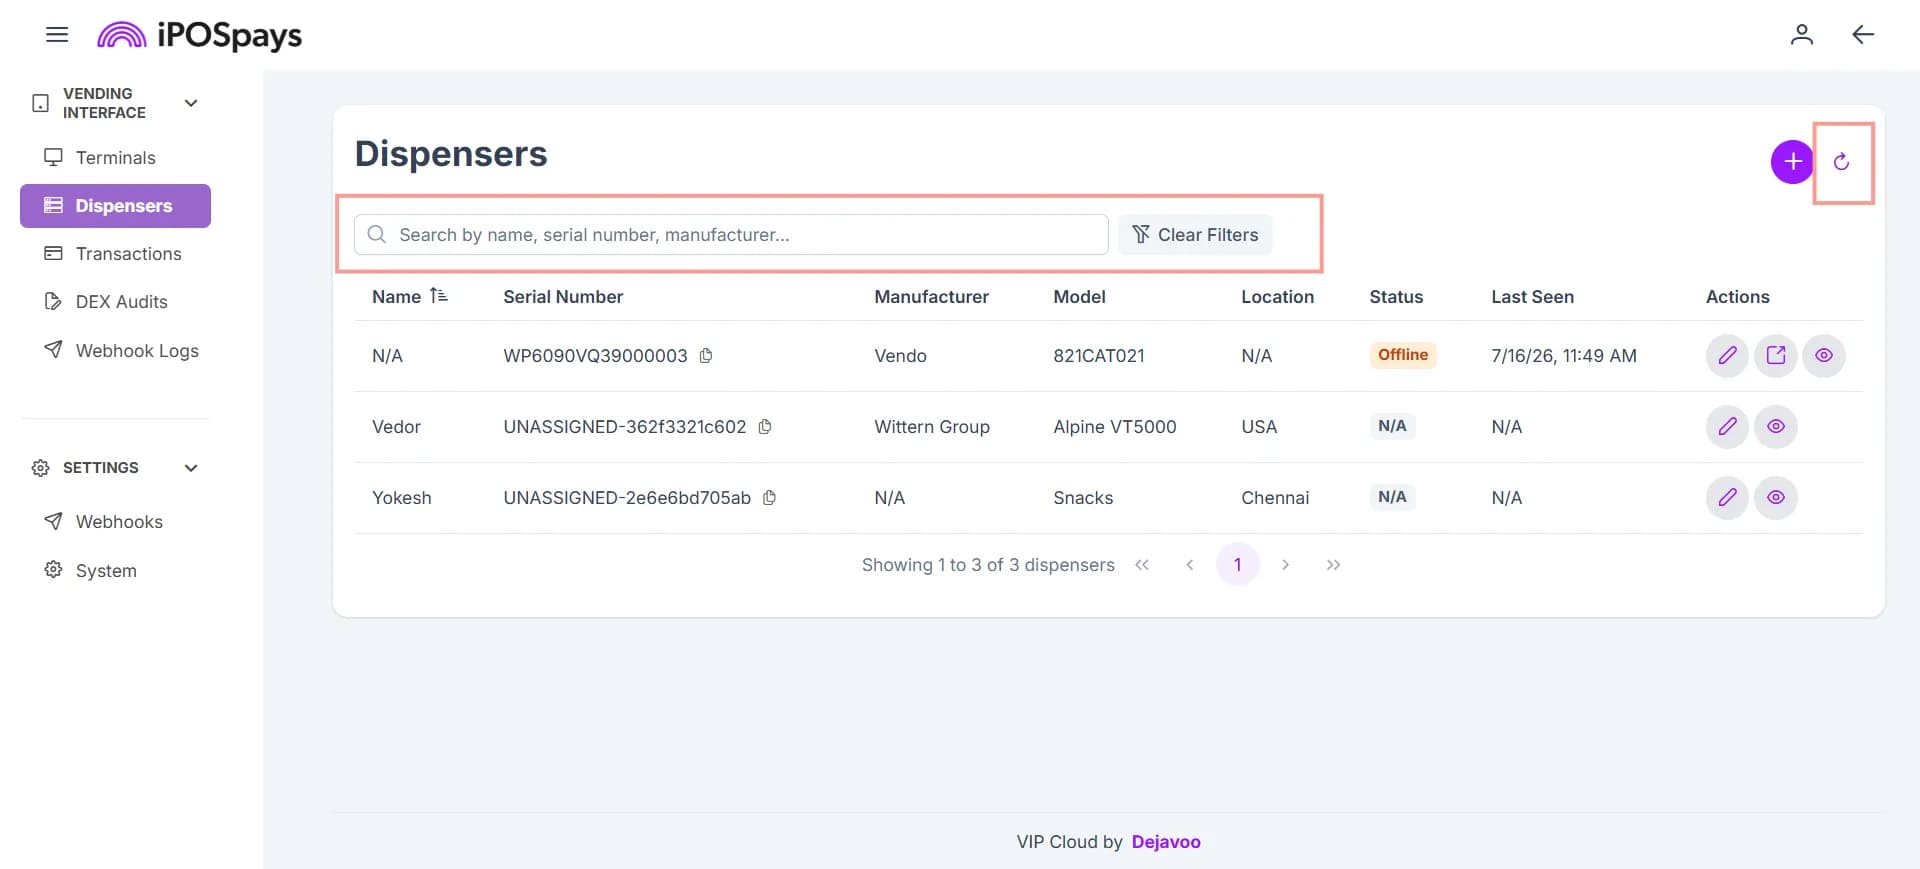
- Search for a Dispenser
Use the search box to find and select a dispenser by its:
- Name
- Serial Number
- Manufacturer
- Clear Filters
Click Clear Filters to remove all applied search filters.
- Refresh the Dispenser List
Click the Refresh icon to reload the latest dispenser information.
How to Add a Dispenser
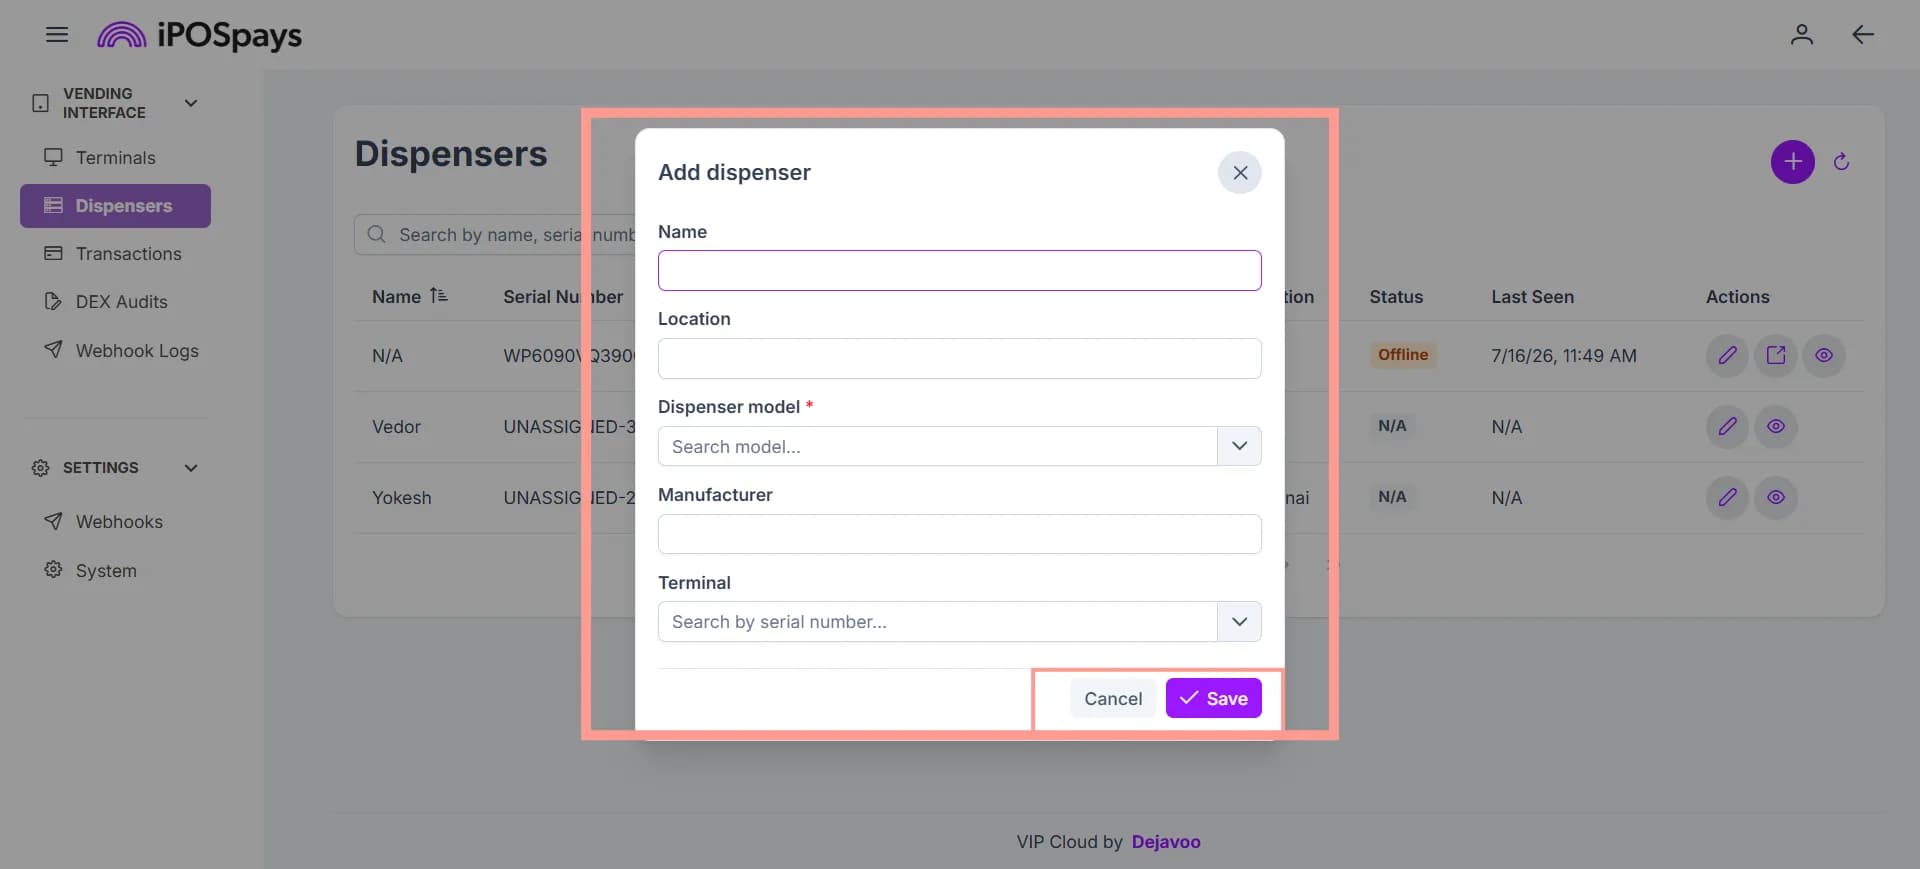
Use the Add Dispenser to link a terminal (vending machine with a payment terminal in DejaUP!). Once added, the dispenser can be managed and monitored through the DejaUP! Portal.
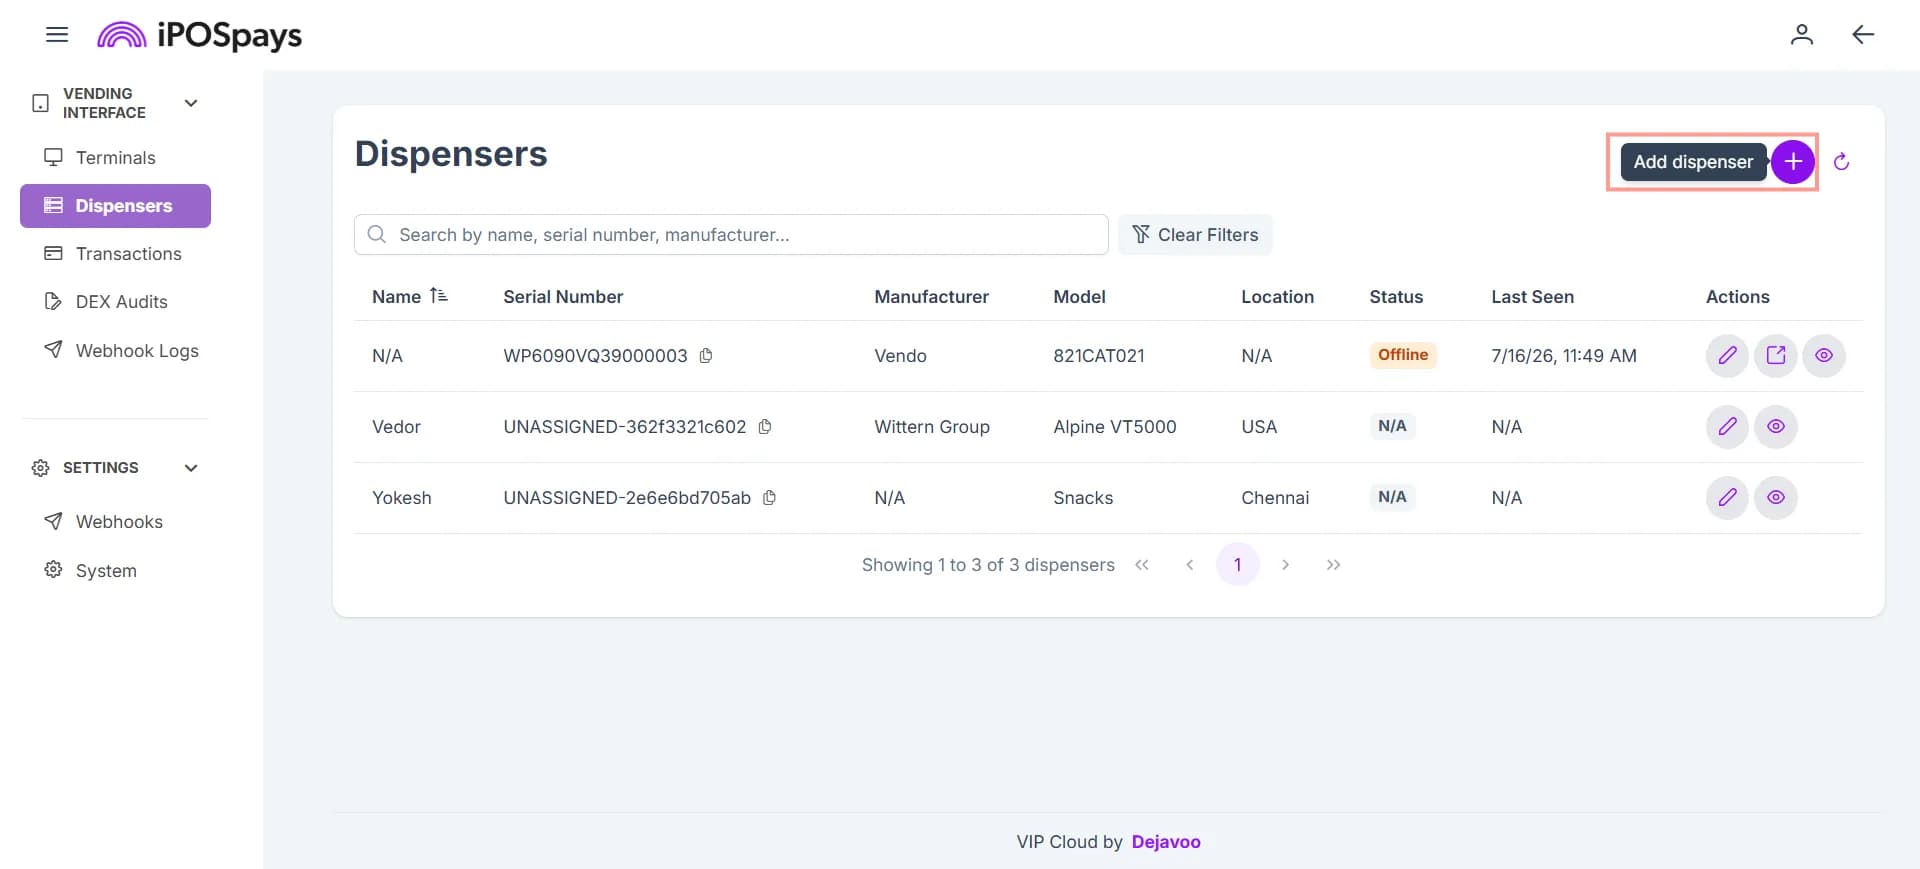
Step 1: Open the Add Dispenser Window
Click the + (Add Dispenser) icon.
Step 2: Enter Dispenser Information
Provide the following information:
- Name
- Location
- Dispenser Model
- Terminal
- Select a terminal to link to the dispenser you are creating from the drop-down.
The Manufacturer field is automatically populated based on the selected dispenser model.
Step 3: Save the Dispenser
- Click Save.
- The new dispenser is added and appears in the Dispensers list.
- Click Cancel to discard any unsaved changes.
How to Edit a Dispenser
Update the dispenser details to reflect changes such as its name, location, model, or assigned payment terminal. This helps keep the dispenser configuration accurate and up to date.
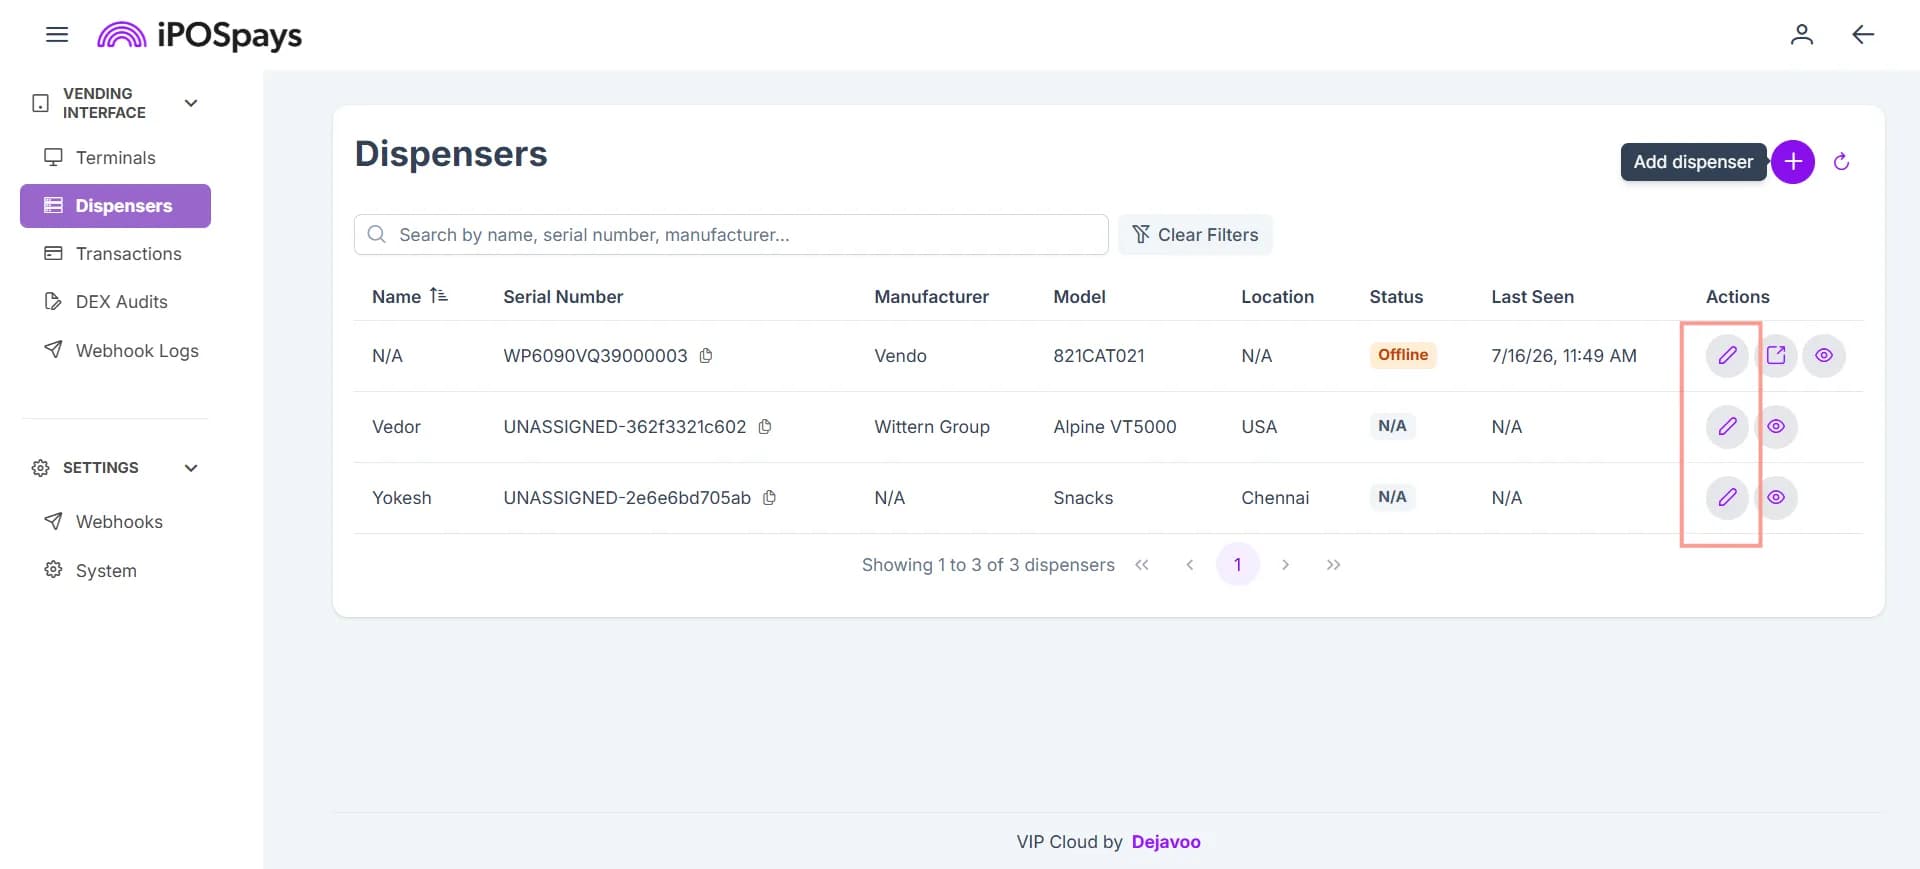
Step 1: Open the Edit Window
- Locate the required dispenser.
- Click the Edit icon under Actions.
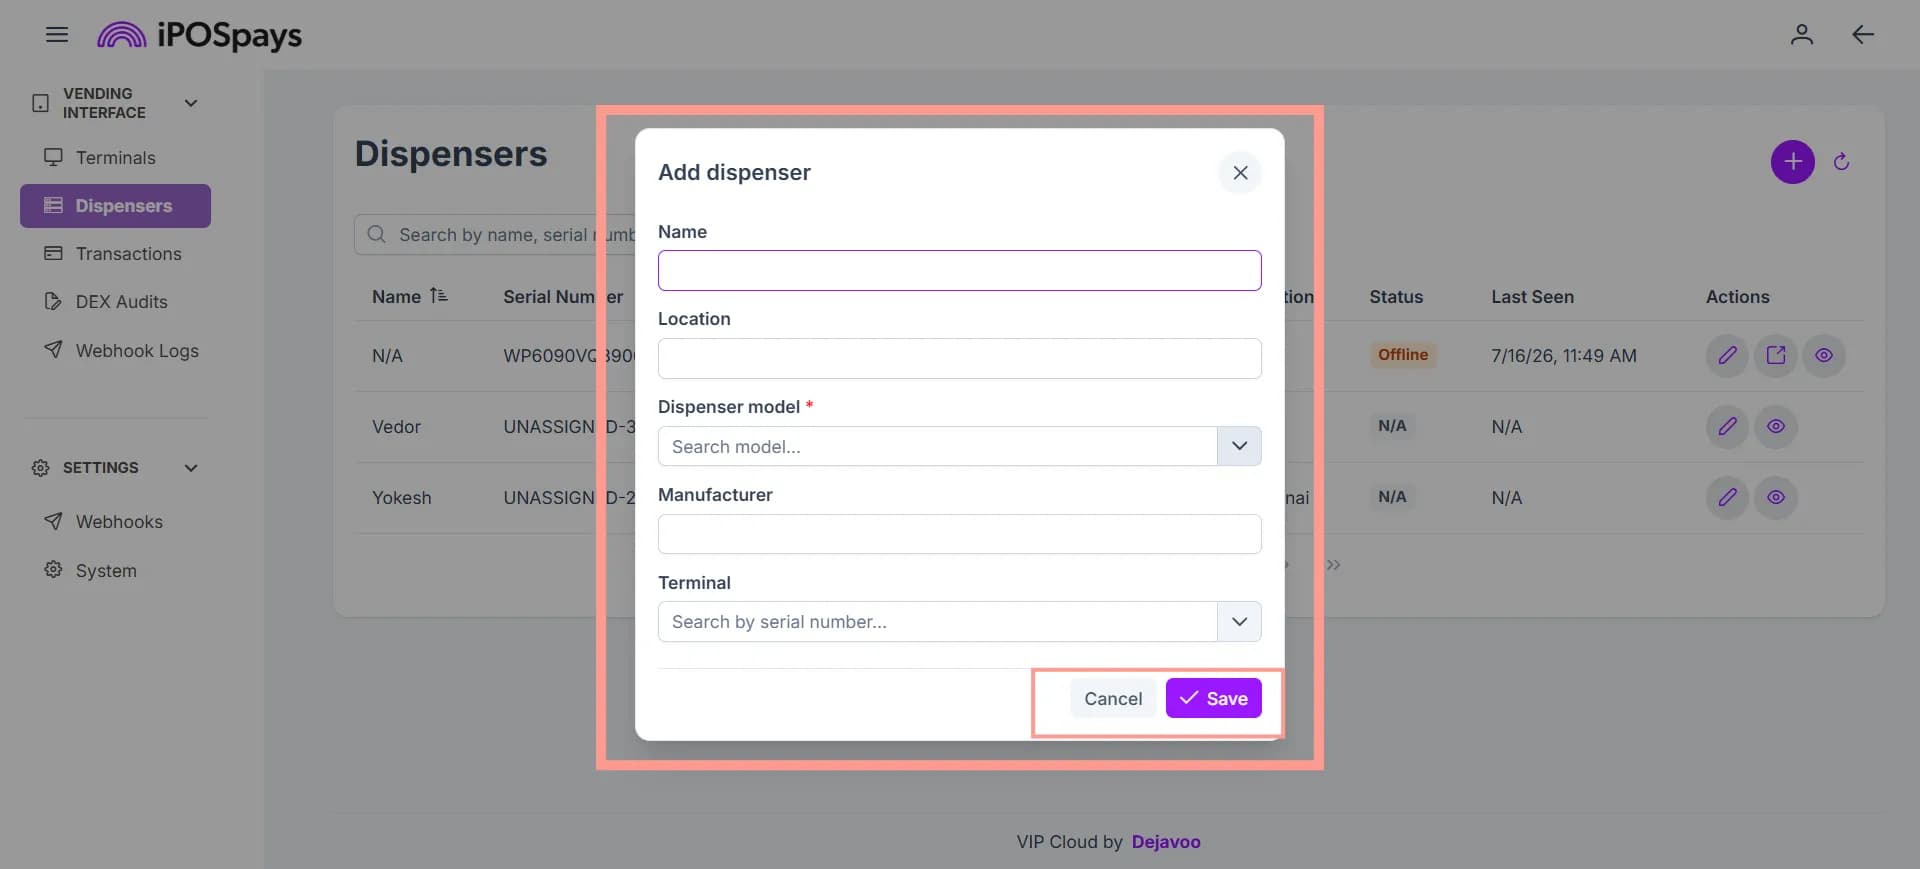
Step 2: Update the Dispenser Information
Update any required information:
- Name
- Location
- Dispenser Model
- Manufacturer
- Terminal
Step 3: Save the Changes
- Click Save.
- The updated dispenser information is saved successfully.
- Click Cancel to discard any unsaved changes.
How to Access the Payment Terminal Associated with a Dispenser
Each dispenser is linked to a payment terminal. You can open the associated payment terminal directly from the dispenser to view or update its configuration.
- Locate the required dispenser.
- Under Actions, click the Open Terminal (↗) icon.
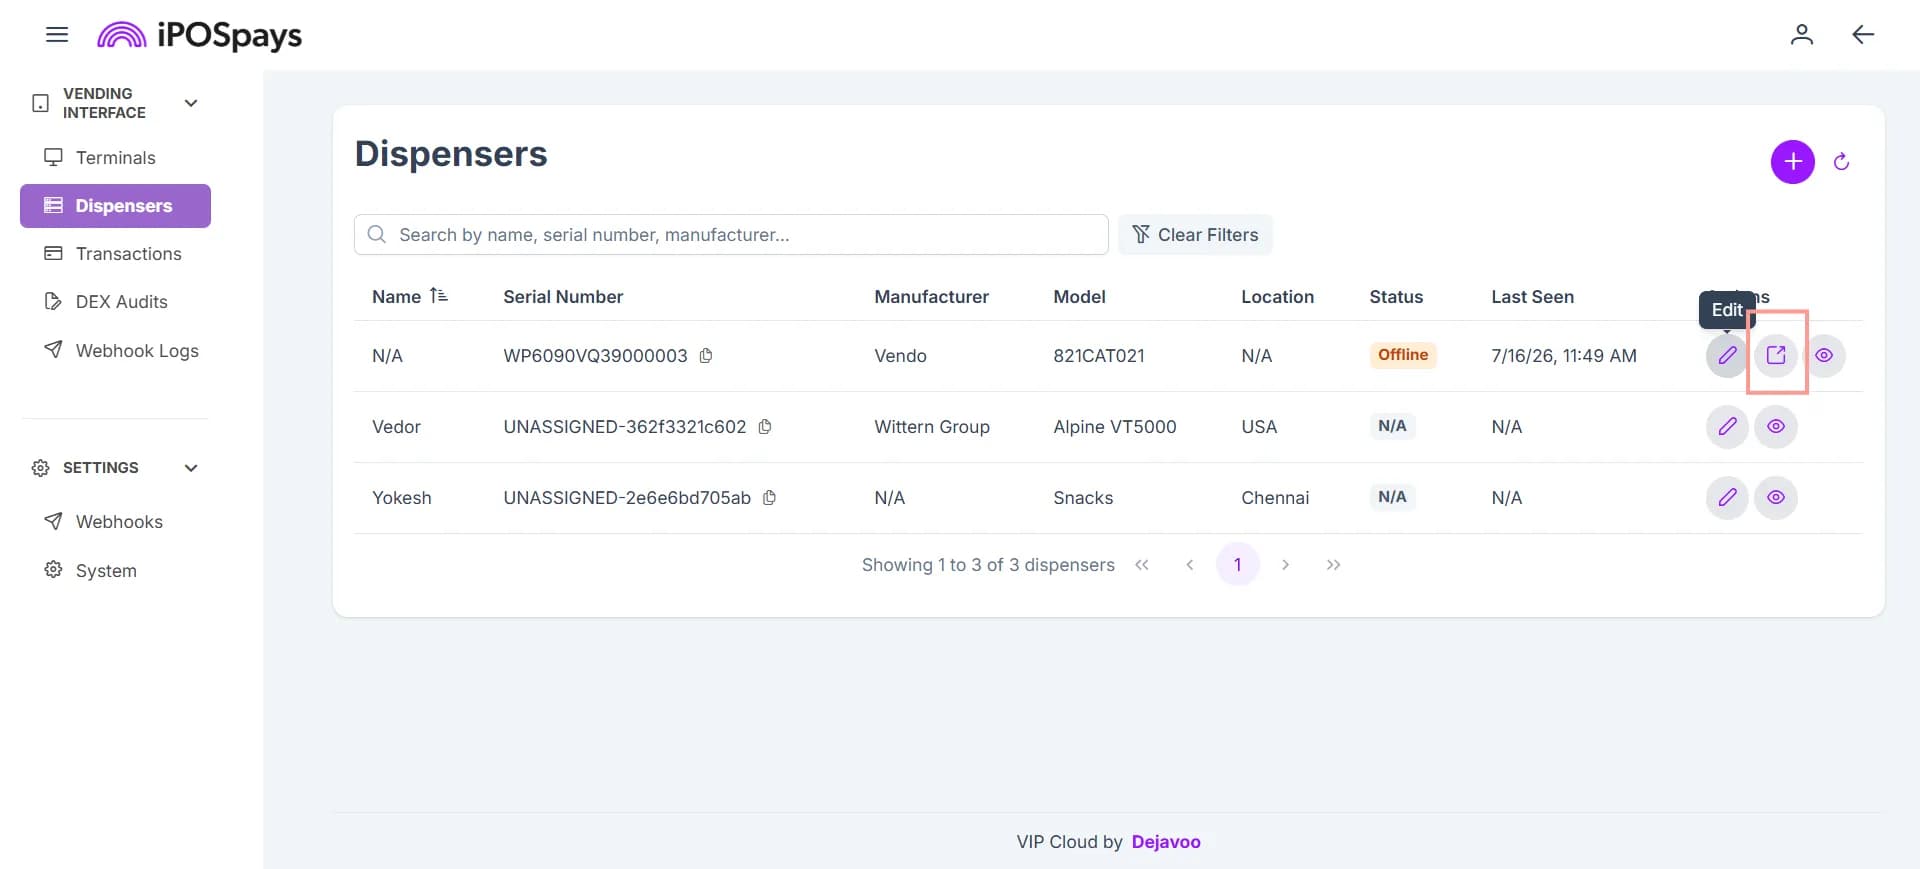
The system opens the associated payment terminal in the Terminals module, where you can view and manage its settings.
View Dispenser Details
View detailed information about the selected dispenser, including its configuration, status, and associated payment terminal details.
Open the Details Window
- Locate the required dispenser.
- Click the View Details (Eye) icon under Actions.
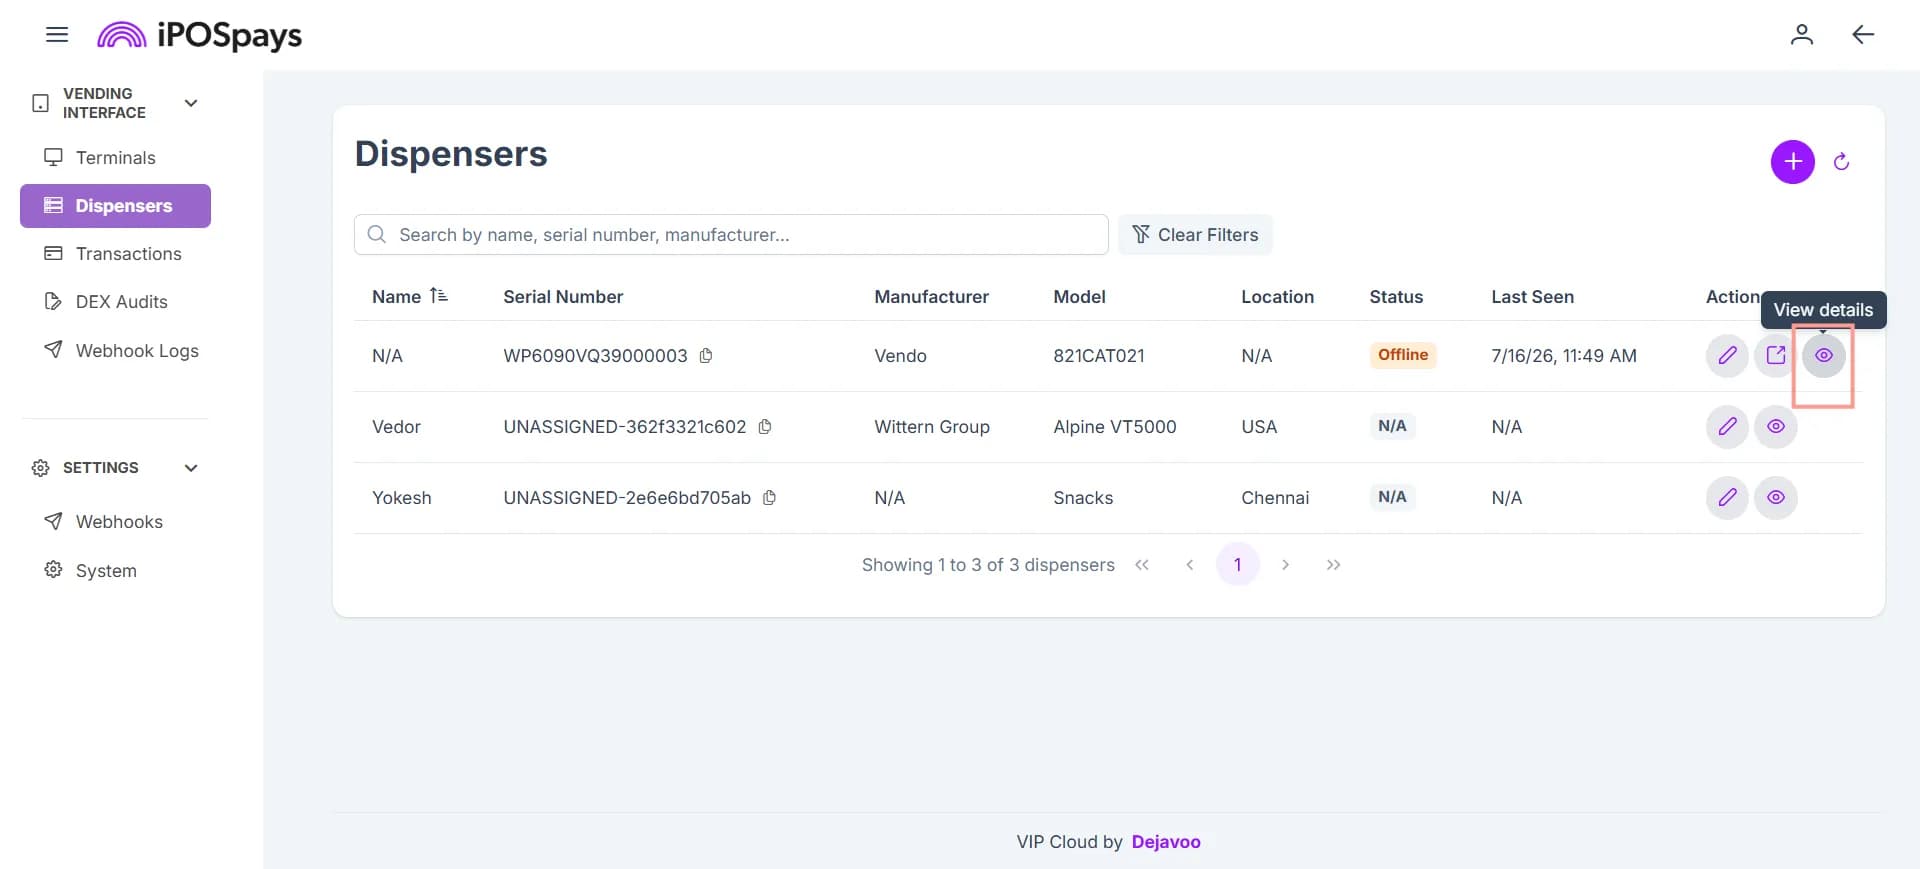
The Dispenser Details window opens.
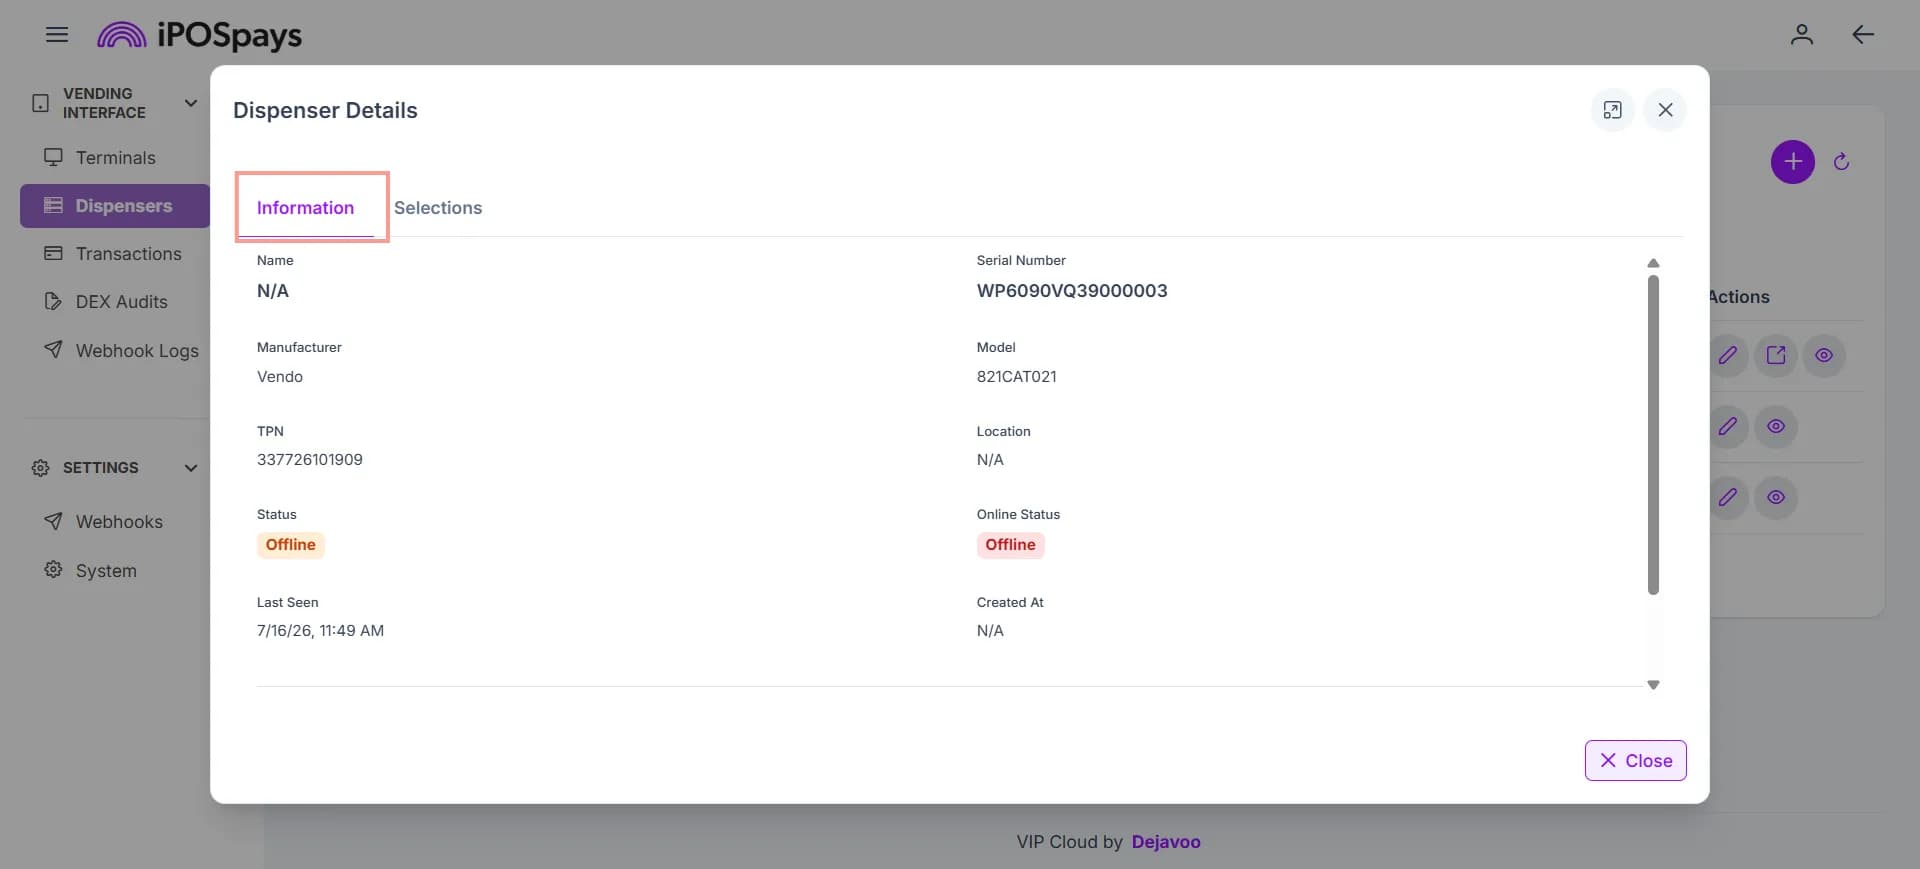
Information Tab
The Information tab displays the following details:
- Name
- Serial Number
- Manufacturer
- Model
- TPN
- Location
- Status
- Online Status
- Last Seen
- Created At
How to Update Dispenser Stock and Prices
This feature is available on compatible VMC boards and supports price updates through the DEX write protocol. The feature is displayed and available only for supported and compatible VMCs.
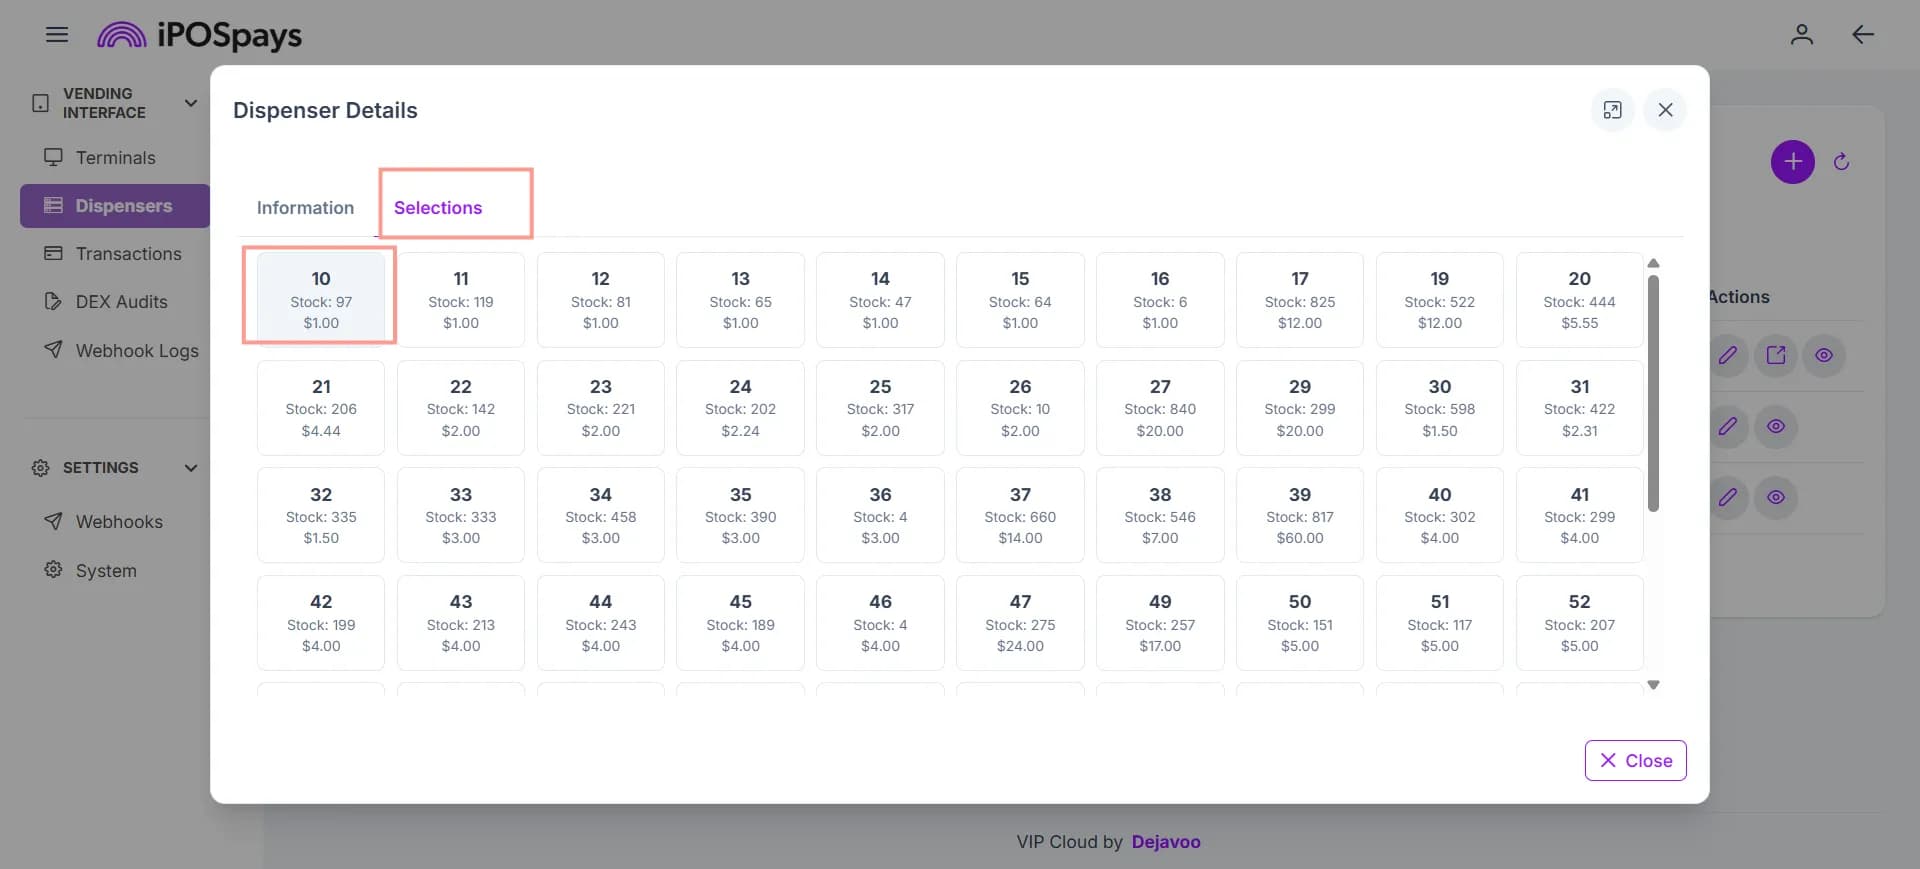
The Selections tab displays the products configured for the selected dispenser. From this tab, you can update the stock quantity and price for each product.
Step 1: Open the Selections Tab
From the Dispenser Details window, click Selections.
The following information is displayed:
- Selection Number
- Current Stock
- Price
Step 2: Update Stock and Price
This feature is available on compatible VMC boards and supports price updates through the DEX write protocol. The feature is displayed and available only for supported and compatible VMCs.
Click the required Selection Number.
Update the following information:
- Stock
- Price (USD)
Click Save.
Click Cancel to discard any unsaved changes.
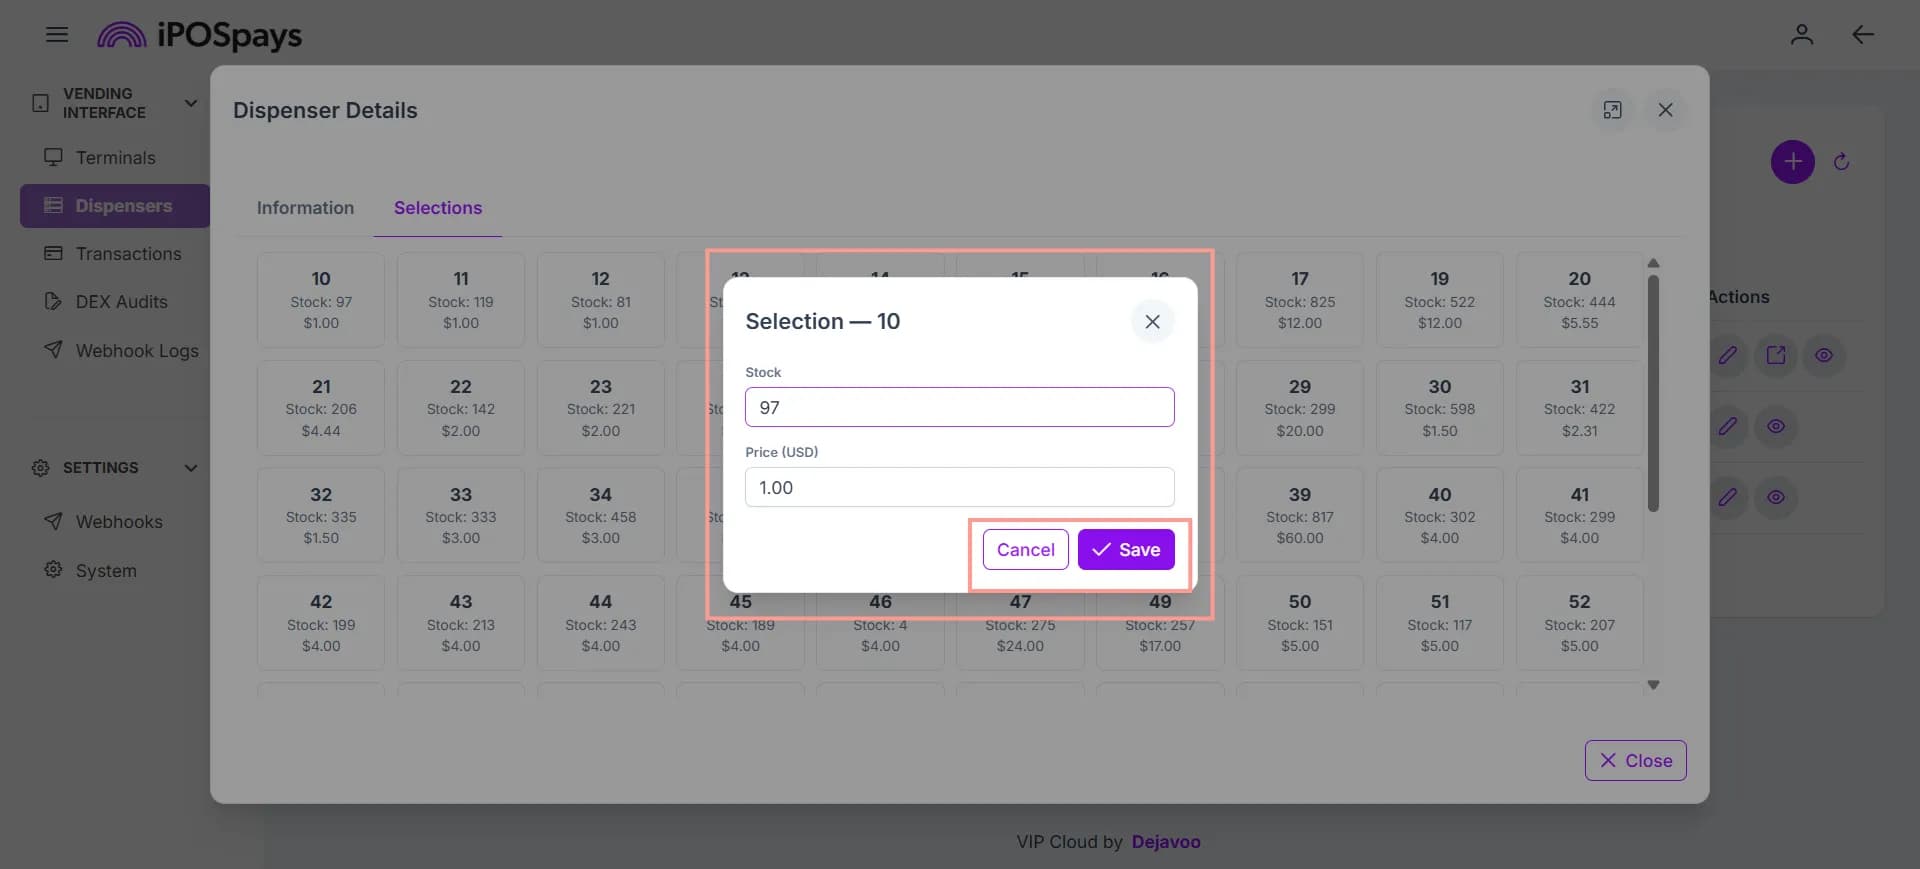
The updated stock quantity and price are applied to the selected dispenser item.