Configure and Manage Transactions in DejaUP!
The Transactions module in DejaUP! allows merchants to view and manage vending transactions processed through connected payment terminals. Merchants can search and filter transactions, view transaction details, and process voids or refunds based on the batch settlement status. This document explains how to access and manage transactions in the DejaUP! portal.
Prerequisites
- Merchant account with access to the iPOSpays Portal.
- DejaUP! is enabled for the merchant.
- A supported vending payment terminal with the DejaUP! app installed and assigned to the merchant.
For instructions, refer to:
How to Access DejaUP!
- Log in to the iPOSpays Portal using your merchant credentials.
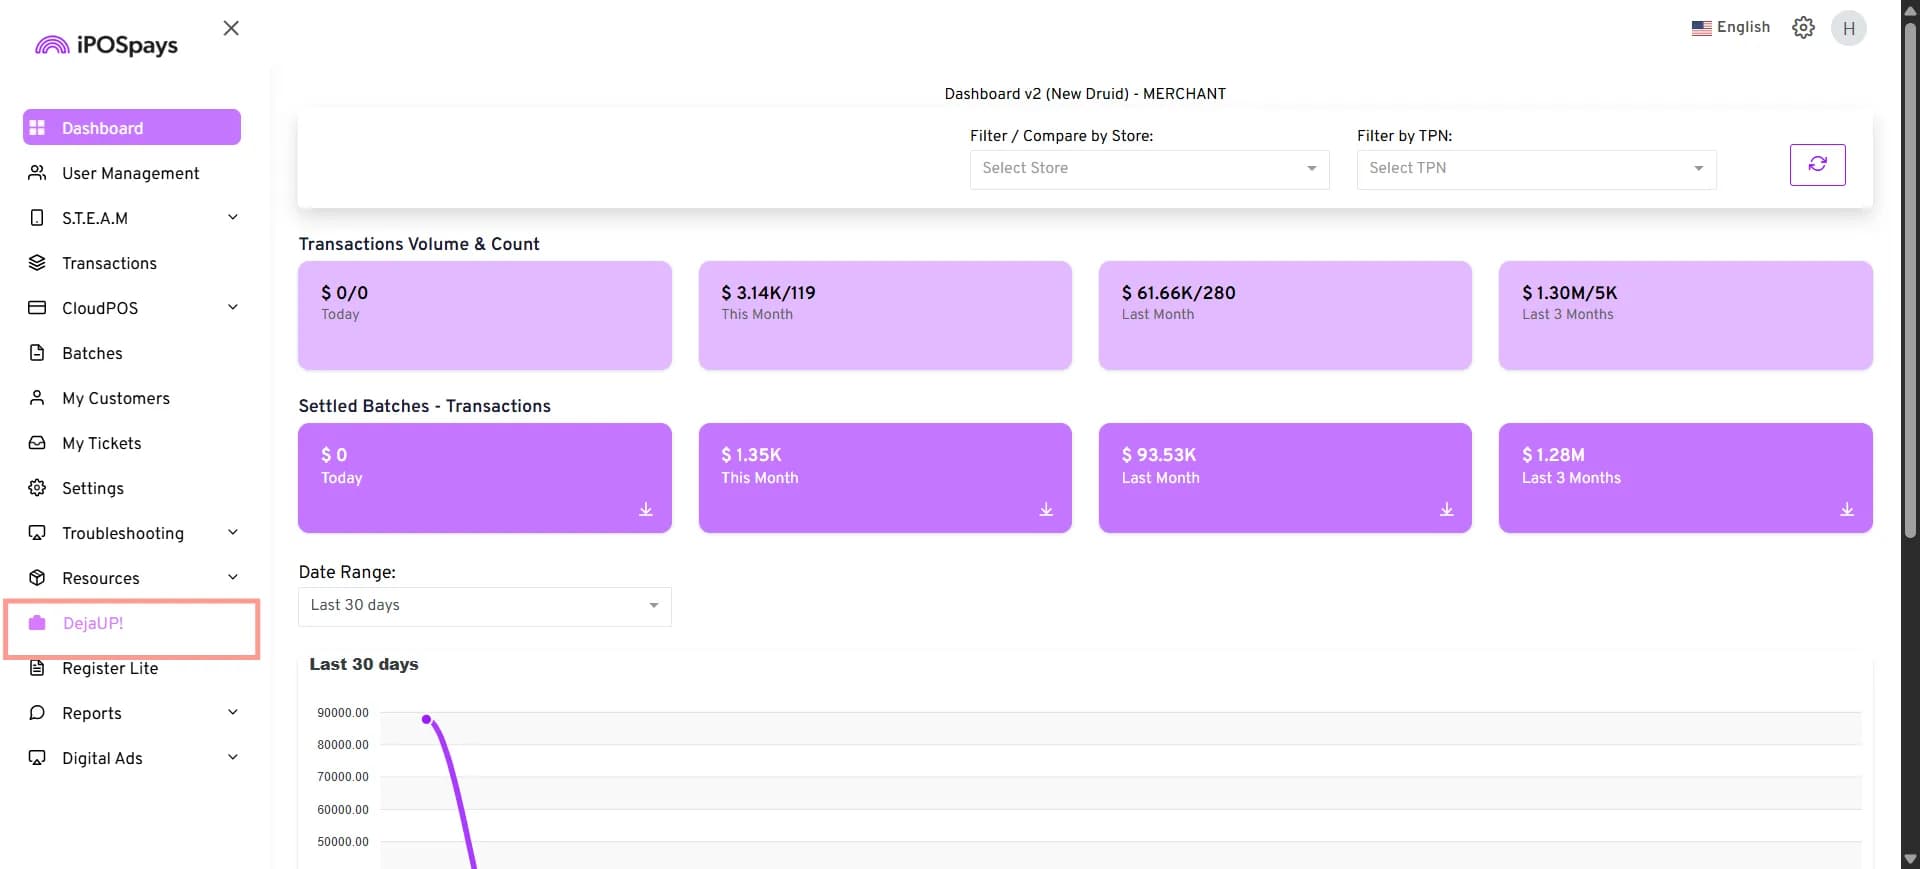
- From the navigation menu on the left, click DejaUP!.
Open the Transactions Module
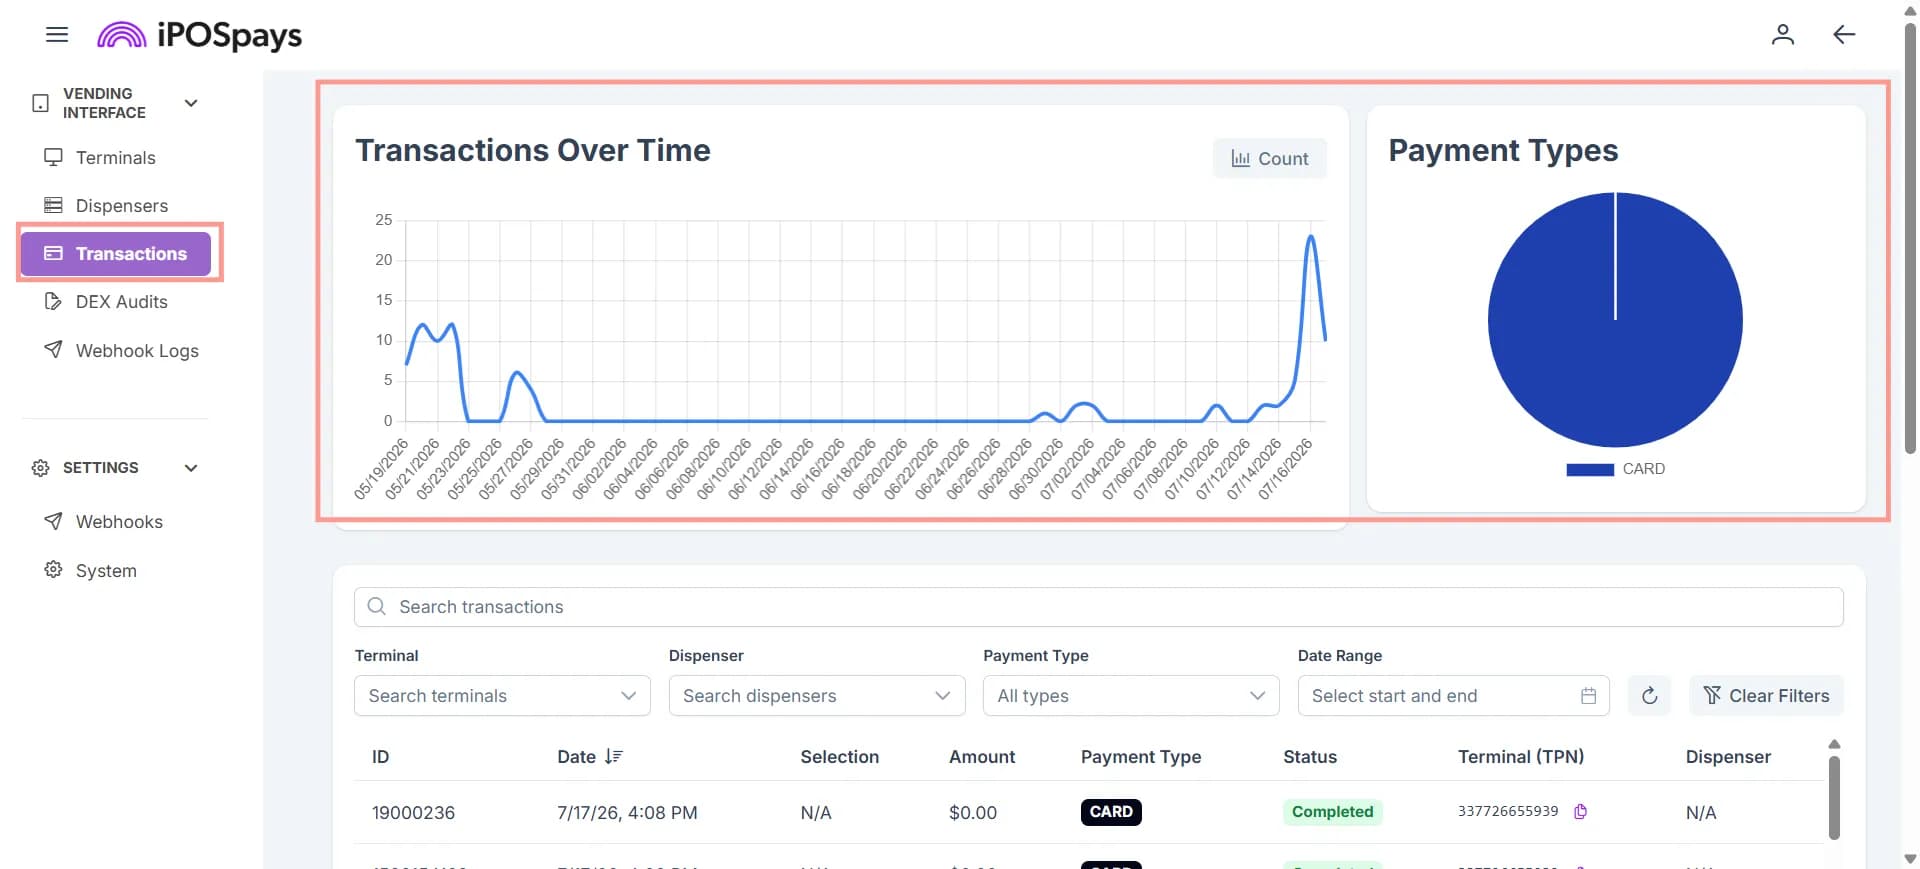
- From the navigation menu on the left, under Vending Interface, click Transactions.
- The Transactions page displays transaction activity associated with your merchant account, along with transaction summary and filtering options.
View Payment Types
Displays a pie chart showing the distribution of transactions by payment method.
View the Transactions List
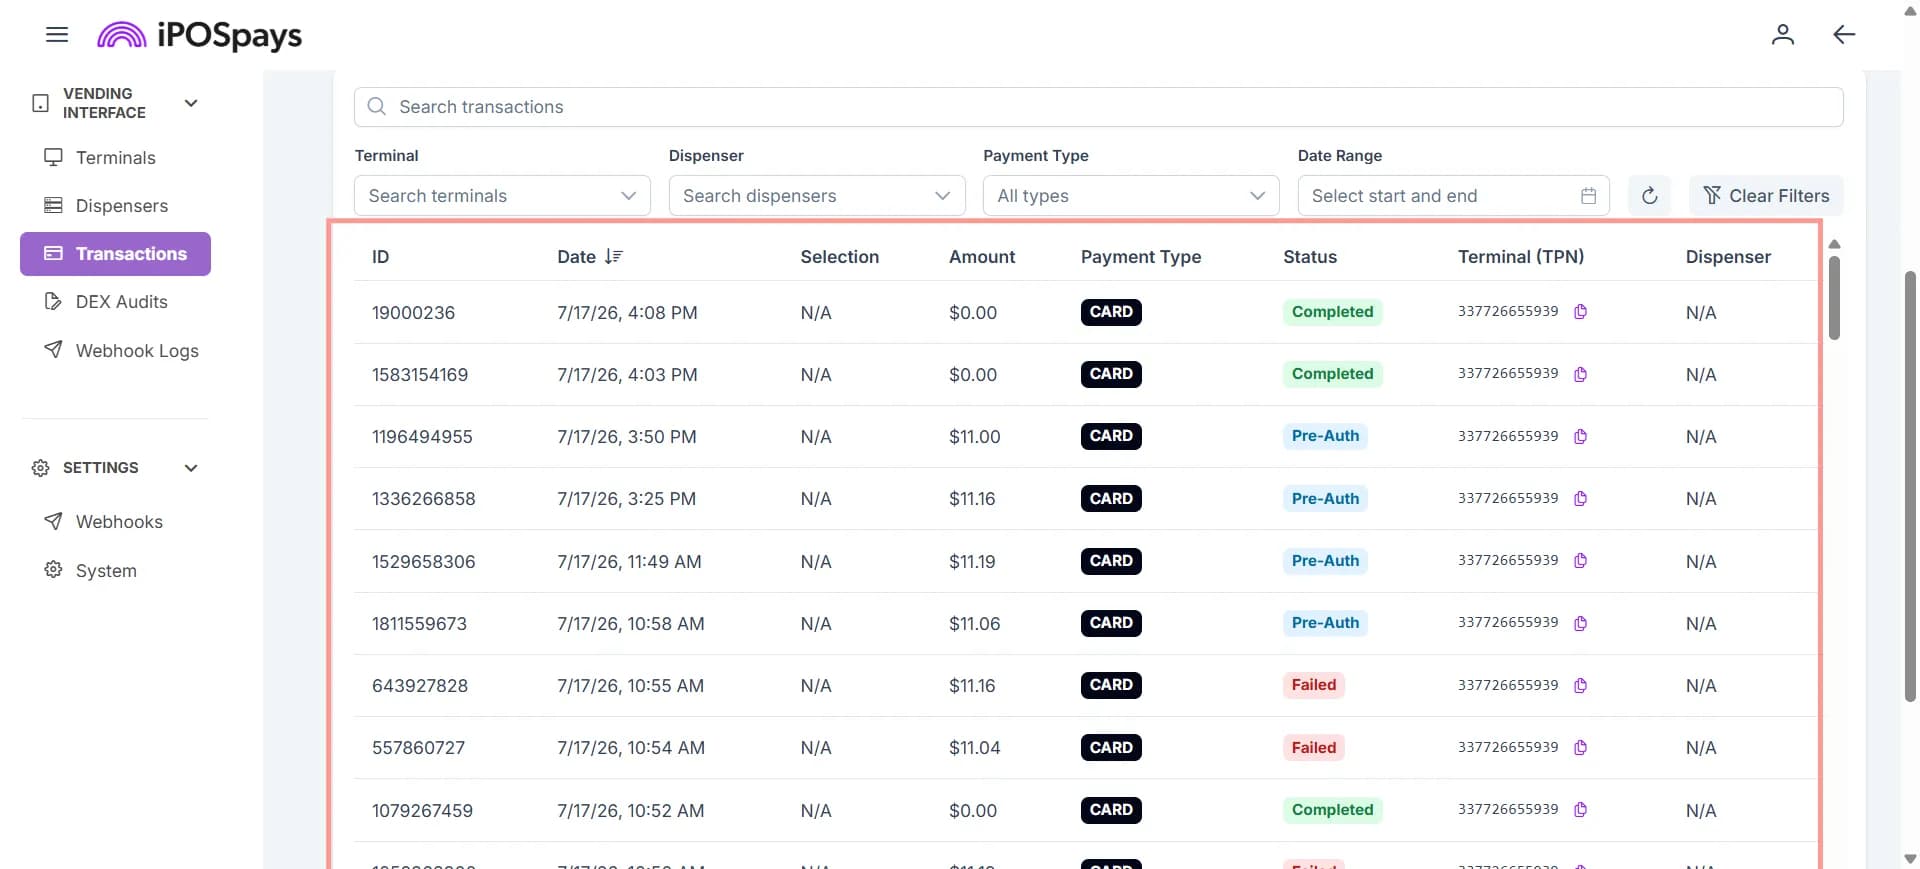
The transaction list displays the following information:
- ID
- Date
- Selection
- Amount
- Payment Type
- Status
- Terminal (TPN)
- Dispenser
Search and Filter Transactions
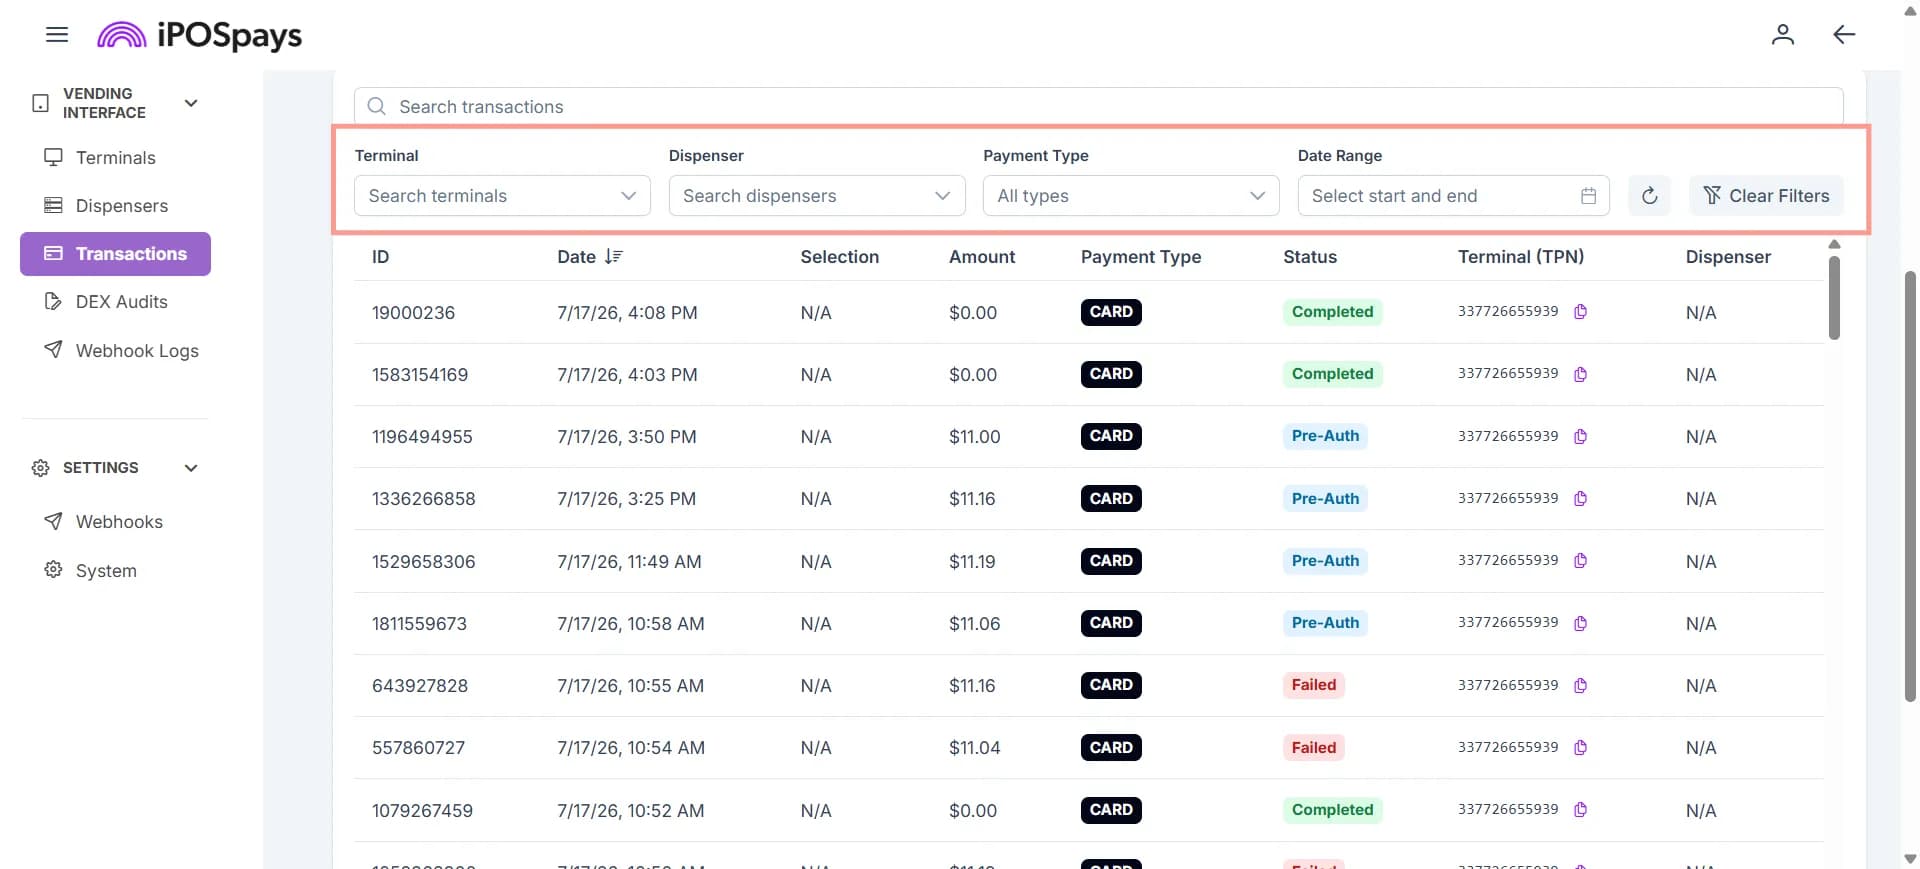
Use the available search and filter options to locate specific transactions.
- Search for a Transaction
Use the search box to locate the required transaction.
- Filter by Terminal
Select the required payment terminal from the Terminal drop-down.
- Filter by Dispenser
Select the required dispenser from the Dispenser drop-down.
- Filter by Payment Type
Select the required payment type:
- Card
- Cash
- Promo
- Mobile
- Remote
- Filter by Date Range
- Click the Date Range field.
- Select the From and To dates.
- Click Apply Filter.
- Clear Filters
Click Clear Filters to remove all applied filters.
- Refresh Transaction Data
Click the Refresh icon to reload the latest transaction information.
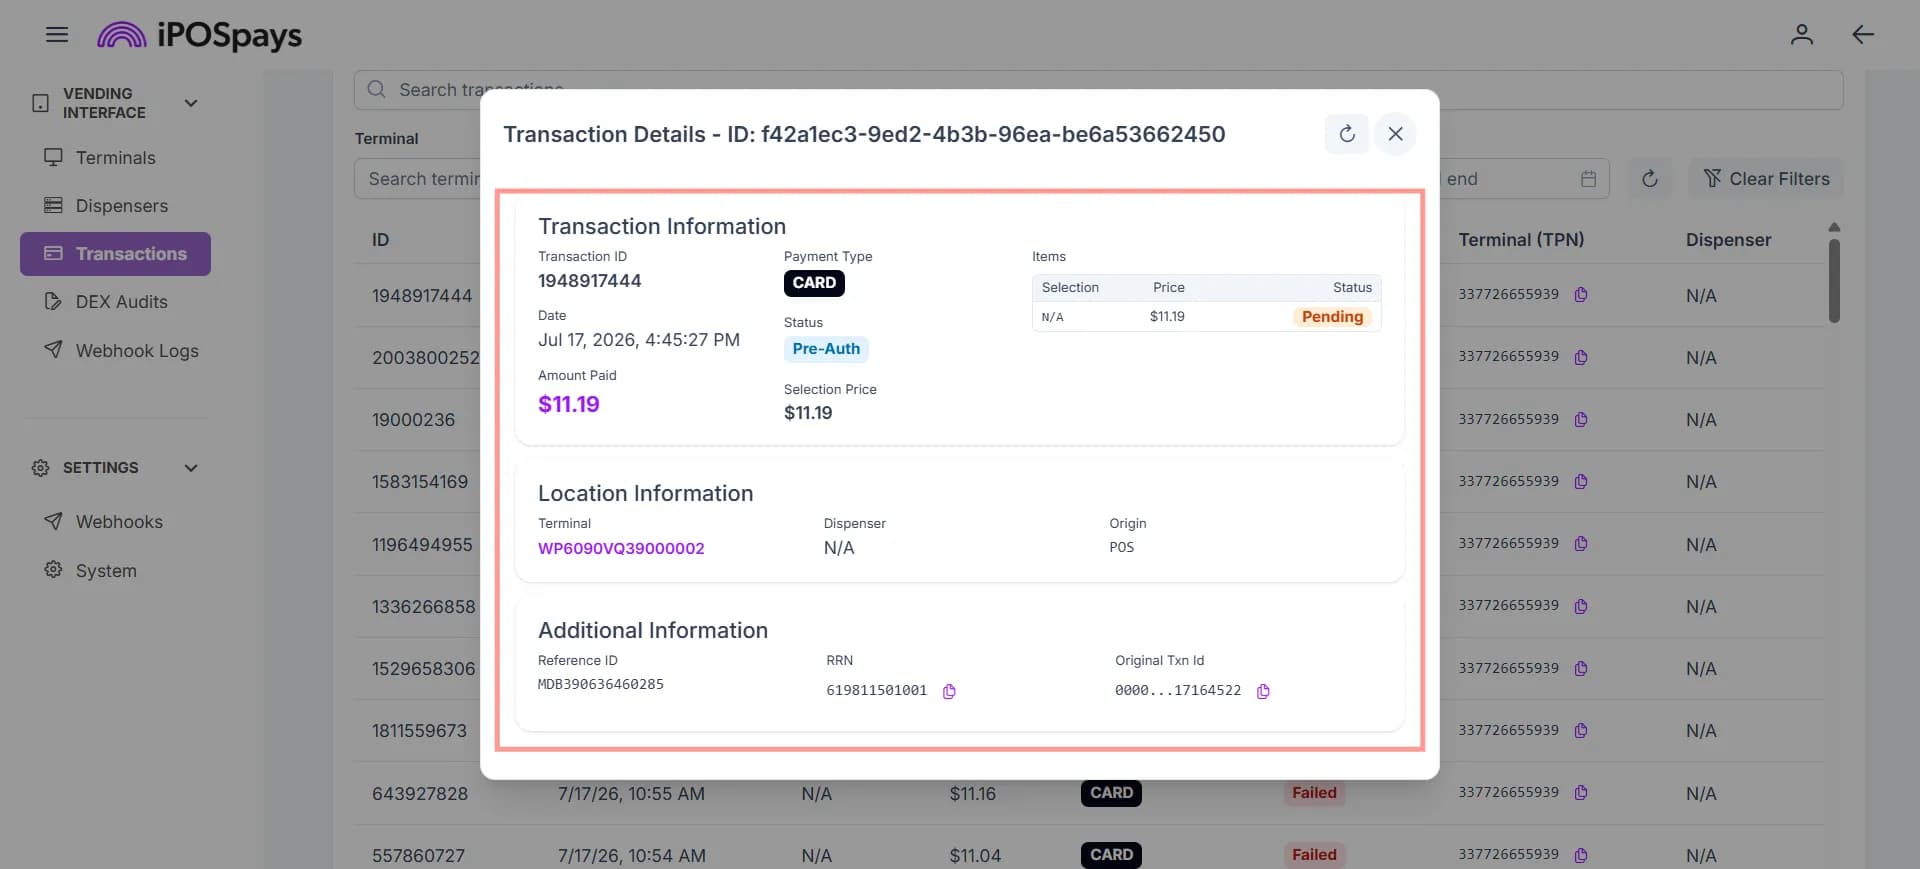
View Transaction Details
- Click the required transaction from the Transactions list.
- The Transaction Details window opens.
Transaction Information
The following information is displayed:
- Transaction ID
- Date
- Amount Paid
- Payment Type
- Status
- Selection Price
Items
Displays the purchased item information:
- Selection
- Price
- Status
Location Information
Displays:
- Terminal
- Dispenser
- Origin
Additional Information
Displays:
- Reference ID
- RRN
- Original Transaction ID
Void or Refund a Transaction
Transactions can be voided or refunded based on their batch settlement status:
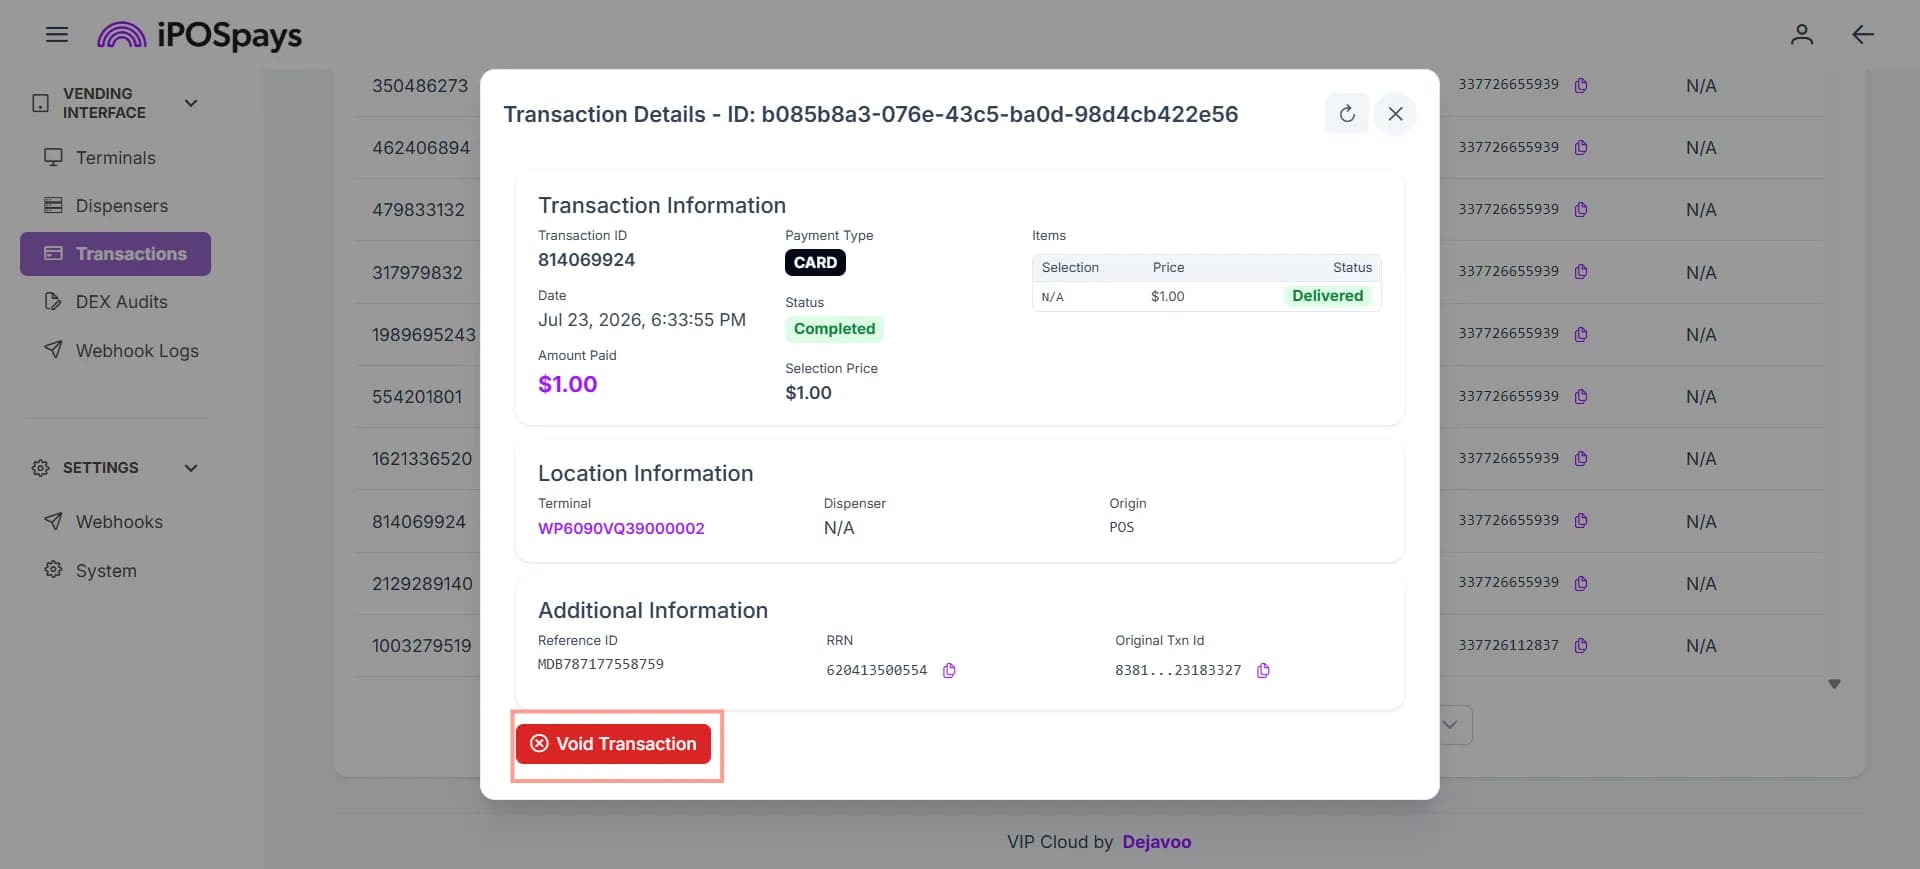
- Void – Available before the transaction is batch settled.
- Refund – Available after the transaction is batch settled.
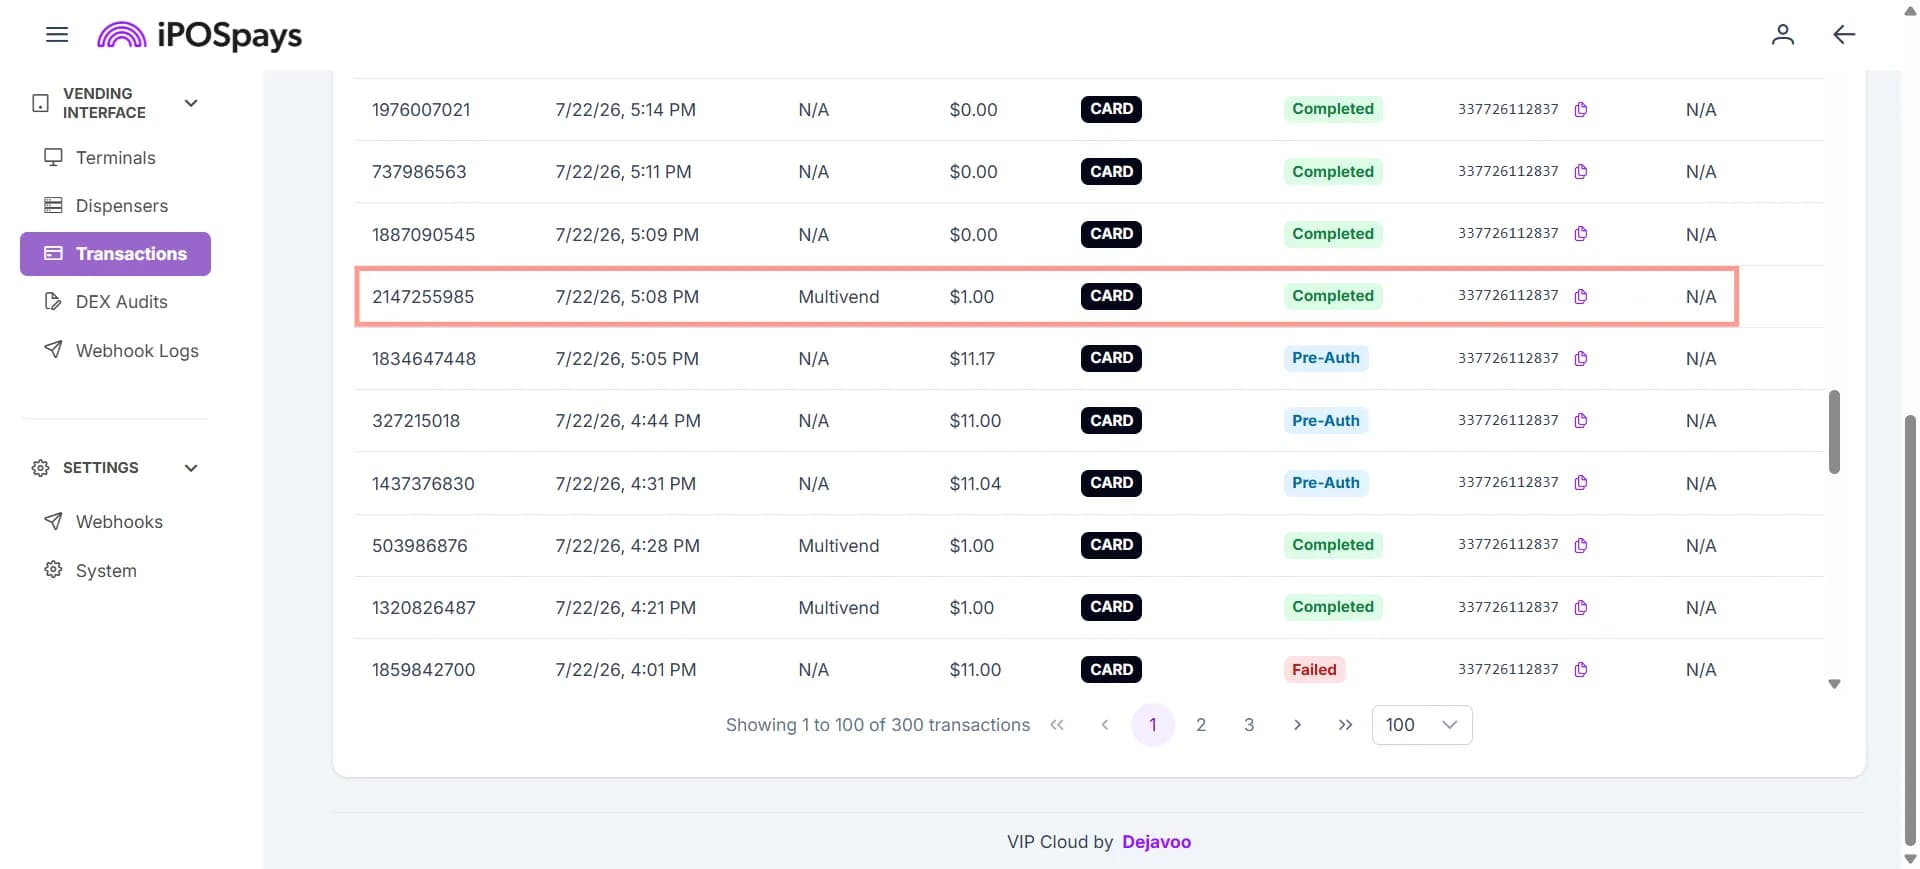
Step 1: Open the Transaction
Click the required transaction from the Transactions list.
Step 2: Select Void or Refund
Based on the transaction status:
- Click Void Transaction if the transaction has not been batch settled.
- Click Refund Transaction if the transaction has been batch settled.
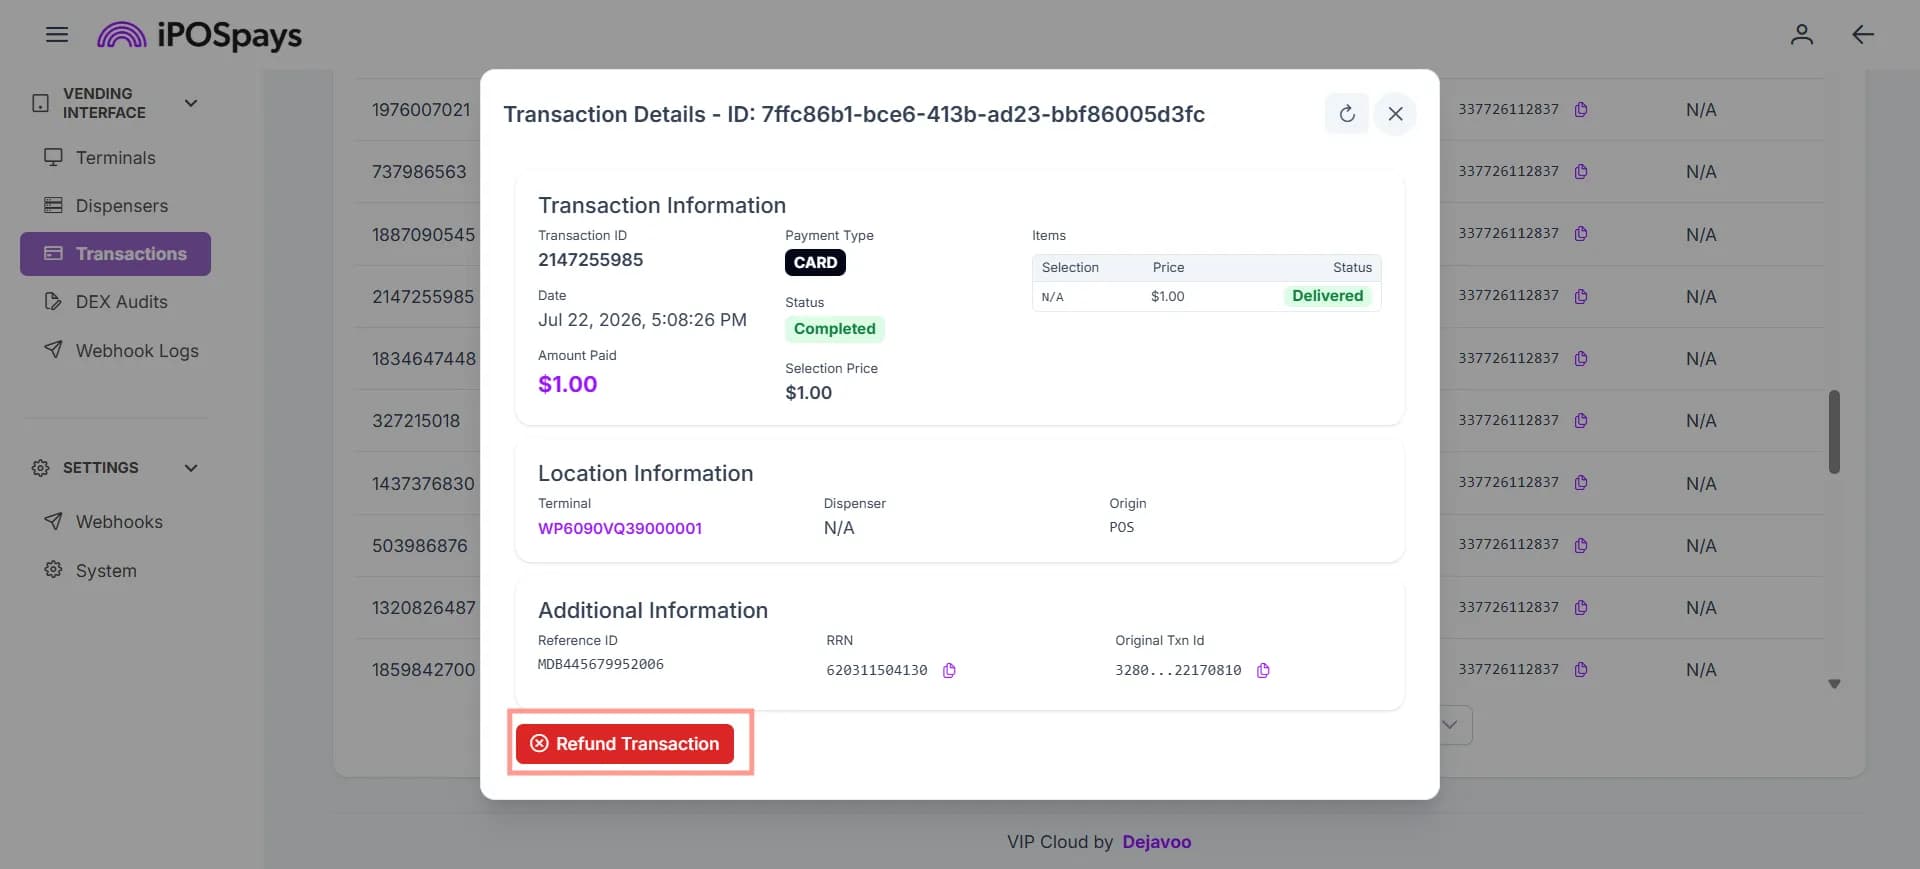
A confirmation message appears.
Step 3: Confirm the Transaction
Review the confirmation message.
Click:
- Yes to proceed with the void or refund.
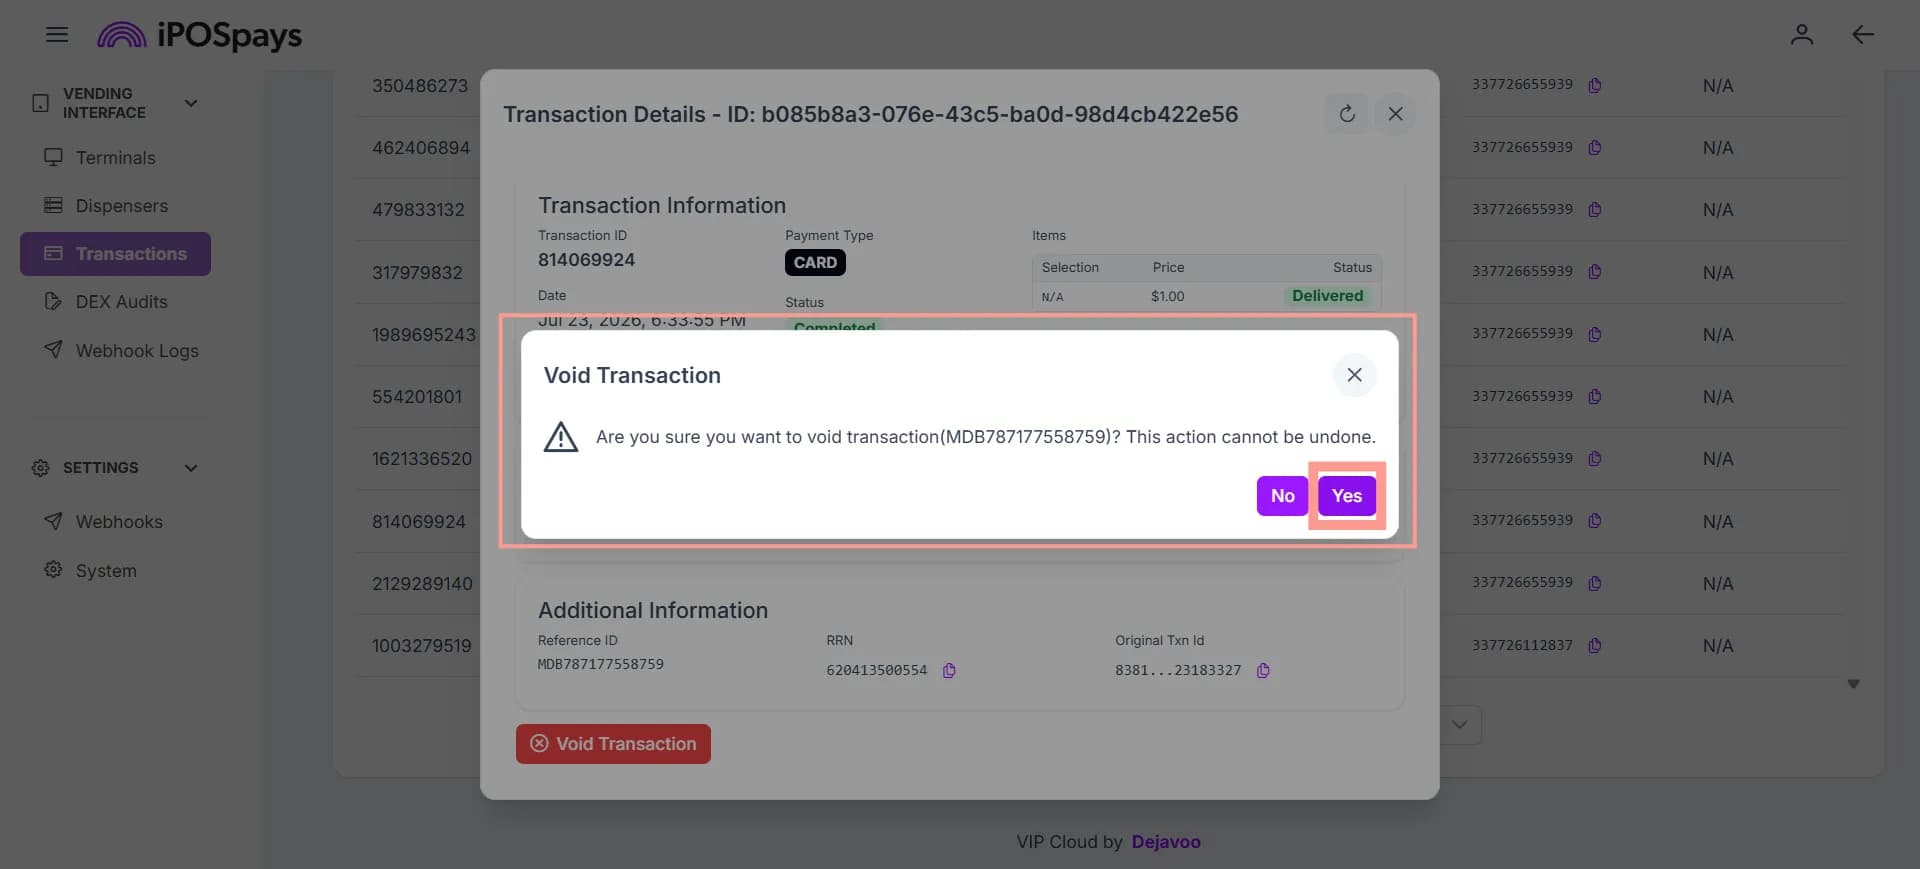
- No to cancel the request.
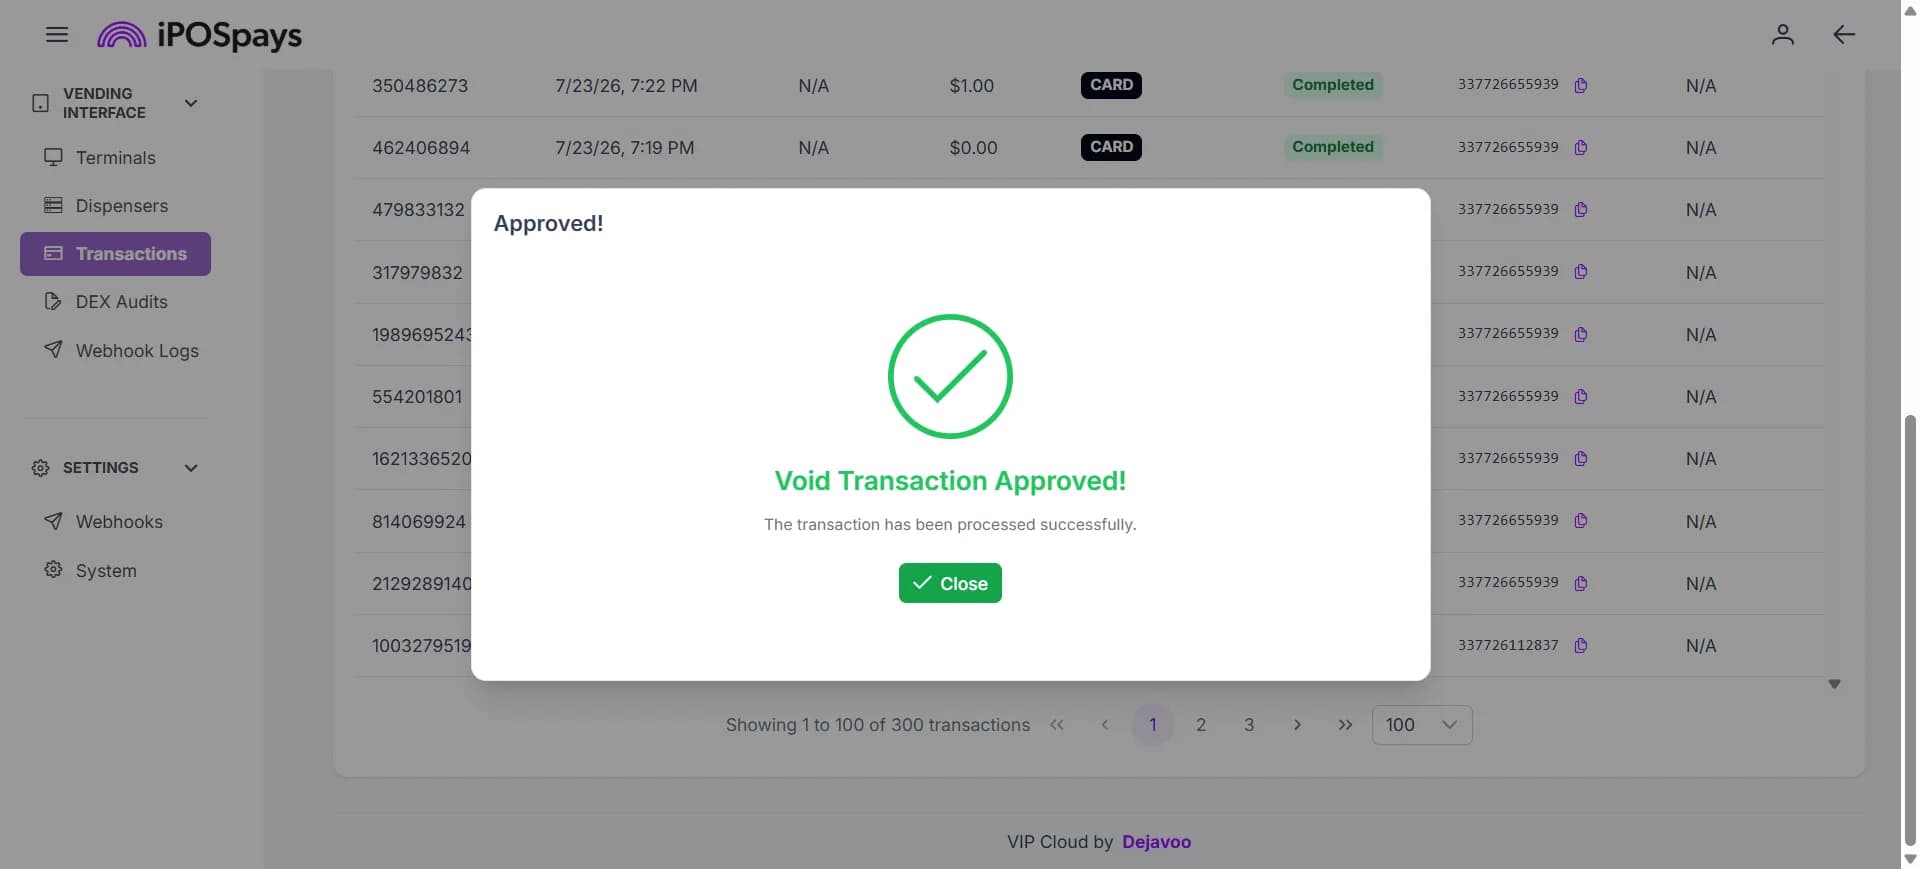
Void and refund transactions cannot be undone once confirmed.