How to Integrate CloudPOS With a PIN pad
Merchants using CloudPOS can use a Dejavoo payment terminal as a PIN pad to securely process transactions. This integration allows merchants to initiate transactions from CloudPOS and process them on the PIN pad through SPIn (Secure Payment Interface). This document explains how to enable SPIn integration in iPOSpays, configure the PIN pad, and download parameters to complete the setup.
Feature Compatibility
-
Supported Processors: Supported by all processors
-
Supported Fee Types: Supports all fee types
-
Supported Terminals:
-
Android P Line Terminals (P1, P3, P5, P8, P12, P17)
-
Android QD Line Terminals (QD2, QD3, QD4, QD5)
-
CloudPOS Integration Overview
CloudPOS integrates with a Dejavoo PIN pad using SPIn (Secure Payment Interface), allowing transactions to be initiated from CloudPOS and completed on the customer-facing PIN pad.
CloudPOS supports two SPIn modes:
-
SPIn Local: Used when the PIN pad communicates with CloudPOS over the same local network (LAN).
-
SPIn Cloud: Used when the PIN pad communicates over the internet using cloud authentication.
SPIn configuration is common across CloudPOS and Register integrations.
Refer to How to Integrate a Register with a PIN Pad for detailed SPIn credential and communication setup.
How to Enable SPIn Integration on iPOSpays
To integrate a PIN pad with a merchant’s CloudPOS TPN, the ISO must enable SPIn integration from the iPOSpays portal.
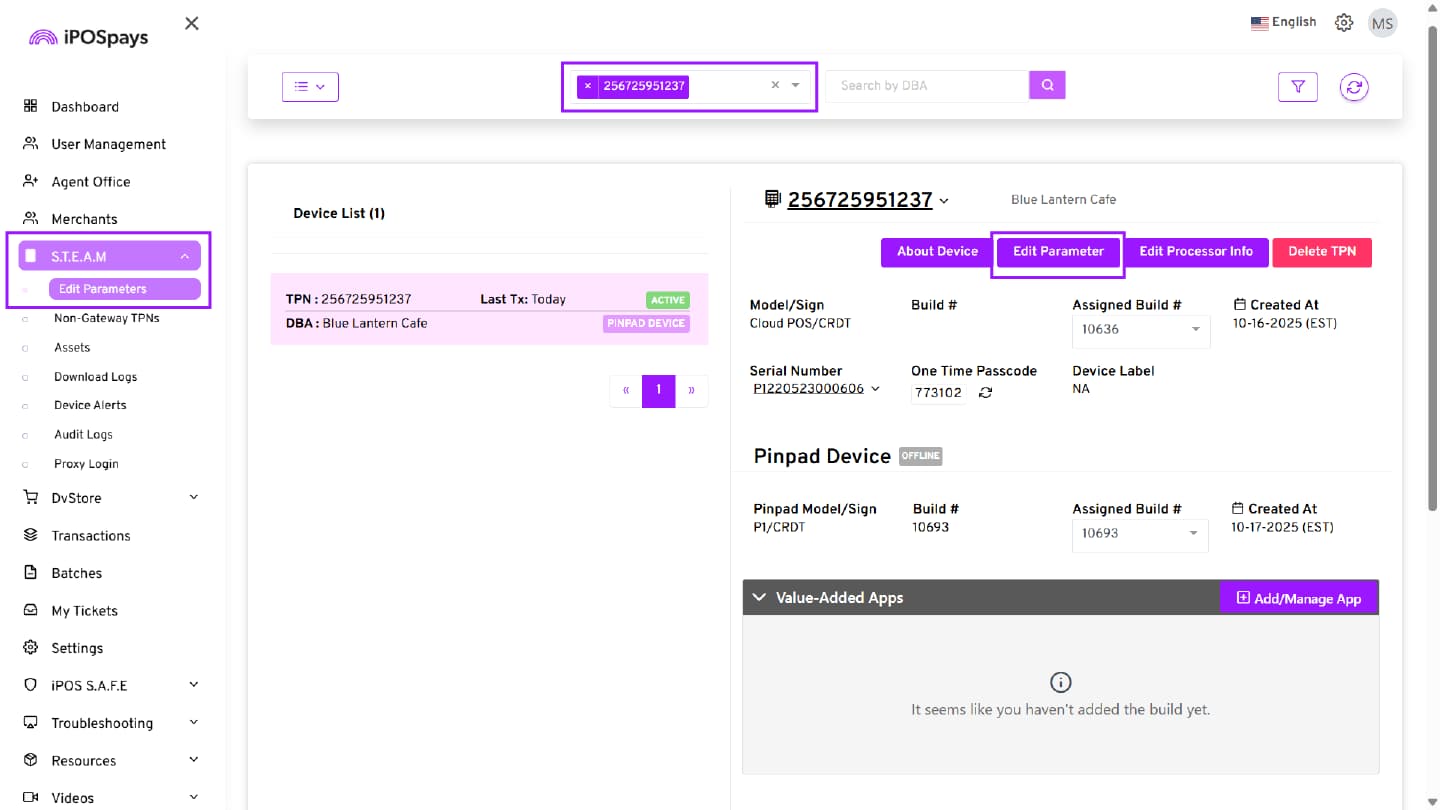
Step 1: Log In to iPOSpays Portal
Log in to iPOSpays using your ISO credentials.
Step 2: Locate the CloudPOS TPN
-
From the side menu, click S.T.E.A.M → Edit Parameters
-
Search for the TPN you want to enable PIN pad integration.
-
Click Edit Parameter.
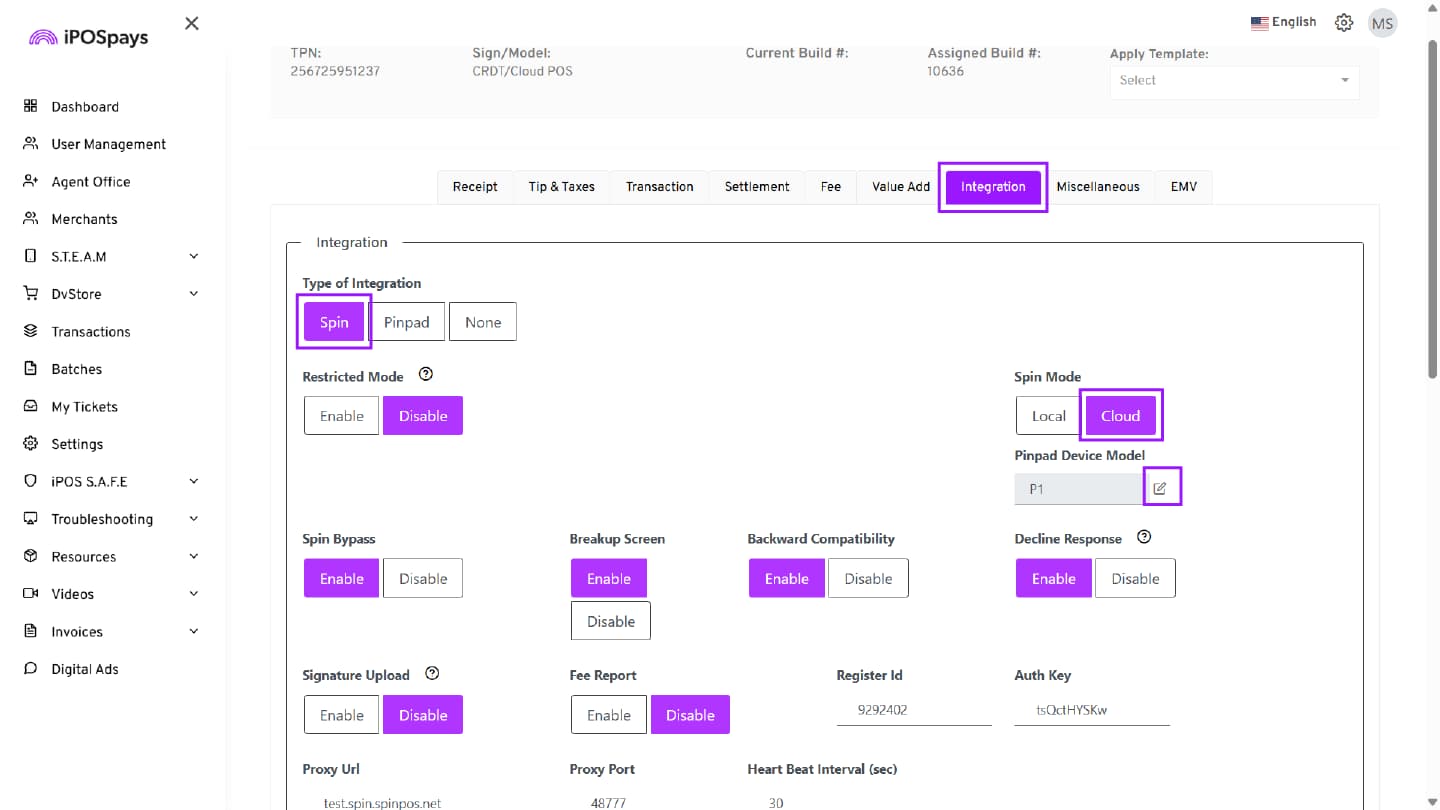
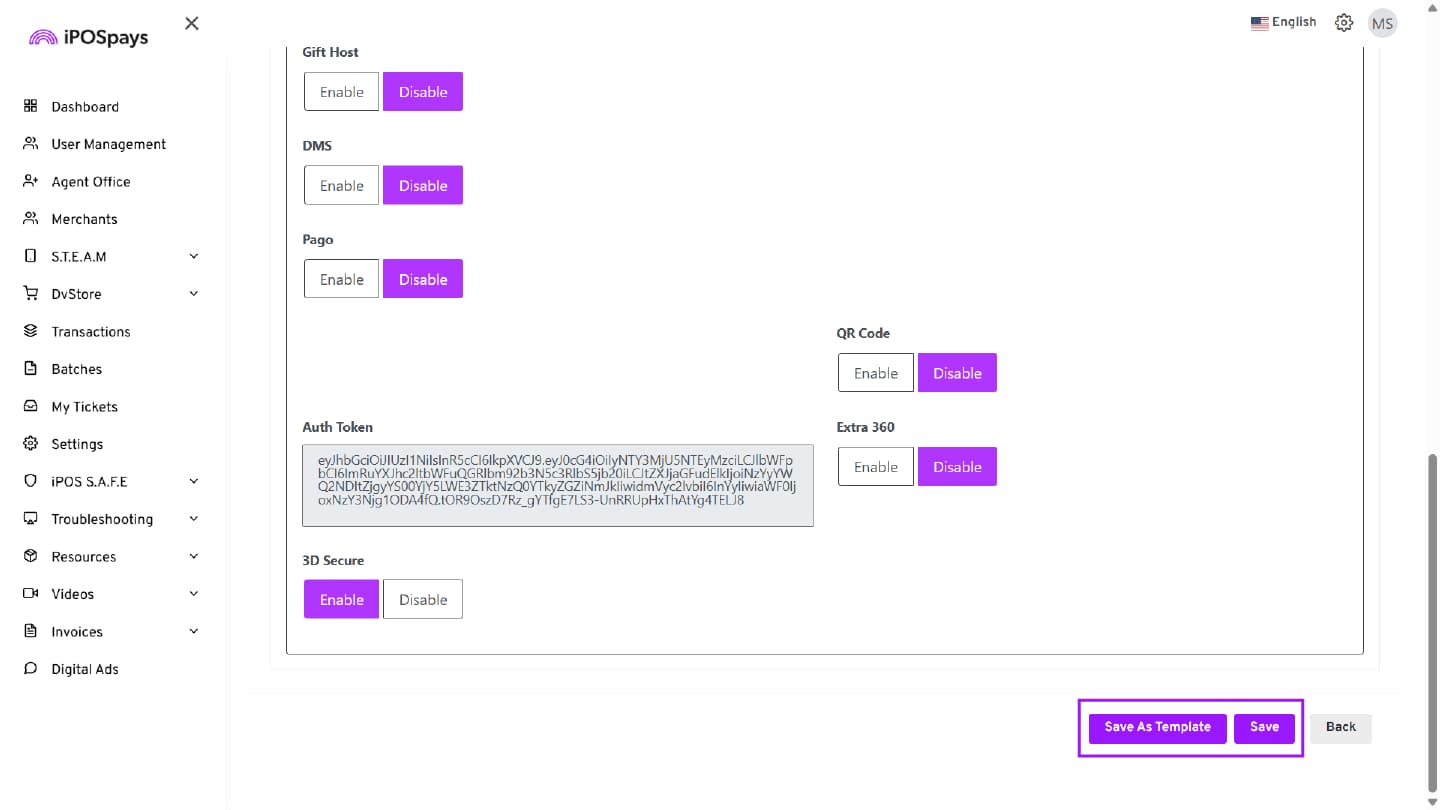
Step 3: Configure Integration Settings
-
In the Type of Integration field, select SPIn.
-
In the SPIn Mode section, select Cloud to enable wireless CloudPOS integration.
-
In the Pinpad Device Model field, click the Edit (✎) icon.
- In the pop-up window:
-
Click the dropdown arrow.
-
Select the appropriate PIN pad device model (for example, P1).
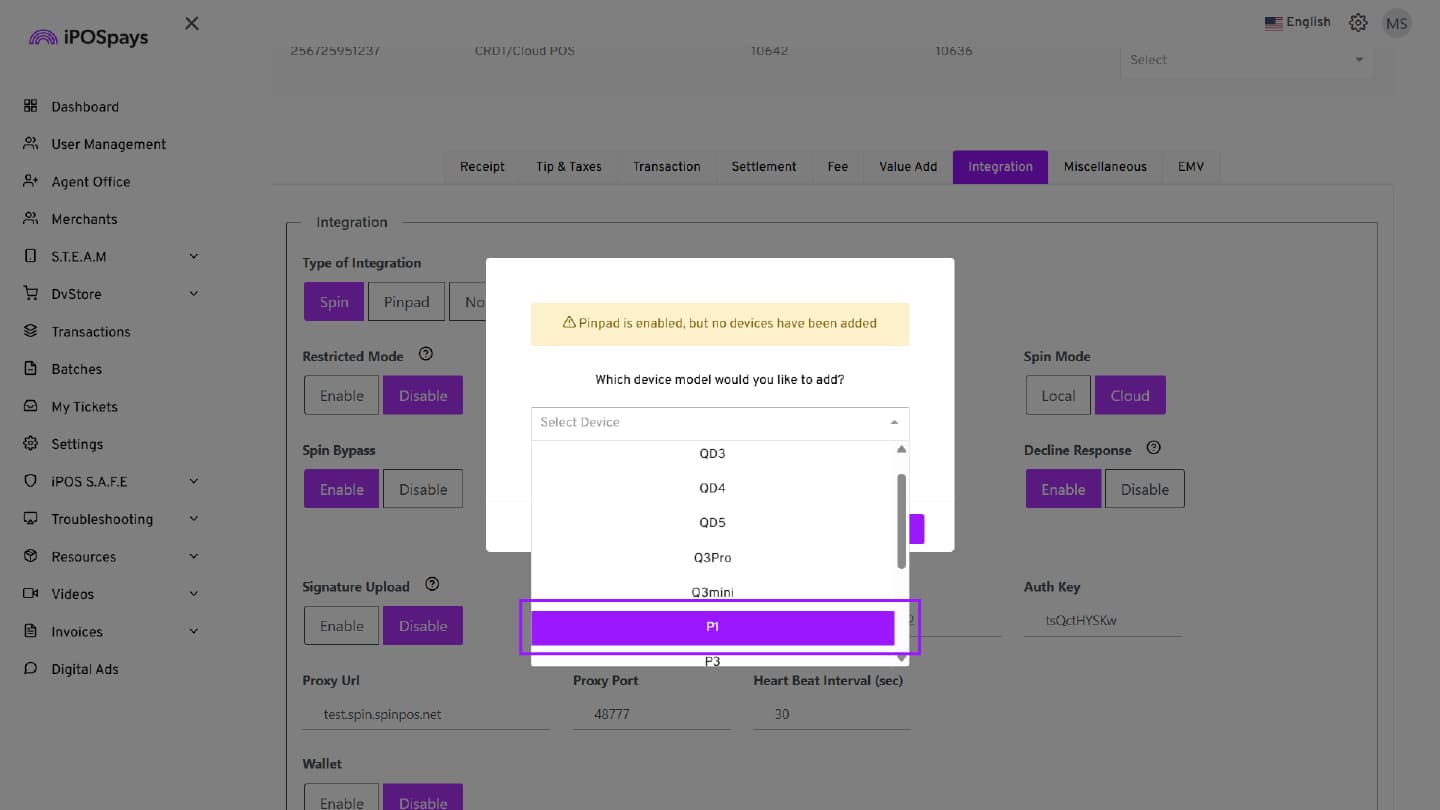
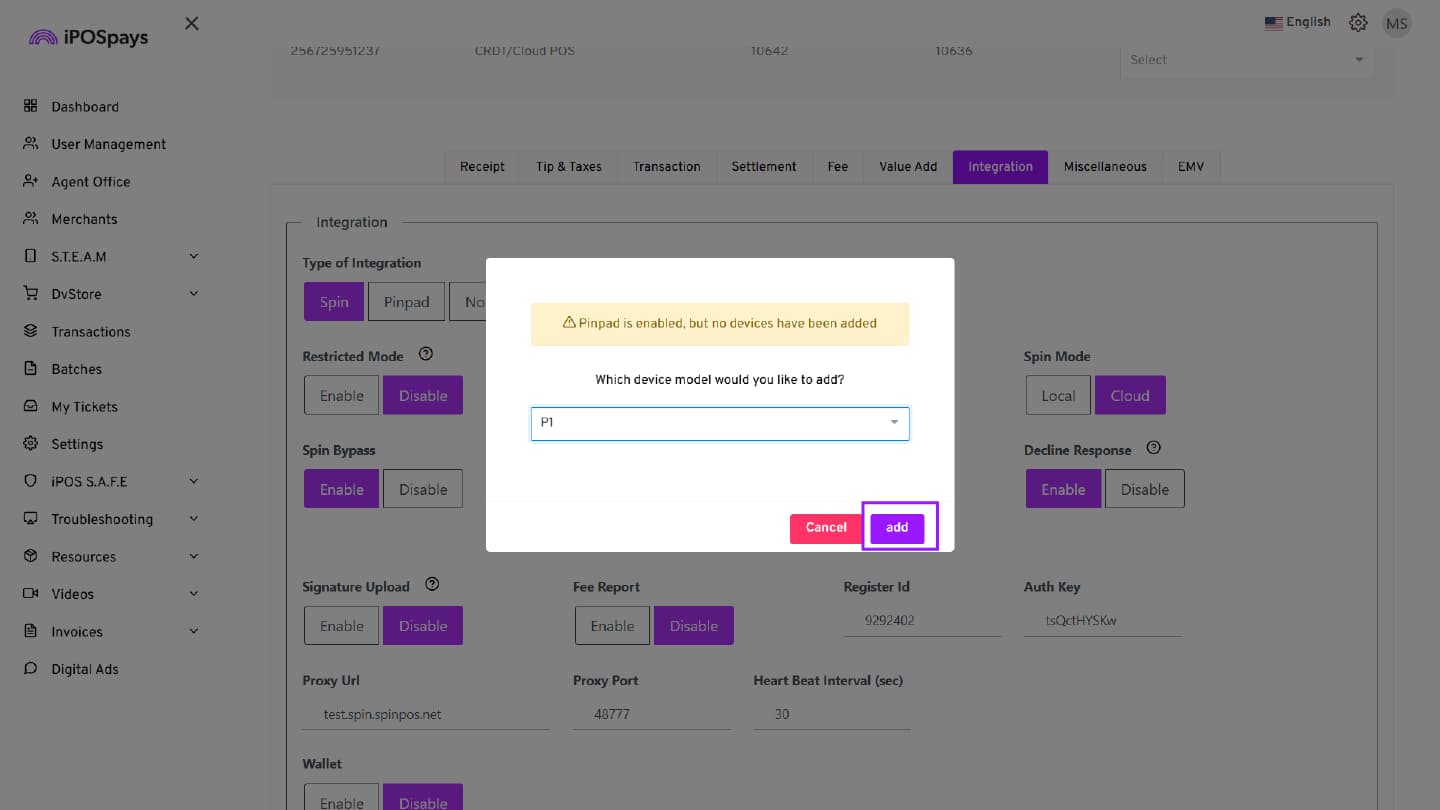
- Click add to confirm the selection.
Step 4: Save the Configuration
Once you have configured the required parameters, you have two options:
-
Save → Applies the current parameter configuration directly to the selected TPN.
-
Save as Template → Saves the current parameter configuration as a reusable template.
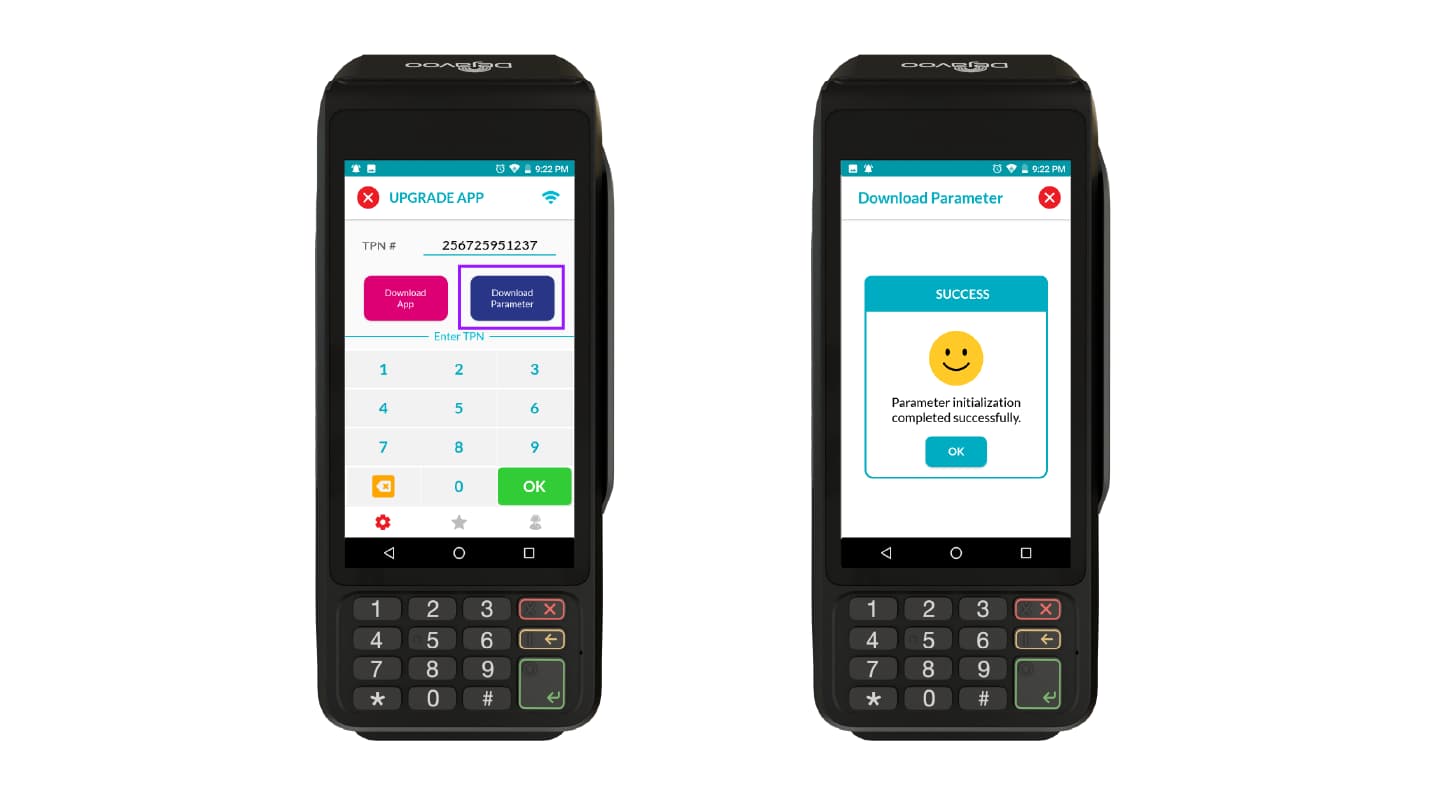
Download Parameters on the PIN pad
After enabling SPIn integration from the portal:
-
Enter the SPIn-enabled CloudPOS TPN on the PIN pad terminal
-
Click Download Parameter.
-
A SUCCESS prompt will appear on the device.
-
Tap OK to proceed.
The PIN pad is now successfully integrated with the Merchant’s CloudPOS.
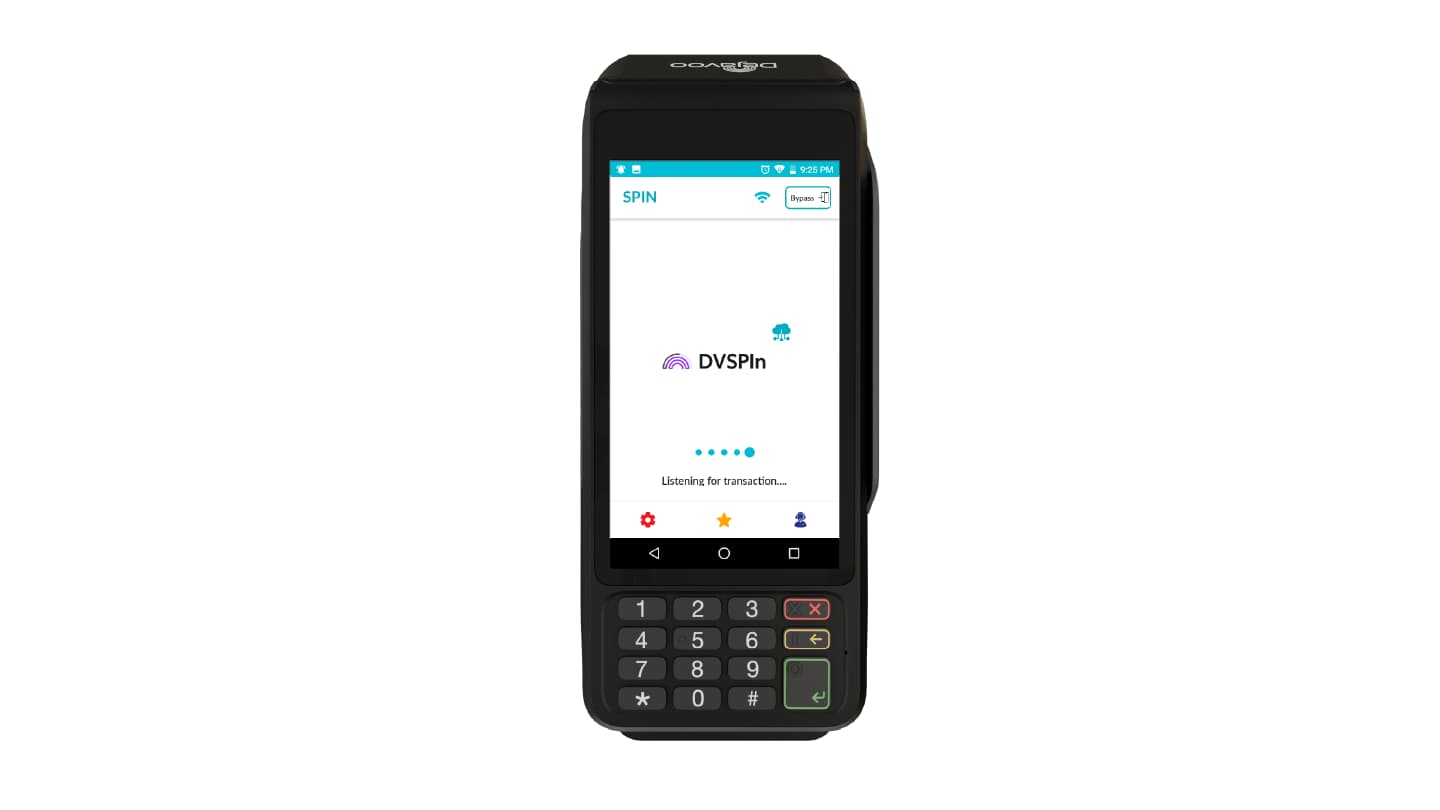
Processing Transactions via CloudPOS
Once CloudPOS and the PIN pad are successfully integrated, transactions can be initiated directly from the CloudPOS interface. The entered amount is automatically transmitted to the integrated PIN pad for customer payment.
Refer to the CloudPOS Transaction with PIN Pad section in the User Guide to Merchant CloudPOS Transactions for detailed processing steps.